What to Do When You Buy a House with Solar Panels
Clear, actionable steps for new homeowners to manage, maintain, and maximize a solar-powered home—from documenting system components to transferring warranties and updating utility accounts.

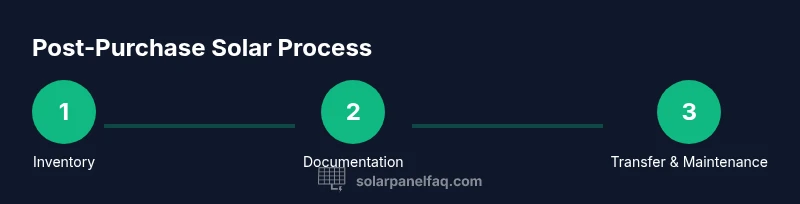
After buying a home with solar panels, your first goal is to verify system details, confirm warranty transferability, and align billing with the new owner. Start by gathering installation paperwork, noting panel and inverter models, and contacting the installer or utility if needed. This quick check prevents surprises and sets the stage for smooth ownership.
Understanding Your Solar System After Purchase
If you’ve just closed on a home with a solar PV system, the first step is to understand what’s actually installed and how it’s wired to your utility. This knowledge shapes every decision from maintenance to potential upgrades. According to Solar Panel FAQ, the most important move after closing is to document what you own: the type of panels, the inverter, the mounting hardware, and the monitoring system. Start by locating the original installation paperwork and any post-installation addenda. Compare what’s in the file to what you see on the roof and in your electrical panel. The goal is to confirm capacity (kW rating), inverter type (string vs microinverters), and whether net metering or a production meter is in place. With this baseline, you can plan maintenance, potential upgrades, and any warranty transfers more confidently.
Take photos of the external array, the inverter cabinet, the service disconnect, and the main electrical panel. Note any labels, serial numbers, and dates. Then, verify that the system is connected to the same meter and that your utility is set up for net metering or any feed-in tariff. These steps prevent miscommunications and set up for accurate billing. You’ll also want to understand the warranty coverage: who owns the PV modules, the inverter, and the mounting hardware, and whether the warranties are transferable to a new owner. If a warranty transfer is required by the installer, make a plan to complete it, since transfers sometimes have specific forms and deadlines. By starting with a precise inventory, you’ll avoid surprises when maintenance or repairs are needed.
Verifying System Details and Documentation
After closing, your first practical task is to verify the system’s core details and gather documentation that will travel with the home. List the make and model of panels, the inverter type (string, microinverters, or central), the total system capacity in kilowatts (kW), and the orientation and tilt of the array. Check the monitoring platform if you have access; a dashboard can reveal production history, alerts, and any faults. Collect the original permit, inspection reports, and the installer’s contact information. If the unit has a production meter or a net-metering arrangement, confirm the meter identifier and billing arrangement with the utility. Finally, compare the seller’s disclosures with what you actually observe on-site to identify any missing components, non-functioning parts, or mismatched paperwork. This due diligence reduces post-purchase surprises and aligns expectations with reality.
Transferring Warranties and Service Contracts
Many solar warranties are transferable, but the process varies by manufacturer and installer. Start by locating warranty certificates for modules, inverters, mounting hardware, and monitoring equipment. Contact the provider with proof of ownership and the closing date to request transfer paperwork or to initiate a new warranty registration in your name. Some warranties require the new owner to register within a specific window; missing it can void coverage. If you inherited a service or maintenance contract, confirm whether the seller’s agreement transfers or if you need to set up a new service plan. Keeping track of these transfers protects you from sudden repair costs and ensures you receive any future replacements when needed.
Financial Impact and Billing: Net Metering, Rates, and Savings
Understanding how your solar system affects the home’s financials starts with the utility bill. Review whether your system uses net metering, time-of-use rates, or a separate production billing arrangement. After you own the home, make sure the utility has your contact information, meter number, and preferred billing method. If the system is still under a device-specific contract or if a third-party financing arrangement exists, verify the terms and whether you or the seller should be responsible for any remaining payments. Examine historical production data and connect it to seasonal usage to estimate savings under typical weather conditions. Finally, plan for annual true-up assessments and potential rate changes, and consider whether now is a good time to pursue upgrades that improve efficiency or expand capacity.
Maintenance, Safety, and System Monitoring
Solar panels are low-maintenance, but ongoing care helps maximize performance and safety. Start with a visual inspection of the array for debris, shading, or broken modules, and verify that the mounting hardware is secure. If you remain comfortable, clean panels only with soft brushes or squeegees and water; avoid abrasive cleaners or metal tools. Inside the home, keep an eye on the monitoring dashboard for unusual production drops or fault alerts. Check the electrical disconnect and the main service panel for any signs of overheating or loose connections, and schedule a licensed electrician if you notice anything unusual. Finally, schedule a periodic professional inspection every 3–5 years to catch aging components before they fail.
Utility Coordination and Homeowner Responsibilities
Transferring ownership requires clear coordination with the utility. Provide the new owner’s contact details, sign any required forms, and confirm the date when net metering or feed-in are officially transferred. Maintain a folder of all relevant paperwork for future buyers or inspectors. If you are in an HOA or a community with shared solar amenities, review homeowner guidelines regarding system visibility, access for maintenance, and any proposed upgrades. Align maintenance windows with utility scheduling and permit approvals to prevent service interruptions. Staying proactive with communication reduces billing disputes and ensures the system remains a value-add to your home.
Long-Term Planning: Upgrades, Resale Value, and ROI
Over time, you may consider upgrading panels, adding battery storage, or expanding the system to match growing energy use. Start by evaluating available space and structural capacity for additional modules or a second inverter. Check local incentive programs, financing options, and any interconnection limits with the utility. When you plan an upgrade, coordinate with a qualified installer to ensure the new equipment remains compatible with your existing hardware and monitoring software. Finally, when considering resale value, document the system performance and maintenance history to demonstrate energy savings and reliability to potential buyers, thereby strengthening the home’s market position.
Tools & Materials
- Recent closing documents (purchase agreement, title report)(Keep in a dedicated folder)
- Solar system paperwork (warranty certificates, installation contract)(Includes inverter, panels, mounting hardware)
- Utility account number and contact information(For transferring billing and metering)
- Photographic inventory (photos of panels, inverter, disconnect)(Helpful for verification)
- Pen, notebook, camera or smartphone(For making notes and receipts)
- Access to solar monitoring app or portal(If installed; helps ongoing monitoring)
- Copy of local permit and inspection reports(If available for reference)
Steps
Estimated time: 3-6 hours
- 1
Gather all solar system documents
Collect warranty certificates, installation contracts, permits, and any post-install addenda. Create a concise folder with sections for modules, inverter, monitoring, and maintenance history. This ensures you have a reliable reference if questions arise during ownership.
Tip: Label each document with purchase date and seller contact. - 2
Document and photograph system components
Take clear photos of the roof array, inverter, service disconnect, and main electrical panel. Capture serial numbers, model numbers, and any labels. Photos help during resale, maintenance, and warranty validation.
Tip: Photograph from multiple angles for a complete record. - 3
Confirm key technical specs
Note the system capacity in kW, the inverter type (string/inverter vs microinverters), and the presence of a production meter or net metering setup. Verify the monitoring dashboard if accessible and check for any unread fault alerts.
Tip: Cross-check specs against the original installation paperwork. - 4
Verify transferability of warranties
Identify which warranties transfer to new owners and the process to activate them. Contact manufacturers or installers to initiate transfer forms and confirm any registration deadlines.
Tip: Ask for written confirmation of transfer steps. - 5
Notify utility and plan billing transfer
Provide the utility with new owner details, update contact information, and request the transfer of net metering or production billing arrangements. Confirm meter transfer dates to avoid billing gaps.
Tip: Keep a copy of the submitted forms and confirmations. - 6
Schedule a professional inspection if needed
Arrange a licensed electrician or solar technician to inspect electrical connections, the inverter, and roof integrity if any signs of wear or damage appear. Address repairs promptly to maintain safety and performance.
Tip: Document any recommended repairs and schedule follow-up visits. - 7
Set up ongoing monitoring and maintenance plan
Reconnect to or set up monitoring access, establish a maintenance calendar, and note recommended service intervals. Consider a yearly check-in to review production history and efficiency trends.
Tip: Automate reminders and keep a maintenance log. - 8
Review HOA rules and future plans
If the home is in an HOA, verify any restrictions or required disclosures related to solar equipment, panels, or potential upgrades. Plan any future improvements with HOA approvals in mind.
Tip: Document HOA guidelines and keep them accessible.
Frequently Asked Questions
Will solar warranties transfer automatically when I buy the house?
Warranty transfer depends on the manufacturer and installer. Check the warranty documents and contact the provider to initiate a transfer or registration in your name.
Warranties may transfer; you’ll need to contact the provider to start the transfer process.
Do I need to inform my utility about the change of ownership?
Yes. Notify the utility of the ownership change to ensure net metering or production billing continues smoothly and to update billing contacts.
Yes—inform the utility so billing and net metering stay correct.
How can I verify the solar system is safe after purchase?
Review the inverter status, visually inspect the roof and equipment, and schedule a licensed electrician or solar technician for a safety inspection if needed.
Have a professional inspect the electrical parts to ensure safety.
Is the solar system part of the closing process?
Solar components should be disclosed and documented in the closing process. Ensure you receive the relevant paperwork and confirm any ongoing service commitments.
Ask for the solar details and documents during closing.
What maintenance is required for solar panels?
Regular visual checks for debris and shading, light cleaning if needed, and periodic professional inspections to catch aging parts.
Keep an eye on production and schedule professional checks as needed.
Can I upgrade or expand the solar system later?
Upgrades are often possible if there is space and the electrical system can accommodate more capacity. Consult a qualified installer for feasibility and permits.
Upgrades are possible—talk to an installer about space and permits.
Watch Video
Top Takeaways
- Document all solar system components and warranties.
- Coordinate warranty transfers and utility billing promptly.
- Keep monitoring data and maintenance records organized.
- Plan for regular inspections and potential upgrades.
- Understand HOA rules and how they affect future changes.