Solar Panel Process: A Homeowner's Step-by-Step Guide
A comprehensive guide to the solar panel process for homeowners, covering planning, permits, installation, inspection, and ongoing maintenance with practical tips and trusted sources.

This article guides homeowners through the solar panel process from planning to maintenance. You’ll learn how to assess your site, understand permits, choose equipment, compare installers, manage installation day, complete inspections, and monitor performance. By following these steps, you can optimize savings, ensure safety, and minimize delays. This approach aligns with Solar Panel FAQ guidance.
What is the solar panel process?
The solar panel process is a structured sequence of coordinated steps that move a homeowner's project from idea to energy generation. It begins with understanding your energy goals, site conditions, and local constraints, then proceeds through system design, financing, permitting, installation, inspections, interconnection, and ongoing monitoring. This end-to-end flow helps ensure safety, code compliance, and predictable performance. According to Solar Panel FAQ, a clear roadmap helps homeowners avoid delays and budget overruns. The Solar Panel FAQ team found that most successful projects start with a realistic assessment of roof space, shading, and the electrical service, followed by selecting equipment that matches goals for reliability and savings. Throughout the process, you’ll interact with contractors, utility personnel, and inspectors, each playing a role in validating the design and ensuring safe operation. The solar panel process invites you to think about every decision as part of a larger system rather than a single purchase. This broader view helps homeowners align expectations with results and stress-test timelines against permitting and weather windows, ensuring quality outcomes.
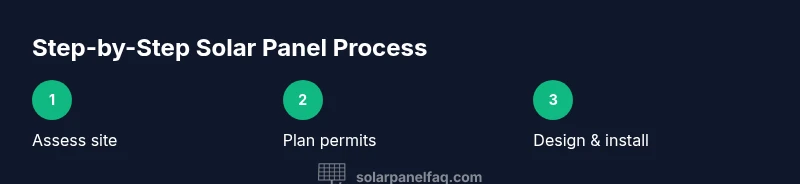
Step 1: Assess site and energy goals
In the solar panel process, the initial assessment determines system size and layout. Evaluate roof orientation, shading from trees or chimneys, and the structural condition of the mounting surface. Review past electricity bills to understand seasonal usage and peak demand. Translate these insights into concrete goals: how many kilowatt-hours you want to generate and whether you aim for energy independence or primarily bill savings. Consider future needs, such as an electric vehicle or home expansion, which may influence system sizing. This groundwork reduces surprises later in the project and helps you communicate clearly with installers. According to Solar Panel FAQ analysis, a thorough site inspection correlates with smoother permitting and more accurate quotes. The Solar Panel FAQ team recommends documenting shade patterns at different times of day and year to inform module placement and inverter selection.
Step 2: Understand local requirements and permitting
The solar panel process requires navigating local regulations before any hardware goes up. Check with your city or county building department for permit requirements, electrical code standards, and inspection timelines. Some jurisdictions also mandate fire safety clearances or roof narrative reports. HOA rules may impose architectural guidelines or community standards for panel appearance. Begin the permitting conversation early to avoid delays, and request a checklist from your inspector so you can prepare documents in advance. The goal is to secure approvals efficiently, which keeps the project on track and prevents costly hold-ups during installation. Solar Panel FAQ emphasizes the value of proactive communication with authorities and a clear permit trail for maintenance and resale.
Step 3: Size and design your system
System design translates goals into a practical layout. Decide module type (monocrystalline vs polycrystalline), mounting method (flush mount or elevated racks), inverter configuration (string vs microinverters), and wiring topology. Consider roof space, orientation, and shade-free zones to maximize production. Plan for energy storage if desired, though storage adds complexity and cost. Prepare a layout that accommodates future expansion, such as an additional array or a second inverter. In the solar panel process, the design phase should balance current energy needs with long-term reliability and ease of maintenance. The Solar Panel FAQ team notes that a conservative buffer increases resilience in years with unusual weather or higher-than-expected energy use, while ensuring a straightforward interconnection.
Step 4: Financing, incentives, and warranties
Financing is a major part of the solar panel process. Explore options such as upfront purchase, solar loans, or lease/PPAs, and compare total cost of ownership rather than just upfront price. Investigate available incentives offered by federal, state, and local programs, as well as utility rebates or time-of-use rate plans that can affect payback. While incentives vary by location, a well-documented plan helps you maximize value. Warranties are an important part of the equation; review equipment, installation, and labor terms to understand coverage and what constitutes a valid claim. The Solar Panel FAQ guidance highlights that a robust warranty can reduce long-term risk and provide peace of mind during the system’s lifespan.
Step 5: Selecting a contractor and getting quotes
Choosing a qualified installer is a pivotal moment in the solar panel process. Gather written proposals from licensed solar installers, and verify licenses, bonding, and certifications. Request a detailed bill of materials, equipment specs, installation schedule, and after-sales support. Check references and consider the contractor’s track record on similar homes and climates. Evaluate quotes not only on price but also on project timelines, permit handling, and interconnection knowledge. The Solar Panel FAQ approach recommends asking for a plain-English performance guarantee and a pre-installation site visit to confirm assumptions before work begins.
Step 6: Preparation for installation day
Preparation reduces day-of surprises. Confirm access to your roof and electrical service, ensure pets and kids are safe, and identify a clear contact person for the crew. Review safety procedures with the installation team, including fall protection and ladder usage. Confirm utility interconnection steps and the expected sequence of tasks so you know what to expect from morning setup through the finish. The goal is a smooth kickoff with defined responsibilities. A well-prepared homeowner minimizes disruptions and helps crews stay on schedule, improving overall outcomes in the solar panel process.
Step 7: Installation day and safety checks
On installation day, expect racking and mounting of modules, wiring runs, and inverter mounts. Crew members should adhere to safety protocols, protect existing surfaces, and keep the site tidy to avoid tripping hazards. Monitor progress and ask for real-time updates so you understand which phase is currently underway. After mounting, verify that module alignment and electrical connections are correct before testing. The safety focus remains paramount; do not attempt to shortcut steps, and ensure that all work complies with electrical codes and manufacturer guidelines. This attention to detail strengthens long-term performance and reduces warranty disputes.
Step 8: Inspection, interconnection, and commissioning
Following installation, inspections validate workmanship and system compliance. Schedule an electrical inspection and coordinate with the utility for interconnection, ensuring net metering arrangements are in place. The commissioning process confirms that the inverter, monitoring system, and grid connection function correctly together. Expect some scheduling lead times and potential follow-up inspections. Document all approvals and keep a comprehensive record of warranty information. The Solar Panel FAQ team reminds homeowners that timely interconnection and proper documentation streamline energy generation and avoid delays in receiving credits.
Step 9: Ongoing maintenance and performance monitoring
The final phase of the solar panel process is ongoing care and watching performance. Establish a maintenance routine that includes periodic cleaning to remove dirt or debris, inspection of mounting hardware for corrosion or looseness, and monitoring data for anomalies. Use a solar monitoring dashboard to compare actual production with expected output and to detect potential system drifts early. Schedule annual professional checkups for electrical safety and component health. This discipline preserves efficiency, extends equipment life, and helps you capture maximum value from your investment.
Authority sources
- https://www.energy.gov/eere/solar
- https://www.nrel.gov/solar
- https://www.energy.gov/eere/sunshot
Tools & Materials
- Ladder or roof access equipment(For safe roof access and work at height)
- Safety harness and fall-arrest system(Use a properly rated harness and anchor points)
- Voltage tester / multimeter(To verify circuits before work)
- Screwdriver set (Phillips and flat)(For mounting hardware and fixtures)
- Measuring tape(Accurate layout and spacing)
- Roof mounting rails and racking hardware(Secure mounting system)
- Inverter and electrical components(DC to AC conversion and connectors)
- Electrical conduit and wiring(Safe routing and protection)
- Permits and documents(Hold permits and HOA approvals on hand)
Steps
Estimated time: 2-8 weeks
- 1
Assess site and energy goals
Assess roof orientation, shading, and structural condition while clarifying your energy targets. Translate these insights into concrete goals: how many kilowatt-hours you want to generate and whether you aim for energy independence or primarily bill savings. Consider future needs such as an electric vehicle or home expansion, which may influence system sizing.
Tip: Document shading with a sun-path analysis and note impact areas. - 2
Check permits and HOA requirements
Identify local permitting requirements, building codes, and any HOA restrictions. Secure approvals before equipment orders to avoid delays. Create a checklist and keep a single point of contact with authorities to streamline the process.
Tip: Ask for a permit checklist from the inspector early. - 3
Size and design your system
Select module type, inverter configuration, and layout based on roof space and goals. Plan for future expansion and ensure shading-free zones. Validate that the system can meet both current and anticipated energy needs.
Tip: Favor modular designs that simplify upgrades. - 4
Explore financing and incentives
Review financing options and incentives, then compare the long-term cost of ownership. Use a simple cash-flow model to understand payback and returns under different scenarios.
Tip: Ask installers to present a cash-flow chart. - 5
Collect quotes and verify credentials
Request detailed proposals from licensed installers, including material specs, labor, and warranties. Check licenses and references; confirm they handle interconnection paperwork.
Tip: Request a line-item breakdown and a written warranty. - 6
Prepare for installation day
Coordinate site access, confirm electrical readiness, and notify household members about work timelines. Ensure pets and children are safe and away from the work area.
Tip: Designate a single on-site liaison for the crew. - 7
Oversee installation and safety checks
Monitor mounting, wiring routes, and inverter placement. Verify safety equipment usage and ensure all connections follow manufacturer guidelines and local codes.
Tip: Take progress photos and compare with the approved plan. - 8
Complete inspection and interconnection
Arrange inspections and utility interconnection; confirm net metering setup and permit closure. Keep the documentation organized for future maintenance and resale.
Tip: Keep a folder of inspection reports and warranties. - 9
Set up monitoring and maintenance
Enable performance monitoring and establish a maintenance plan, including periodic cleaning and checks for loose hardware. Review data monthly to catch performance drift early.
Tip: Use alerts to flag production dips immediately.
Frequently Asked Questions
What is included in the solar panel process?
The process includes planning, permitting, system design, installation, commissioning, and ongoing monitoring. It covers choosing equipment, assigning a qualified contractor, and coordinating inspections.
The solar panel process includes planning, permits, design, installation, and commissioning, plus ongoing monitoring.
Do I need permits to install solar panels?
Most jurisdictions require permits for solar installations; check with your local building department early to avoid delays.
Yes, permits are typically required. Check with your local building department.
How long does the process take from planning to commissioning?
Timelines vary by location and scope, but you should plan for several weeks from planning to commissioning.
Timelines vary by location; plan for several weeks.
Can I install solar panels myself?
We generally recommend professional installation to ensure safety, code compliance, and warranty validity.
We recommend hiring a licensed installer for safety and compliance.
What maintenance does a solar system require?
Basic cleaning and periodic inspections help maintain performance; monitoring can alert you to issues early.
Keep the panels clean and monitor performance for early issues.
What are common warranty terms?
Warranties vary by system and component; review terms for performance, materials, and workmanship.
Warranties vary; review the details for performance, materials, and workmanship.
Watch Video
Top Takeaways
- Define energy goals before shopping
- Get multiple quotes from licensed installers
- Expect permit and inspection phases
- Monitor performance after commissioning
- Keep warranties and maintenance in mind