Have Solar Panels Installed: A Complete Homeowner's Guide
Learn step-by-step how to have solar panels installed: site assessment, permits, quotes, installation day, interconnection, and warranty considerations. Practical, trusted guidance from Solar Panel FAQ.

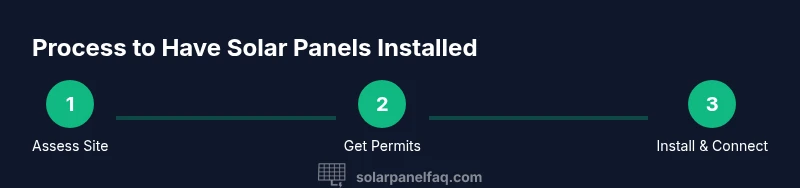
By following this step-by-step guide, you will be able to have solar panels installed on your home with confidence. It covers site assessment, permits, quotes, system sizing, installation day, interconnection, and post-install maintenance, as well as budgeting, financing, and warranty considerations. According to Solar Panel FAQ, planning ahead reduces delays and simplifies permits.
Why have solar panels installed matters
Having solar panels installed can help homeowners reduce monthly electricity bills, increase energy resilience, and boost home value. If you’re considering this investment, you’re not alone: millions of households are embracing solar across the country. The process requires careful planning, not just purchasing equipment. According to Solar Panel FAQ, having a clear plan, realistic expectations, and a qualified installer can minimize surprises and maximize performance. Before you commit, define your energy goals, evaluate roof orientation, and review available incentives. This article walks you through each step, from site assessment to interconnection, so you can approach the project with confidence. By the end, you’ll understand key terms, typical timelines, and how to avoid common pitfalls while you have solar panels installed. You’ll also learn how to monitor performance and keep the system operating at peak efficiency for years to come.
How solar installation works
Solar installation transforms sunlight into usable electricity through a sequence of well-defined steps. First, a design is created to match your energy needs and roof layout. Then, mounting hardware, racking, and solar panels are installed, followed by wiring to an inverter and the electrical panel. Finally, the system is connected to the grid and tested for safe operation. When you have solar panels installed, you should expect professional handling of permits, inspections, and interconnection with your utility. The outcome is a sealed, code-compliant system that can deliver clean energy for decades.
Site readiness: roof, shade, and orientation
Site readiness is the foundation of a successful installation. Assess roof condition, tilt, direction, and shading from trees or nearby structures. A south-facing or gently east/west orientation with minimal shading will maximize production. If your roof is aging or heavily shaded, you may need roof repairs or a different mounting plan. Structural assessment ensures the roof can support the panels and ballast. By planning around sun exposure and shade patterns, you’ll increase the likelihood that you have solar panels installed that perform reliably year after year.
Permits, inspections, and interconnection
Permitting is a critical phase that varies by locality. You will typically file with your city or county building department and, if required, your HOA. Utilities may require a grid interconnection agreement and a system size verification. Solar Panel FAQ analysis shows that early preparation for paperwork reduces delays. Expect inspections at several stages: post-installation, and final interconnection approval. Keeping all documents organized and communicating with your utility helps ensure a smooth process and a timely energization of your system.
Financing and incentives overview
Financing options include cash purchases, solar loans, and lease or power purchase agreements. Each option has pros and cons related to ownership, tax credits, and monthly costs. Incentives and rebates vary by year and state, so it’s important to check current offerings during planning. When you have solar panels installed, an understanding of incentives can improve payback timelines and overall return on investment. This section outlines how to compare financing options and maximize value while aligning with your budget and goals.
Getting bids: choosing your installer
Choosing the right installer is as important as selecting equipment. Look for NABCEP-certified technicians, solid warranties, and clear performance guarantees. Request full system designs, proposed inverter types, mounting methods, and energy production estimates. Compare quotes for equipment quality, labor costs, and timeline expectations. A thorough bidder will explain maintenance plans and monitoring options. Don’t rush to sign—take time to verify credentials, insurance coverage, and past project references.
The installation day: workflow and safety
Installation day is the culmination of planning. Crew members will prepare the site, install mounting hardware, place the panels, and connect wiring to the inverter and electrical panel. Expect interruptions to some electrical circuits and temporary roof access restrictions. Safety is paramount: fall protection, PPE, and lockout/tagout procedures are standard. After mounting, inspections may occur, and the system must be tested to confirm safe operation and proper interconnection with the grid.
Post-install: testing and warranties
Once installed, the system undergoes commissioning tests to verify performance. A monitoring platform will often be set up so you can track energy production, system health, and alerts for any faults. Warranties cover panels, inverters, and mounting hardware for varying durations; read the fine print to understand coverage and exclusions. Regular maintenance, such as cleaning panels and inspecting wiring, helps sustain performance. Understanding warranty terms means you’ll have better protection and confidence if issues arise.
Tools & Materials
- Safety gear (gloves, goggles)(Non-slip footwear; sun protection)
- Measuring tape(At least 25 ft for roof layout)
- Roof anchor harness and fall protection(Proper training required)
- Voltage tester / multimeter(DC isolation testing)
- Solar mounting hardware (rails, clamps, hardware)(Corrosion-resistant for outdoors)
- Inverter starter kit (or specific model)(Determine string sizing)
- Disconnect tools and insulated pliers(Safe disconnection of circuits)
- Wire cutters/strippers(Copper conductors, UL-rated)
- Permits and documentation kit(Copies of permits, HOA approvals)
Steps
Estimated time: 4-8 weeks
- 1
Assess roof suitability
Evaluate roof age, material, orientation, and shading to confirm it can support a solar system. Document sun exposure across seasons and identify any potential revisions needed before work begins.
Tip: Use a shade analysis tool or app to quantify daylight vs. shade hours on the proposed installation area. - 2
Obtain permits and utility approvals
Identify local permit requirements and start the utility interconnection process if applicable. Gather architectural drawings and any HOA authorization if required.
Tip: File early and keep digital copies organized; delays often come from missing documentation. - 3
Compare installer bids and credentials
Solicit multiple bids, verify NABCEP or equivalent certifications, and ask for detailed system design, equipment lists, and production estimates.
Tip: Ask for a warranty summary and service plan; this can save you headaches later on. - 4
Design system sizing and equipment selection
Size the system to meet energy goals, considering panel efficiency, inverter type, and available roof area. Confirm panel layout and electrical connection points.
Tip: Don’t oversize the system to chase savings; oversizing can add unnecessary cost and complexity. - 5
Schedule installation and prep your home
Set installation dates, arrange pet and family safety plans, and clear the installation zone. Confirm utility appointment windows and access needs.
Tip: Provide clear access instructions and parking for crew vehicles to avoid delays. - 6
Complete installation and interconnection
Install mounting hardware, mount panels, wire to inverter, and complete electrical connections. Ensure interconnection paperwork is submitted for final approval.
Tip: Double-check all fasteners and torque specs; improper mounting can cause long-term issues. - 7
Test, inspect, and monitor performance
Run commissioning tests, verify production against estimates, and configure monitoring dashboards. Schedule a post-install inspection if required by code or utility.
Tip: Set up alerts for performance drops so you can address issues early.
Frequently Asked Questions
What is the typical timeline from permit to grid interconnection?
Timeline varies by locality and utility, but planning ahead helps. Expect permit processing, scheduling, and interconnection steps that may take several weeks. Delays are often caused by incomplete documentation or utility backlogs.
Expect weeks for permits and interconnection; plan ahead to avoid delays.
How much does installation cost, and what factors influence price?
Costs vary with system size, roof conditions, equipment quality, and local permitting. The final price reflects panels, inverters, mounting hardware, wiring, and labor. Compare multiple quotes to understand what’s included and avoid hidden fees.
Prices depend on size and equipment; compare several quotes to gauge value.
Do I need a roof inspection before installation?
Most projects require a roof and structure check to ensure it can support the system. Inspectors verify mounting integrity, wiring routes, and roof condition before installation proceeds.
Yes, a roof inspection is usually required to confirm structural support.
What warranties come with solar panels and inverters?
Panels typically come with a 25-year performance warranty, inverters with 10-12 year warranties (longer for some models), and mounting hardware with lengthy endurance warranties. Warranty terms vary by manufacturer.
Look for long panel warranties and inverter warranties; read the terms carefully.
Can I install solar panels myself?
Installing solar panels yourself is generally not recommended due to safety, warranty, and code compliance concerns. A licensed installer ensures proper electrical connections and inspections.
DIY is not advised; professional installation ensures safety and code compliance.
Will I participate in net metering or similar programs?
Most utilities offer net metering, which credits excess generation. Eligibility depends on local policy and interconnection agreement. Check with your utility to understand how credits are calculated.
Net metering is common, but rules vary by location—check with your utility.
Watch Video
Top Takeaways
- Plan early to minimize permit delays.
- Choose a qualified installer with clear warranties.
- Understand interconnection and incentives before signing.
- Monitor performance to ensure long-term savings.