What Solar Panel Do I Need: A Practical Home Guide 2026
Discover how to choose the right solar panel for your home by evaluating roof space, energy needs, and budget. This guide covers sizing, panel types, and basic installation considerations.

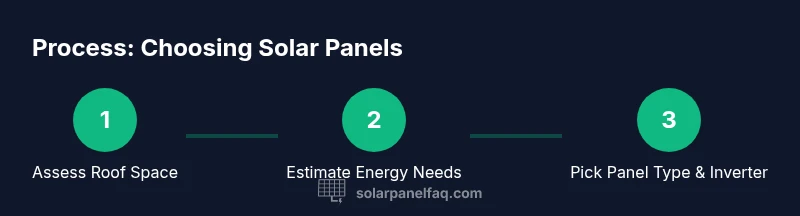
According to Solar Panel FAQ, choosing the right solar panel starts with your roof condition, your daily energy use, and your budget. Start by estimating daily kWh needs, assess roof space and orientation, then compare panel types (mono- vs polycrystalline) by efficiency, cost, and warranties. This quick guide points you to the detailed steps below.
Assessing Your Roof and Climate
Your roof is the stage for your solar setup. The Solar Panel FAQ team notes that effective solar gains depend on roof orientation, shading, and climate. Begin with a north- or south-facing assessment (depending on hemisphere) and check for shading from trees, chimneys, or vents. If shading is an issue, plan for microinverters or power optimizers to maximize production where possible. Consider climate effects: hot panels can lose efficiency slightly, while winter sun may compensate with higher overall days of sun. Gather roof measurements, confirm mounting feasibility, and note any required repairs before deciding on panel wattage. A careful initial assessment reduces surprises during installation and helps you choose a system that fits both energy goals and budget. According to Solar Panel FAQ, this foundational step sets the stage for accurate sizing and a smooth installation process.
Estimating Your Energy Needs (kWh)
Your energy footprint is the primary driver of how many panels you need. Start by reviewing 12 months of energy bills to identify your average daily kilowatt-hours (kWh). Include seasonal variations from heating, cooling, and major appliances. If you’re unsure, use a reputable home energy calculator and verify with your utility bill. Translate daily kWh into a system size by dividing by the expected sun hours per day in your area to estimate the necessary DC wattage. This anchors your budget and helps avoid oversizing or undersizing. Also consider future changes—adding a bedroom, electric vehicle, or new appliances can shift needs. With careful modeling, you’ll reach a target system size that aligns with energy goals and financial plans.
Panel Types: Mono-crystalline vs Polycrystalline vs Thin-film
Panel technology affects efficiency, space needs, and cost. Monocrystalline panels are typically more efficient and space-saving, making them ideal for smaller roofs, while polycrystalline panels offer lower upfront costs with slightly lower efficiency. Thin-film panels are flexible in form and can perform better in high-heat environments but usually trade off long-term durability and efficiency. Your choice should reflect roof space, budget, and climate. For most homeowners, a balanced mix of higher-efficiency mono panels with solid warranties offers a dependable return, while poly panels can fit larger, budget-conscious installations. Always compare manufacturer warranties and real-world performance in your climate when deciding.
Sizing Your System: Watts, Panels, and Inverters
Sizing involves translating your target DC wattage into a combination of panels and an inverter. The goal is to meet or slightly exceed your calculated DC requirement without oversizing beyond what your roof can accommodate. Determine the number of panels by dividing the total wattage by the watt rating of a typical panel (e.g., a 300–370 W panel is common in many homes). The inverter should be sized to handle the DC input with some headroom (often 1.1–1.25x the nominal DC wattage) to accommodate future growth and safety margins. Include considerations for microinverters or optimizers if shading or uneven tilts affect a portion of the array.
Matching Warranties and Durability
Warranty length and coverage are crucial for long-term performance. Look for product warranties that cover power output for a substantial portion of the panel life and performance warranties guaranteeing minimum output over many years. Durability matters too: corrosion resistance, frame quality, and seal integrity impact lifespan, especially in coastal or extreme climates. While initial cost matters, the total cost of ownership—driven by efficiency, degradation rate, and warranty terms—often tells the real story. Prioritize reputable brands with proven field performance and accessible service, and verify what the installer covers in the warranty.
Considering Roof Orientation, Shading, and Mounting
Your roof orientation and tilt affect energy production. South-facing roofs in the northern hemisphere typically yield higher annual output, while shading from trees, chimneys, or vents can dramatically lower production if not mitigated. Use a shading analysis tool or app to map potential losses throughout the day and year. Mounting must consider roof integrity, weight load, and wind exposure. Fixed mounts offer low maintenance, but adjustable mounts or seasonal tilts can optimize performance in some climates. Ensure your plan accounts for roof access, clearance, and inspection requirements.
Efficiency and Temperature Coefficients: What Matters
Panel efficiency matters most where roof space is limited. Higher-efficiency panels produce more power per square meter, which can reduce the total system area required. Temperature coefficients explain how performance drops as temperatures rise; in hot climates, efficient panels with strong heat tolerance can maintain better output. While efficiency and temperature coefficients are important, real-world performance also depends on orientation, shading, and system design. Evaluate these factors together with warranty terms to select a long-lasting option that delivers consistent energy.
Practical Selection: Case Scenarios
Case A: Small roof, high energy needs. A homeowner with a compact roof and high daily usage benefits from high-efficiency mono panels with a robust 25-year warranty, possibly paired with microinverters to handle shading and maximize output. Case B: Large roof, budget focus. A homeowner with ample space and moderate energy use may choose a mix of polycrystalline panels to hit a cost-per-watt target while still maintaining good durability and warranty coverage. Case C: Shaded roof. For partial shading, plan for optimizers or microinverters and a design that minimizes shaded string losses. Each scenario demonstrates the importance of roof space, energy patterns, and climate in panel selection.
Next Steps: Getting Quotes and Installing
With a preferred panel type and target system size in mind, contact licensed installers for quotes. They will verify roof condition, handle permits, and design the system layout. Ask about warranties, maintenance expectations, and expected timelines. After selecting a proposal, ensure you have a written plan for inspections and grid interconnection. The Solar Panel FAQ team recommends pursuing a plan that balances cost, durability, and long-term energy performance.
Tools & Materials
- Measuring tape(at least 25 ft)
- Safety gloves(ANSI-rated)
- Ladder or scaffolding(stable, secured)
- Cordless drill(with appropriate bits)
- Voltage tester(to check wiring)
- Solar mounting hardware(per roof type and panel layout)
- Shading analysis tool(mobile app or online calculator)
- Personal protective equipment (PPE)(hard hat, non-slip shoes as needed)
Steps
Estimated time: 2-4 weeks
- 1
Define energy goals and gather data
Collect a full year of utility bills and note peak usage periods. Identify appliances that affect daytime and evening load and consider future changes such as additional rooms or an EV charger. This establishes a baseline for system sizing and helps avoid under- or over-sizing.
Tip: Document any planned changes to appliances or efficiency upgrades to refine sizing. - 2
Assess roof space and shading
Measure available roof area and map shading through the year. Record orientation, tilt, and potential obstructions. This determines panel count and whether to consider microinverters or optimizers for shaded sections.
Tip: Do the shading check on a clear day with a sunny sky for the most accurate results. - 3
Choose panel technology
Compare mono and polycrystalline options based on efficiency, cost, and space. If roof area is limited, prioritize higher-efficiency mono panels; if space is abundant, poly panels can be a budget-friendly choice.
Tip: Review warranty terms and degradation rates alongside price per watt. - 4
Size the system and select an inverter strategy
Calculate total DC wattage from your target daily kWh and sun hours. Choose a panel count that meets the DC wattage, and size the inverter (or inverters) with some headroom for growth and safety.
Tip: Consider either a string inverter with optimizers or a microinverter approach if shading is a concern. - 5
Check warranties and maintenance needs
Review product warranty, performance warranty, and installer workmanship warranty. Understand expected panel degradation and maintenance tasks like cleaning and inspection.
Tip: Ask for written warranty transfer terms if you sell the home. - 6
Request quotes and verify permits
Solicit at least three quotes from licensed installers. Ensure the proposal outlines permitting, grid interconnection, and inspection steps. Clarify who handles wiring diagrams, safety testing, and interconnection paperwork.
Tip: Choose installers who provide a clear, itemized scope and a timeline. - 7
Finalize design and prepare for installation
Select a preferred plan, sign a contract, and schedule installation. Prepare for a possible one- to two-day installation depending on roof type and system size. Confirm access, safety measures, and post-install testing.
Tip: Obtain a grid interconnection agreement early to avoid delays.
Frequently Asked Questions
How do I determine the right system size for my home?
Begin with your average daily energy use and your roof’s available space. Translate annual usage into a daily kWh figure, then estimate the required DC wattage. This anchors your panel count and helps you select an inverter size that accommodates growth.
Start with your daily energy use and available roof space; translate annual usage to daily kWh, then estimate the required DC wattage and inverter size.
Can I mix panel types in one installation?
Mixing panel types is possible but can complicate performance and warranties. If you mix, ensure the string layout, microinverters, or optimizers are properly configured and documented by your installer.
You can mix panel types, but it can complicate performance and warranties; check with your installer for proper configuration.
What is the difference between mono- and polycrystalline panels?
Monocrystalline panels tend to offer higher efficiency and better space utilization but often come with a higher price. Polycrystalline panels are typically less expensive and slightly less efficient, making them a solid budget option with ample roof space.
Mono panels are more efficient but pricier; poly panels are cheaper and slightly less efficient. Choose based on roof space and budget.
Do I need permits or inspections?
Most jurisdictions require electrical permits and inspections for rooftop solar. Your installer usually handles the paperwork, including interconnection with the utility grid and safety testing.
Yes, permits are usually required. Your installer will manage them and the interconnection process.
What about warranties and maintenance?
Look for a robust product warranty (often many years) and a performance warranty. Maintenance typically includes periodic cleaning and annual inspections, but confirm specifics with the installer.
Warranties protect your investment; expect product and performance coverage plus occasional maintenance checks.
How long does installation take?
Residential installations usually occur over one to two days, depending on roof type, system size, and permitting timelines. Weather and crew availability can extend the schedule.
Most installs take a day or two, depending on the roof and permits.
Watch Video
Top Takeaways
- Assess roof space and shading before sizing.
- Match panel type to roof space and budget.
- Size the system with proper inverter capacity and future growth in mind.
- Prioritize warranties and professional installation.