What goes wrong with solar panels: Troubleshooting for homeowners
Urgent, practical guide for homeowners to diagnose and fix common solar panel issues, with a diagnostic flow, step-by-step fixes, safety tips, and when to call a pro.

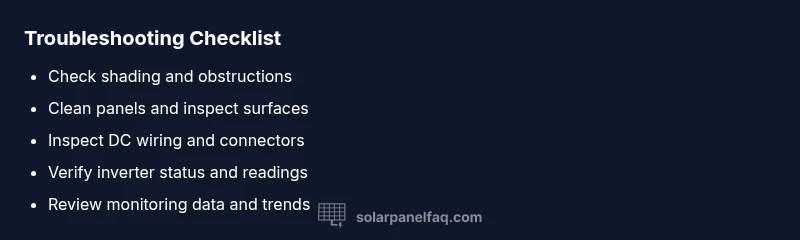
Most solar-panel problems fall into a short list: shading and soiling, loose or corroded connections, degraded modules, inverter or monitoring faults, and wiring or junction-box issues. Start with the easiest fixes: clean the panels, remove shade sources, and inspect the inverter display. If readings still lag or safety concerns arise, shut down as recommended and contact a licensed solar technician.
Common failure modes in solar systems
According to Solar Panel FAQ, homeowners rely on rooftop solar to power homes, but performance can falter due to a handful of predictable failure modes. The most common problems are shading from nearby trees or new structures, soiling from dust or bird droppings, and degraded modules from weathering. On the electrical side, loose or corroded connections, damaged wiring, or failed junction boxes can silently erode output. Inverters and monitoring equipment are also susceptible to faults that reduce visibility into performance. This section breaks down each failure mode, how to spot it, and why it matters for daily energy bills and equipment longevity. Throughout, you’ll find practical checks you can perform safely and when to escalate to a professional.
Shading, dirt, and environmental factors
Shading remains the most impactful and immediate culprit for reduced production. Even transient shade from tree branches, neighboring buildings, or seasonal changes can dramatically drop power output, especially on partially shaded arrays. Dirt, dust, pollen, leaves, and bird droppings create micro-blockages that reduce irradiance. Environmental factors such as snow, ice, or heavy rainfall can temporarily or permanently affect performance. Regular inspection and prompt cleaning (when weather and safety permit) can restore production and protect long-term panel efficiency. Remember that shade patterns can also shift with the sun’s angle, so monitoring over a full day or week provides the clearest picture.
Electrical faults: connections, modules, and inverters
Electrical faults are often less visible but more damaging if ignored. Loose, corroded, or oxidized DC wiring and connectors can cause hotspots, voltage drops, or even fire hazards. Damaged or scratched PV modules may have microcracks that propagate under thermal cycling, reducing output. The inverter, the system’s brain, can fail or misreport due to firmware glitches, cooling issues, or blown fuses. Monitoring devices may show misleading data if sensors drift or communication drops. A methodical check of both the DC side (panels, combiner boxes, conduits) and the AC side (inverter, breakers) helps pinpoint the fault source.
Reading monitoring data: how to interpret performance metrics
Most solar systems include a monitoring interface that tracks energy production, instantaneous power, and historical trends. A sudden drop in daily kWh, a mismatch between irradiance and output, or a deviation from expected performance curves should trigger a closer look. Compare real-time readings with manufacturer specs and with your historical baseline. If your monitor shows alarm codes or persistent fault messages, consult the manual or the installer’s support portal. Data interpretation is often the fastest route to a quick win.
Safe, practical checks you can perform today
Begin with the basics: ensure the system is safe to inspect and that you follow proper lockout/tagout procedures. Clear the area around the inverter and disconnects so you can examine wiring without risk. Look for obvious signs like loose clamps, corrosion, exposed conductors, or damaged conduit. Check for new shading sources—growth on nearby trees or changes to roof obstructions. If you notice scorching, melted insulation, or smell ozone, stop and call a professional immediately. Safety always comes first.
When to escalate: safety first and warranty considerations
If basic checks don’t restore performance, escalate to a licensed solar technician. Electrical faults, roof damage, or degraded modules may be covered by manufacturer warranties or installer guarantees, so document issues, take photos, and log dates of outages. Avoid DIY fixes on high-voltage DC components or at heights. Understanding your warranty terms can help you decide whether to pursue replacement panels, inverter service, or a full system assessment.
Maintenance routines to prevent problems
Proactive maintenance saves money and keeps your system healthy. Schedule periodic inspections, particularly after severe weather or seasonal changes. Clean panels with gentle water and soft brushes, avoid harsh chemicals, and never climb onto a roof during wet or windy conditions. Keep wiring intact and protected, check seals on inverters, and verify monitoring data monthly to catch slow declines early. A simple annual checklist can extend panel life and sustain energy yield.
Steps
Estimated time: 60-120 minutes
- 1
Power down and secure safety
Begin by turning off the system at the main DC disconnect and AC disconnect per the installer’s guide. Wear non-conductive gloves and avoid touching exposed conductors. Confirm that there is no exposed live voltage before proceeding.
Tip: If you’re unsure, skip to Step 7 and call a pro. - 2
Check for shading and obstructions
Inspect sun exposure on all panels at different times of day. Trim branches and relocate any temporary obstructions that could cast shadows over sections of the array.
Tip: Use a solar path tool or app to map shade times across the day. - 3
Clean panels and inspect surfaces
Rinse panels with gentle water and use a soft brush to remove dirt. Avoid abrasive materials or harsh chemicals that can degrade coatings. Inspect for cracks or damaged glass after cleaning.
Tip: Do not spray water under pressure; use a steady, gentle stream. - 4
Inspect wiring and connectors
Look for loose clamps, frayed insulation, or corrosion on DC conductors and junction boxes. Re-seat connectors carefully and ensure conduits are intact and properly sealed.
Tip: Only perform this if the DC side is clearly accessible and you’re comfortable. - 5
Check inverter and monitoring data
Read inverter status, error codes, and LED indicators. Compare real-time production with expected output from the manufacturer’s curves and compare to yesterday for a baseline.
Tip: Document any error codes with timestamp for reference. - 6
Test and evaluate performance
Re-energize the system following safety checks. Monitor for a full sun period to verify return to baseline output. If not, proceed to Step 7.
Tip: If the output remains low, don’t force it; escalate rather than risk damage. - 7
Call a professional if unresolved
If you cannot identify or safely fix the fault, contact a licensed solar technician or your warranty provider. Provide fault codes, baseline data, and photos.
Tip: Professional service may be required for warranty claims.
Diagnosis: System underperforms or shows no output under sunlight.
Possible Causes
- highShading from new construction, trees, or obstructions
- highDirt, dust, bird droppings, or debris on panel surfaces
- highLoose, corroded, or oxidized DC wiring and connectors
- mediumFaulty or degraded inverter or monitoring equipment
- lowPanel damage from hail, thermal cycling, or microcracks
- lowLoose DC isolator or AC disconnect causing safety shutoffs
Fixes
- easyClean panels and trim shade sources; ensure unobstructed sun exposure
- easyInspect and reseat connectors, tighten loosened lugs, and repair corrosion if safe
- mediumTest DC and AC voltages with a multimeter; compare to system specs
- easyCheck inverter status LEDs and error codes; reset or service as indicated in manual
- mediumIf panels are damaged or microcracks suspected, arrange professional inspection or warranty service
- easyVerify safety disconnects and check for tripped breakers; re-energize only when safe
Frequently Asked Questions
What are the most common causes of solar panel underperformance?
Shading, dirt buildup, loose wiring, inverter faults, and worn panels are the top culprits. Start with cleaning, check shade, and inspect the inverter. If performance does not recover, consult a professional.
The most common causes are shading, dirt, loose wiring, inverter faults, or worn panels. Begin with cleaning and shade checks, and contact a professional if performance doesn’t improve.
How do I tell if my inverter is failing?
Check the inverter display for error codes, unusual LEDs, or overheating. Compare readings with the expected output and listen for fan noise. If in doubt, switch off and have a technician inspect.
Look for error codes, odd LEDs, or overheating on the inverter. Compare output to expectations, and call a technician if you’re unsure.
Can shading affect performance even if panels look clean?
Yes. Partial shading can dramatically reduce output due to bypass diodes and module design. Even small shadows on a portion of the array can lower overall production.
Absolutely. Even light shading on part of the array can drop total output significantly.
Do I need to wash solar panels?
Cleaning helps when dirt or pollen reduces irradiance. Use gentle water flow and soft brushes; never use harsh chemicals or abrasive tools.
Yes, cleaning can help if there’s dirt buildup. Use gentle water and a soft brush.
Is it safe to troubleshoot solar panels myself?
Only perform basic, non-energized checks from a safe location. High-voltage DC systems pose serious risks; consult a professional for anything beyond surface-level checks.
DIY safety is important: only do basic checks when safe, and call a pro for anything involving live wiring.
How long do solar panels last before problems arise?
Most panels come with warranties of 25 years or more, and degradation occurs gradually. Regular maintenance helps preserve lifetime performance and catch issues early.
Panels typically last 25 years or more, but regular maintenance helps catch issues early.
Watch Video
Top Takeaways
- Inspect for shading and debris promptly.
- Clean panels safely to restore efficiency.
- Interpret monitoring data to spot declines early.
- Escalate to a pro for complex faults and warranty work.
- Establish a routine maintenance plan.