Why Do Solar Panels Stop Working? A Practical Troubleshooting Guide
A practical, urgent troubleshooting guide to diagnose why solar panels stop working, with safe at-home fixes, when to call a pro, and tips to prevent future outages.

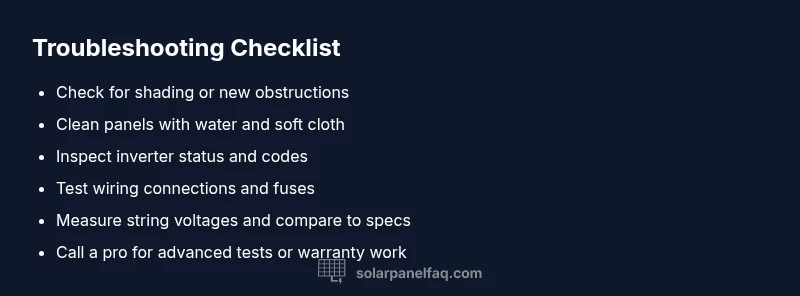
Most outages come from simple, checkable causes. Start with basic checks: confirm sun exposure, look for shading or dirt, verify inverter status, and inspect wiring and safety switches. If these fixes don’t restore output, follow the diagnostic flow or call a professional. According to Solar Panel FAQ, many failures are solvable with a methodical, at-home approach.
Overview: Why solar panels stop working
When homeowners ask why do solar panels stop working, the immediate concern is often a sudden drop in energy production or an error on the monitoring app. In many cases, the culprit is not a failed panel but a peripheral issue such as shading from new trees, dirt buildup, or a tripped safety device. The Solar Panel FAQ team notes that most outages are addressable with a careful audit of the system components and environmental conditions. Understanding the typical failure modes helps you act quickly and safely, reducing downtime and maximizing your investment. This isn’t about panic—it’s about a clear, methodical path to restore performance and protect your solar investment.
Key terms you’ll see in this guide include: irradiance (sunlight amount reaching the panels), optimizers or microinverters, string inverters, and the AC/DC disconnects. Each plays a role in why solar panels stop working and how to diagnose the issue without unnecessary risk.
Check the basics first: shading, dirt, and connections
The most common culprits are environmental and simple mechanical issues. Inspect for new shade from growing branches or nearby obstacles that block sun during peak hours. Look for debris, bird droppings, or dust that can accumulate on module surfaces and reduce output. Clean outdoor panels only with non-abrasive methods and water if safe to do so, following manufacturer guidelines. Next, verify the wiring connections at the module junction boxes, combiner boxes, and the inverter. Loose or corroded connections are a frequent source of voltage drop and apparent underperformance. Finally, check safety switches and disconnects to ensure they are in the closed position. If any component is visibly damaged, avoid “ DIY fixes” on live circuits and call a professional. According to Solar Panel FAQ, addressing these basics resolves many day-to-day outages and buys time for deeper diagnostics.
Inspect the inverter and monitoring system
Inverters are the heartbeat of most solar systems. If the inverter displays an error code or has blinking lights, consult the manual or manufacturer app to interpret the fault. A fault could indicate overvoltage, overtemperature, grid issues, or a communication problem with sensors. Ensure the inverter is receiving the expected DC input from the panels and that the AC output is connected to the home circuit. If the monitoring system shows inconsistent data or a gap in reporting, reset the inverter following the manufacturer’s instructions and re-check. Document any readings and error codes; this data helps you or a technician trace faults more quickly. A failed inverter is a common reason panels appear nonfunctional even when the panels themselves are healthy.
Common electrical and physical causes
Beyond shading and dirt, several electrical and physical issues can mimic a true panel failure. Loose DC wiring, damaged insulation, or bent/melted connectors can interrupt current flow. Microinverters or optimizers may fail independently of the main inverter, causing partial or total output loss. Panel-level problems such as microcracks, delamination, or hotspot damage increase resistance and reduce output while not always triggering obvious alarms. Inspect visible wiring for pinches, frayed insulation, or discoloration. If you suspect a damaged panel, avoid stepping on the surface or applying pressure; high voltage can be dangerous even if it looks fine. Addressing electrical faults often requires tightening connections or component replacement, sometimes involving a licensed electrician or solar technician.
A practical diagnostic flow you can follow
A systematic approach minimizes guesswork. Start by confirming sun exposure and basic physical integrity, then move to the inverter and monitoring data. If the issue persists, test the DC wiring and panel strings for continuity and voltage drops. Use a multimeter to compare expected voltage with actual readings at the junction box. Check for blown fuses or tripped breakers in the PV disconnect and main service panel. If you find a mismatch between expected and actual values, trace the circuit step by step toward the fault location. Keep safety in mind at every step: never work on live DC circuits, and avoid climbing on the roof without proper harnesses and assistance. If the fault remains elusive, escalate to a professional with the data you’ve collected.
Safety first: when to call a professional
Solar systems involve high DC voltage; improper handling can cause electric shock or fire. If you are uncomfortable with climbing onto a roof, working near live wiring, or interpreting inverter fault codes, contact a licensed solar technician. Warranty considerations also matter: many modules are warranted for 25 years, inverters typically 10–15 years, but warranty coverage varies. A professional can perform advanced tests such as PV string tracing, insulation resistance measurements, and infrared thermography to identify hidden defects. Early professional assessment can prevent longer downtime and protect long-term system performance.
Maintenance and prevention to keep solar panels productive
Preventive care saves time and money. Establish a regular cleaning cadence for dust, pollen, and bird droppings—especially in dry or windy climates—while avoiding harsh chemicals that may damage coatings. Schedule periodic inspections of modules, cabling, and inverters; verify mounting hardware remains tight and corrosion-free. Trim nearby foliage to prevent future shading and evaluate the optimal tilt and orientation as sun angles shift seasonally. Keep a simple log of production data, weather events, and any repairs. This habit helps you spot anomalies early and reduces the risk of extended outages.
Steps
Estimated time: 60-120 minutes
- 1
Power down safely and prepare
Before touching any components, shut off the PV disconnect and main service breaker if accessible. Wear insulated gloves and avoid wet surfaces. Document the system layout and take photos of connections for reference.
Tip: Always assume circuits are energized until you confirm they’re off. - 2
Assess shading and surface cleanliness
Inspect panels for new shading from trees or building features. Clean dusty surfaces with water and a soft cloth, avoiding abrasive cleaners. Note any panels that look unusually dirty or uneven in shading.
Tip: Cleaning is more effective on cool, dry mornings; hot panels can crack under rapid temperature changes. - 3
Check the inverter and monitoring data
Read the inverter display for fault codes and verify the monitoring app shows consistent data. If codes appear, consult the manual or manufacturer site for interpretation. Reset if recommended by the manual.
Tip: Record any fault codes and timestamped readings for later reference. - 4
Inspect DC wiring and fuses
Trace DC wiring from panels to the inverter junction box. Look for loose connectors, corrosion, or damaged insulation. Test continuity and check for any tripped fuses or protective devices.
Tip: Only perform continuity tests if you are trained; incorrect testing can cause hazards. - 5
Test string voltage and current
Using a properly rated multimeter, measure the open-circuit voltage and short-circuit current of each string. Compare values against manufacturer specs and nameplate data. Any significant deviation indicates a fault in that string.
Tip: Avoid touching live conductors; keep one hand in your pocket to reduce shock risk. - 6
Decide on next steps
If readings align with specs and the issue persists, escalate to a professional for deeper testing such as insulation resistance or infrared thermography. If a component is damaged or a wiring fault is found, arrange replacement or repair promptly.
Tip: Do not attempt extensive repairs on panels or inverters beyond your training.
Diagnosis: Significant drop in system output or inverter fault codes
Possible Causes
- highShading or dirt reducing irradiance
- highInverter fault or communication error
- mediumLoose or damaged wiring connections
- lowDamage to panel or string components
Fixes
- easyClean panels and trim shading sources; recheck irradiance
- easyReset or reconfigure the inverter/monitoring system per manual
- easyInspect and tighten DC/AC connections; replace blown fuses
- hardReplace damaged wiring or panels; consult a professional
- mediumRun a full system diagnostic with a licensed technician
Frequently Asked Questions
What should I check first when my solar panels stop producing electricity?
Begin with sunlight availability, inspect for shading, and ensure panels are clean. Then verify the inverter status and monitoring readings to identify where the outage originates.
First, check sun exposure and panel cleanliness. Then look at the inverter status and monitoring data to locate the fault.
Why does the inverter show a fault code?
Fault codes usually indicate overvoltage, overtemperature, grid issues, or a communication problem with sensors. Consult the manual, reset if recommended, and note the code for a technician.
Inverter fault codes point to voltage, temperature, grid issues, or sensor communication problems. Record the code and consult the manual.
Can dirty panels still produce electricity, and how much can dirt affect output?
Dirty panels reduce irradiance and can significantly lower output, especially in dusty or pollen-heavy environments. Cleaning improves performance, but persistent low output after cleaning indicates a deeper fault.
Dirty panels do reduce output. Cleaning helps, but if production remains low after cleaning, there may be a deeper fault.
Is it safe to reset the inverter myself?
Resetting may be safe if the manual instructs it, but avoid resets if you’re unsure of the procedure. Incorrect resets can damage the system. When in doubt, contact a professional.
Only reset the inverter if the manual says it’s safe. If you’re unsure, call a pro.
When should I consider replacing panels or the inverter?
Replacement considerations depend on age, warranty coverage, and performance data. Inverters typically have shorter lifespans than panels; consult a licensed technician to assess whether repair or replacement is warranted.
Replacement should be considered if components are out of warranty, show persistent faults, or performance is well below expectations.
Watch Video
Top Takeaways
- Start with basic checks—shading, dirt, and connections.
- Inverter faults are a common reason for outages; inspect displays and codes.
- Safe, staged troubleshooting minimizes risk and downtime.
- Know when to call a professional for complex tests or warranty work.