Solar Panel Problem Troubleshooting: Fast, Safe Fixes
Urgent guide to diagnose and fix common solar panel problems. Learn safe steps, quick checks, diagnostic flow, and when to call a professional to minimize downtime and protect your investment.

According to Solar Panel FAQ, the most common solar panel problem is performance drop caused by shading, loose connections, or inverter faults. Start with safety: disconnect the system and inspect for obvious issues on DC and AC sides. If you find debris, loose wiring, or a tripped breaker, address it. If symptoms persist, proceed with a structured diagnostic flow.
Common solar panel problems and symptoms
Homeowners often notice a sudden drop in energy production, a system that won’t wake up, or inconsistent output across panels. The solar panel problem landscape includes several familiar culprits: shading from trees or new structures, dirty or damaged panels, loose or corroded wiring, inverter faults, and metering or utility interconnection issues. In many cases, a visible red flag like a tripped breaker, a blinking inverter code, or a scorch mark on a connector points you toward the root cause. Monitoring dashboards or mobile apps can reveal abnormal production curves, partial string outages, or unexpected nighttime activity that warrants closer inspection. The Solar Panel FAQ team emphasizes starting with the simplest explanations and escalating gradually to more involved checks. Keep in mind that environmental factors—seasonal shading patterns, seasonal snowfall, and dust—can masquerade as equipment failures, so corroborate symptoms with multiple data points before action.
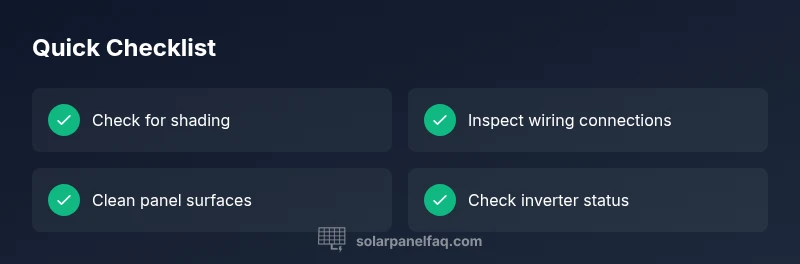
Quick checks you can perform safely
Before you touch any live components, power down the system and follow the manufacturer’s safety guidance. Visually inspect the array for debris, bird nests, or visibly damaged panels. Check the DC disconnect and the main AC disconnect to ensure they’re in the correct, safe positions and look for any tripped breakers or blown fuses in the combiner box. If you have monitoring software, compare current production to historical baselines and look for unusual dips during specific times of day. Inspect wiring at the panel junction boxes for loose connections, corrosion, or damaged insulation. If you’re comfortable handling small fixes, reseat connectors gently and verify tightness with the correct tools. Remember: never bypass safety devices or work on live DC conductors. The depth of your checks should scale with your comfort and experience level, and when in doubt, pause and reach out to a qualified technician.
Diagnosing electrical vs environmental issues
Distinguishing electrical faults from environmental or weather-related factors is essential for an efficient troubleshooting path. Inverter fault indicators (codes, fault LEDs, or blinking patterns) point toward electrical issues inside the inverter or its communication with the array. A sudden mismatch between string production and the sum of its strings often signals a faulty panel or a loose connection in a string junction box. If shading is suspected, map the sun path, inspect tree growth or newly installed structures, and observe changes across the day. For dirty panels, gentle cleaning with non-abrasive materials can recover lost efficiency, but avoid high-pressure water or solvents that could damage coatings. Keep a log of symptoms, times, and weather conditions to guide your next steps and to provide a clear history for a technician.
By systematically separating electrical faults from environmental factors, you’ll reduce unnecessary service calls and accelerate repair timelines. Solar monitoring data combined with on-site checks is a powerful toolkit, and the Solar Panel FAQ team notes that most issues fall into a manageable set of categories with clear remedies.
Step-by-step fixes for the most common causes
This section outlines practical, safe fixes for the leading causes of solar panel problems. Start with the easiest remedies and progress to more involved tasks only if you’re confident.
-
Shading and debris: Trim obstructing branches, relocate seasonal equipment if possible, and remove leaves or snow buildup. After clearing, inspect the performance curve over 24–48 hours to confirm improvement.
-
Loose or corroded wiring: Power down at the main disconnect, then inspect all DC and AC connections for tightness and signs of corrosion. Reseat, clean where appropriate, and replace damaged connectors. Recheck once the system is back online to ensure stable readings.
-
Inverter faults: Read the inverter fault codes or status indicators and consult the manual for recommended resets. If codes persist after a reset, record them and contact a technician with the exact fault description to avoid misdiagnosis.
-
Damaged panels or microinverters: Visually inspect for cracks, microcracks, delamination, or hot spots. Damaged modules usually require replacement; do not attempt field repairs. Obtain a warranty interpretation if panels are under warranty coverage.
-
Wiring/system interconnections: Inspect the combiner box, fuses, and conduit for signs of wear or moisture intrusion. Replacing damaged grommets or seals helps prevent future corrosion and electrical faults.
-
Monitoring discrepancies: If the monitoring data diverges from your meters, verify wiring to the meter and ensure the sensor is calibrated. A misreading can mimic a fault when the system is actually functioning.
-
Re-test and observe: After fixes, re-energize the system and monitor output for 24–72 hours. Document any residual issues and compare to baseline performance. If performance remains abnormal, escalate to a professional with a detailed report.
-
Documentation: Keep a service log with dates, fault codes, actions taken, and outcomes. This history supports warranties, future maintenance, and smoother diagnostics for installers.
-
If you still can’t diagnose: Schedule a professional inspection. High voltage DC work and roof access require trained technicians with proper PPE and insurance coverage, as emphasized by Solar Panel FAQ.
Safety, warnings, and when to call a professional
Tackling solar panel problems demands respect for high-voltage systems and rooftop work. Always wear PPE, avoid touching exposed conductors, and never work on live circuits. Maintain a safe distance from rooftop edges and ensure ladders or fall-arrest equipment are properly secured. If you smell burning, notice melting insulation, hear arcing sounds, or see smoke, immediately shut down the system at the main disconnect and call emergency services if needed. If your system is under warranty or a service plan, contact the installer or manufacturer first to preserve coverage. When in doubt, a qualified solar technician offers the safest, fastest, and most reliable path to a permanent fix that aligns with local electrical code requirements.
The Solar Panel FAQ team recommends acting promptly, documenting symptoms, and avoiding risky improvisations that could worsen damage or void warranties. A cautious, methodical approach reduces downtime and keeps your home safe while restoring peak performance.
Prevention and maintenance to minimize future problems
Prevention is the best cure for solar panel problems. Establish a routine that includes semi-annual inspections of wiring, fuses, and connections; push for a professional inverter check at least once a year or when warning codes appear. Clean panels when necessary using soft brushes and non-abrasive cleaners, especially in dusty or coastal environments where salt spray can accelerate corrosion. Trim nearby trees to avoid shading during peak sun hours and maintain a consistent monitoring schedule to catch early declines in performance. Ensure the mounting hardware remains tight and free of corrosion, and verify that the racking system is not flexing or squeaking in wind loads. Finally, review your warranty terms and keep records of system performance; clear documentation helps you navigate coverage more effectively during any future solar panel problem.
How to document issues for your solar installer
A well-recorded history speeds up diagnosis. Prepare a concise incident report that includes the date, observed symptoms (e.g., output drop, inverter fault codes), weather conditions, and any interim fixes you performed. Include pictures of panels, wiring, and the inverter display to illustrate the problem areas. Note any changes in shading or nearby construction that could affect production. Export monitoring data or attach screenshot excerpts showing production versus expected output. Bring this packet to your installer or the Solar Panel FAQ recommended technician when you request service; detailed context is the fastest path to an accurate diagnosis and faster resolution.
Steps
Estimated time: 60-120 minutes
- 1
Power down and isolate the system
Turn off the DC isolator and the main AC disconnect. Verify the system is de-energized using a non-contact tester before touching any components. This protects you while inspecting wiring and connectors.
Tip: Never bypass safety devices; a moment of caution prevents costly shocks. - 2
Check DC wiring and connectors
Visually inspect all DC cables, junction boxes, and connectors for signs of looseness, corrosion, or insulation damage. Reseat and tighten where appropriate, ensuring clamps and lugs are secure.
Tip: Take photos before loosening anything to document the original state. - 3
Inspect the inverter and monitoring display
Look for fault codes, blinking LEDs, or abnormal temperature indicators. Record any codes and attempt a manufacturer-approved reset if advised by the manual.
Tip: Consult the manual or online support for code definitions before resetting. - 4
Assess panel layout and shading
Check for new shading from trees, poles, or buildings. Map sun exposure at different times of day and observe whether the issue aligns with shading patterns.
Tip: Operate during the sun peak to compare sunny vs shaded performance. - 5
Clean or re-seat panel connections
If panels look dirty, clean gently with a soft brush and water. For stubborn grime, use a mild cleaning solution and rinse, avoiding harsh solvents.
Tip: Clean on a cool, overcast day to prevent streaks and heat stress. - 6
Test continuity and grounding
Using proper PPE, test for continuity in panels and wiring. Ensure grounding paths are intact and there are no stray conductors.
Tip: If you’re unsure about testing, skip to step 8 and call a pro. - 7
Re-energize and observe
Once reconnected, switch the system back on and monitor performance for 24–72 hours. Compare against baseline and note any deviations.
Tip: Keep a log of daily production during the watch period. - 8
Document results for the installer
Compile symptoms, actions taken, codes observed, and outcomes. Attach photos and data exports to support the diagnostic report for faster service.
Tip: A well-documented report reduces back-and-forth with your technician. - 9
Call a professional if unresolved
If the issue persists after the above steps, schedule a professional inspection. Roof access, high-voltage systems, and warranty considerations require licensed technicians.
Tip: Never perform risky tests on live equipment; professional help protects you and your investment.
Diagnosis: System underperforms or stops generating unexpectedly
Possible Causes
- highLoose or corroded wiring at panels or combiner box
- highInverter fault or fault codes
- mediumShading from trees, buildings, or new obstructions
- lowDirty panels reducing light absorption
- lowInterconnection or meter issues with the utility
Fixes
- easyInspect and reseat all DC/AC connections; tighten terminals and replace damaged connectors as needed
- mediumCheck inverter fault codes, perform a manufacturer-recommended reset, and recheck after power-up
- easyTrim shading sources or relocate equipment; clean debris from panel surfaces and monitor changes
- easyClean panels with non-abrasive methods; ensure no coatings or films cover the glass
- hardVerify meter wiring and interconnection; contact utility if suspected interconnection issues
Frequently Asked Questions
What is the most common solar panel problem?
Shading, loose connections, and inverter faults are among the most frequent causes of performance drops. Start with a safety check and a quick visual inspection to identify the simplest fix.
Shading, loose wiring, or inverter faults are the usual culprits. Begin with safety and a quick visual check, then proceed step by step.
Can I troubleshoot solar panel problems myself?
Yes for many basics, such as cleaning panels and checking visible connections, but high-voltage DC work and roof access should be done by a licensed professional. Follow safety guidelines and manufacturer instructions closely.
You can do basic checks, but leave high-voltage work to a licensed pro.
How do I know if shading is causing the issue?
Compare production during different times of day and check for new obstructions or growth. If output recovers when shade changes, shading is the likely cause.
If output changes with shade, shading is likely the culprit.
When should I call a professional?
Call a professional if you suspect inverter faults, burning smells, moisture in electrical boxes, or if the system is under warranty and the issue persists after basic checks.
Call a professional if you suspect inverter issues or smells, or if it’s under warranty and unresolved.
What safety precautions are essential?
Always turn off the system at the main disconnect, wear PPE, and avoid touching live conductors. Work from a stable surface and never climb onto a wet roof without proper fall protection.
Shut it down, wear PPE, and avoid live wires or wet roofs.
How can I prevent future solar problems?
Maintain a regular cleaning and inspection schedule, trim shading sources, monitor performance with your system's software, and review warranty terms so issues are covered.
Keep up with cleaning and monitoring, trim trees, and know your warranty.
Watch Video
Top Takeaways
- Isolate power before inspecting any components
- Differentiate electrical faults from shading or weather effects
- Follow a stepwise approach to save time and reduce risk
- Consult a professional for high-voltage or roof work immediately