Troubleshooting Common Solar Panel Problems
Learn urgent, practical steps to diagnose and fix common solar panel problems—from shading and dirt to inverter faults—so your system stays productive, safe, and energy-efficient year-round.

Most common solar panel problems stem from shading, dirt, or inverter faults. Start with quick, safe checks: remove shade, wash panels if needed, and confirm the inverter status lights indicate normal operation. If output remains low, inspect wiring only if you are qualified; otherwise, contact a professional for a full diagnostic.
Understanding the landscape of common solar panel problems
Most homeowners assume solar panels should deliver steady, maintenance-free power. In reality, several issues can cause output to dip or vanish. The term common solar panel problems covers environmental, electrical, and equipment-related factors. According to Solar Panel FAQ, shading from trees, buildings, or new rooftop obstacles is one of the most frequent culprits, followed by dirt, leaves, and bird droppings that blanket modules and reduce light absorption. Electrical faults—loose connectors, degraded wiring, or a failing inverter—also appear commonly when systems age or suffer weather stress. Temperature swings, hail, and micro-cracks in cells can gradually erode performance. The goal of this guide is to help homeowners identify symptoms, triage the likely causes, and perform safe, practical fixes. You’ll learn when a DIY steps suffice and when to escalate to a licensed technician. By focusing on the most frequent culprits, you can cut downtime, preserve energy production, and extend the life of your solar investment.
Safety first: safe checks you can perform now
Safety is non-negotiable when inspecting a live solar system. Always turn off the system at the main disconnect and, if possible, lockout the switch to prevent accidental re-energization. Wear non-slip shoes, gloves, and eye protection. Avoid climbing on the roof unless you have fall protection and a partner helping. Start with simple checks: look for obvious shading changes, debris on panels, and any fluid leaks near electrical cabinets. If you notice any exposed wiring, scorch marks, or melted insulation, stop and call a professional immediately. When in doubt, delay inspection until you can confirm the system is de-energized. This section lays the groundwork for safe, effective troubleshooting.
Diagnostic mindset: symptoms guide the path to a fix
Symptoms drive the troubleshooting path. A clear drop in daily energy production often points to shading, dirt, or inverter issues. Intermittent output may indicate loose connections or degraded components in a string or microinverter. If the inverter display shows warnings or the system suddenly stops producing, the fault could be electrical or a safety switch tripping. Use a notebook to track symptoms across several days and times, so you can present a precise timeline to a technician if needed. The goal is to narrow down the likely causes quickly while maintaining safety.
The top three culprits and how to address them
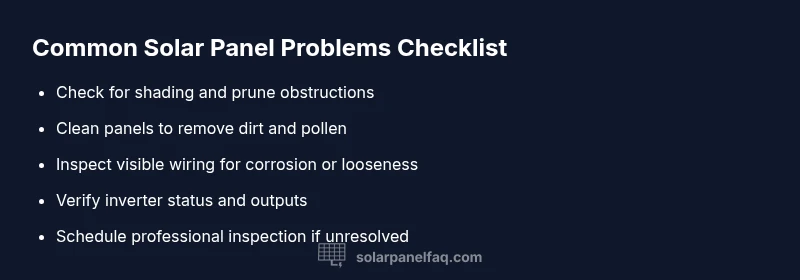
Shading: trim branches, relocate obstacles, or prune trees to restore sun exposure. Dirt and debris: wash panels with a soft cloth or sponge and mild soap, avoiding abrasive cleaners. Wiring: inspect visible connectors for corrosion or looseness and reseat them carefully with the system off. For structural issues like mounting looseness or frame damage, contact a professional. These are the most common drivers of performance loss and are the most actionable DIY checks.
Inverter and electrical components: diagnosing faults
Inverters are the bridge between DC panels and AC loads. Check the inverter’s status lights, error codes, and whether the unit overheats. If lights are abnormal or the display shows an error, consult the manual for codes and reset procedures. Do not open the inverter housing unless you’re qualified, as high-voltage components can cause serious harm. For microinverters or string inverters, verify that each device is communicating and supplying the expected current. If you suspect an inverter fault, arrange a professional assessment.
Maintenance for prevention: keep problems at bay
Create a simple, ongoing maintenance routine. Schedule a seasonal cleaning of panels, especially after pollen storms or snow, and inspect mounting hardware for corrosion. Use monitoring data to spot trends—notice any gradual declines in output that diverge from expected daily patterns. Keep a log of inspections, cleanings, and repairs so you can compare future performance. Regular maintenance reduces downtime, extends panel life, and helps protect your investment.
When to escalate: understanding warranties and limits
Not every issue can be solved with a DIY fix. If you’ve exhausted safe checks, cleaning, and basic troubleshooting without restoring optimal output, or you detect burned wiring, odor, or persistent inverter warnings, escalate to a licensed solar technician. Review your system's warranties and document the symptoms, dates, and steps you’ve taken. A professional can perform a full electrical diagnostic, verify grounding, and ensure components meet code requirements. Early professional input can prevent further damage and ensure ongoing performance.
Steps
Estimated time: 45-90 minutes
- 1
Power down and perform a quick visual check
Turn off the system at the main disconnect and verify no parts are energized. Look for obvious shading changes, loose debris, or recent weather damage. Do not climb on the roof if you’re uncertain about safety.
Tip: Wear PPE and never touch exposed wiring while the system is energized. - 2
Clean panels and remove debris
Wash panels with a soft cloth or sponge and mild soap. Rinse thoroughly to avoid streaks, and dry with a non-abrasive cloth. Check for stubborn grime near panel edges that could cast shade later.
Tip: Use lukewarm water and avoid high-pressure sprays that can damage seals. - 3
Check inverter status and outputs
Look at the inverter display for error codes or unusual light patterns. Note any trip or thermal warnings and reset if advised by the manual. Do not open the inverter case.
Tip: Keep a log of status lights and any codes to share with a tech. - 4
Inspect wiring and connections
With the system off, inspect exposed cables and connectors for corrosion or looseness. Tighten any loose connections and reseat plugs firmly. Do not touch inside the inverter or junction boxes without training.
Tip: Only handle connections you can safely reach without stepping on panels. - 5
Conduct a midday performance check
If you have basic measurement tools, compare current performance against expected values around solar noon. Note discrepancies that suggest degraded or shaded modules that haven’t been addressed.
Tip: Take readings in consistent weather conditions for accuracy. - 6
Call a professional if unresolved
If output remains low after the above steps, contact a licensed solar technician for a comprehensive diagnostic, including grounding and code-compliance checks.
Tip: Provide your symptom log and steps taken to speed up service.
Diagnosis: Persistent drop in solar output or system shutdown
Possible Causes
- highShading from new obstructions
- mediumDirt, dust, or snow on panels
- mediumLoose or degraded wiring/connectors
- mediumInverter fault or tripping safety switch
- lowPanel degradation or micro-cracks
Fixes
- easyInspect for new shade sources and trim or relocate obstructions
- easyClean panels and remove debris
- mediumTighten or reseat visible wiring/connectors with system powered down
- mediumReset inverter or consult manual; if warnings persist, call a professional
- hardSchedule a professional inspection for deeper electrical or panel faults
Frequently Asked Questions
What is the most common problem homeowners face with solar panels?
Shading and dirt are frequent culprits, followed by inverter faults. A quick visual check and basic cleaning can resolve many issues; if not, escalate.
Shading and dirt are common culprits; start with an inspection and cleaning, then call a pro if it persists.
How can I tell if my inverter is failing?
Look for no lights, unusual error codes, frequent tripping, or abnormal heat. Refer to the manual and avoid opening the unit unless trained.
If the inverter light is off or you hear unusual noises, it’s time to have it checked.
Is it safe to clean solar panels myself?
Yes, with proper precautions: turn off the system, use a soft cloth or sponge, mild soap, and avoid pressure washers or harsh cleaners.
Yes, you can clean them yourself if you stay safe and follow guidelines.
When should I call a professional?
If cleaning and shade checks don’t restore output or you detect wiring/inverter issues, contact a licensed technician and review warranties.
Call a licensed solar technician when in doubt or if you’re not comfortable handling electrical work.
Can shading cause permanent damage?
Shading mainly reduces output; prolonged shading can affect performance but is not typically permanent. Address shade quickly to protect efficiency.
Shading reduces output and can hurt performance, but it usually isn’t permanent if dealt with promptly.
Do solar panels degrade over time?
Yes, panels lose efficiency slowly; regular maintenance helps maintain performance, but gradual aging is normal.
Panels do degrade gradually, but proper maintenance keeps performance up.
Watch Video
Top Takeaways
- Start with safety and quick checks.
- Shading, dirt, and inverter faults are the primary culprits.
- Escalate to a professional when DIY fixes fail.
- Maintain a regular cleaning and monitoring routine.
- Keep a symptom log to aid diagnosis.