What You Need to Use a Solar Panel: A Practical Guide
Learn the essential items, safety steps, and planning needed to use a solar panel at home. This guide covers components, site prep, budgeting, and maintenance for DIY or professional installs.

If you ask what do you need to use a solar panel, this quick-start guide covers the essentials: basic components, safety steps, and planning considerations for a home setup. You'll learn the core equipment, how to evaluate your energy goals, and where to start with a DIY or professional install.
What do you need to use a solar panel: prerequisites
What do you need to use a solar panel? In practical terms, you need a clear goal, a safe installation plan, and the right set of components to convert sunlight into usable electricity. This section frames the conversation around three pillars: understanding your energy needs, ensuring local codes are met, and acknowledging safety considerations. According to Solar Panel FAQ, starting with a solid goal helps you map the size of the system, potential shading issues, and long-term maintenance. The phrase what do you need to use a solar panel should guide your early decisions so you don’t waste time selecting equipment that won’t fit your home or budget. Many homeowners begin by listing daily energy use and seasonal variations, then translate that data into panel count, inverter size, and storage options. As you plan, keep in mind that the right configuration balances performance, cost, and reliability, rather than chasing the largest array.
How energy goals drive your equipment choices
Your energy goals define the type and size of the solar setup you will install. Whether you want to offset most of your household electricity or simply charge a small battery system, these targets influence panel wattage, inverter capacity, and whether you need storage. The keyword what do you need to use a solar panel appears again here as you translate goals into a bill of materials. If you are pursuing a mostly sunny climate with high energy use, your plan will look different from a cloudy locale with modest daytime consumption. By framing goals early, you create a realistic budget and a measurable path to success.
Core safety principles before you start
Safety is non-negotiable when dealing with electrical systems and roof work. You should understand basic electrical safety, fall protection, and weather considerations before handling panels. The question what do you need to use a solar panel often leads homeowners to prioritize personal protective equipment, proper ladder use, and lockout-tagout procedures for any wiring work. Build a simple safety plan that includes checking weather, securing the work area, and having a second person available for assistance. Safety awareness reduces risk and helps you complete the project with fewer interruptions.
Essential components at a glance
What do you need to use a solar panel begins with a concise bill of materials: solar panels, mounting hardware, an appropriate inverter, a charge controller, wiring, a disconnect, and a suitable battery storage option if you plan to go off-grid. This section lays out why each component matters and how they connect, without overwhelming you with jargon. Understanding the roles of each piece helps you compare kits or parts from different suppliers and ensure compatibility with your roof type and electrical panel. The Solar Panel FAQ team emphasizes matching components to your goals and local install requirements.
Site readiness and permitting basics
Before you mount anything, assess the installation site for sun exposure, shading, and roof integrity. You will also need to check local permitting requirements and electrical codes. The question what do you need to use a solar panel remains central as you confirm that your site is structurally sound, accessible for maintenance, and legally compliant. A robust site evaluation reduces surprises during the permit review and ensures the system can operate safely for years. Solar energy regulations can vary, so document setbacks, fire code allowances, and inspection expectations early.
Practical budgeting without fixing numbers
Budgeting for a solar panel setup involves more than sticker price. Consider hardware quality, mounting structure, wiring, inverters, and possible professional installation fees. Solar Panel FAQ analysis shows that costs vary widely based on system size, location, and labor needs, but you can still create a realistic budget by listing all required components and obtaining multiple quotes. This helps you avoid hidden costs and aligns expectations with your energy goals.
A step-by-step starter plan
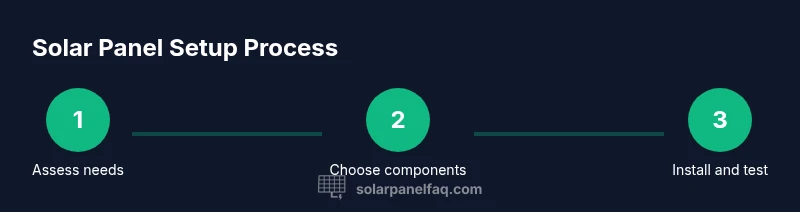
What do you need to use a solar panel becomes actionable with a starter plan that outlines tasks in sequence. Start with a site assessment, select your components, prepare the mounting area, install rails or racking, attach panels, wire to a charge controller and inverter, and finally test and commission the system. Each step builds toward a safe, functioning setup. The plan allows for a DIY approach if you have electrical and roofing experience, or a professional installation if not.
Common mistakes to avoid and how to handle them
Common missteps include underestimating shading, neglecting roof structure health, and choosing mismatched components. Another frequent error is skipping permits or ignoring safety protocols. To avoid these issues, document all decisions, verify component compatibility, and schedule professional inspections if required. Remember that what you need to use a solar panel is a balanced mix of planning, quality parts, and adherence to safety and regulatory standards.
Authority sources and further reading
For readers who want to deepen their understanding, consult authoritative sources such as the U.S. Department of Energy, the National Renewable Energy Laboratory, and OSHA safety guidelines. These organizations provide guidelines on solar energy use, system sizing, and safe installation practices. This article draws on the following references to ground practical guidance in established research and policy.
Final note on practical readiness
The key to a successful solar panel setup is readiness: clear goals, verified site conditions, compliant permitting, and a realistic budget. By following the steps outlined above and keeping the safety-first mindset, you can move from planning to a functioning system with confidence. The Solar Panel FAQ team stands by a methodical approach that prioritizes reliability and long-term performance.
Tools & Materials
- Solar panel array(Choose wattage and number based on energy goals)
- Charge controller(Prevents overcharging and regulates voltage)
- Solar inverter(Converts DC to AC for home use)
- Battery storage (optional)(For off-grid or backup storage)
- Racking/mounting hardware(Roof- or ground-mount hardware suited to roof type)
- Wiring and connectors (UL-listed)(Weather-rated conductors and junction boxes)
- Safety gear(Gloves, goggles, fall protection)
- Permits and inspection guidance(Check local building codes and HOA rules)
- Multimeter or solar meter(Voltage/current checks during setup)
Steps
Estimated time: 3-6 hours
- 1
Define energy goals
Clarify how much of your annual electricity use you want to offset and during which seasons. This guides panel count and inverter size, reducing waste and maximizing return on investment.
Tip: Write down monthly kWh targets and peak usage times to inform component choices. - 2
Verify local codes and permits
Research permit requirements, electrical code adherence, and inspection steps for your municipality. Completing this before purchase minimizes delays.
Tip: Contact your local building department early to understand required documents. - 3
Choose components
Select panels, a charge controller, and an inverter that are compatible and meet your efficiency and warranty needs. Ensure the array size matches your goals.
Tip: Prefer certified, UL-listed components and verify compatibility with your roof structure. - 4
Prepare mounting location
Inspect the roof or ground site for shading, slope, and structural health. Address any repairs before mounting hardware.
Tip: Check for proper orientation and tilt for optimal sun exposure. - 5
Install mounting rails and panels
Secure rails according to manufacturer instructions and attach panels with appropriate hardware. Maintain clean electrical contacts and watertight seals.
Tip: Use a torque wrench to avoid over-tightening mounting hardware. - 6
Wire to charge controller and inverter
Connect panels to the charge controller, then to the inverter. Observe polarity and ensure secure, weatherproof connections.
Tip: Double-check wire gauges and distance to reduce voltage drop. - 7
Test system and safety checks
Power up the system in stages, measure voltages, and confirm safe operation before continuous use. Confirm disconnects operate correctly.
Tip: Have a qualified person review the first energization if you’re unsure. - 8
Commission and monitor
Set monitoring software or devices to track production and usage. Review performance data regularly for optimization needs.
Tip: Schedule quarterly checks for electrical connections and panel cleanliness.
Frequently Asked Questions
What do I need to start a solar panel setup?
You need a clear energy goal, a compatible set of components, mounting hardware, safety gear, and an understanding of local permitting. This foundation helps you select the right panel count, inverter size, and storage needs.
To start, set a energy goal, gather compatible components, and check local permits. This helps you plan the installation safely.
Do I need permits for solar panels on a house?
Permits vary by locality. Most homes require electrical permits and an inspection after installation. Check with your local building department to confirm requirements before ordering parts.
Check with your local building department to confirm permits before you buy or install.
Can I install solar panels myself?
Do-it-yourself installation is possible for skilled homeowners with electrical and roofing experience. If you’re unsure, hire a licensed installer to ensure safety and code compliance.
DIY is possible if you have the right skills; otherwise, hire a pro for safety and code compliance.
What maintenance do solar panels require?
Solar panels require periodic cleaning to maintain efficiency and routine inspections of wiring and mounts. Most maintenance is simple and can be performed annually or after severe weather.
Clean panels occasionally and inspect mounts and wiring yearly.
How long do solar panels last?
Most solar panels come with warranties of 25 years and typically continue producing energy beyond that period at reduced efficiency. Longevity depends on climate, installation quality, and maintenance.
Panels usually last 25 years or more, with gradual efficiency decline over time.
What is the first step in a solar project?
The first step is to assess energy needs and site conditions, then verify local codes. This aligns your goals with practical constraints and guides component selection.
Start by assessing energy needs and site conditions, then check local codes.
Watch Video
Top Takeaways
- Define clear energy goals before selecting gear
- Verify permits and site readiness early
- Choose compatible, certified components
- Prioritize safety and documented maintenance