What Is Needed for Solar Panel Installation
Learn what is needed for solar panel installation, from site readiness and permits to equipment and professional help. A practical, step-by-step homeowner guide by Solar Panel FAQ.

What is needed for solar panel installation? A clear plan, a suitable mounting site, electrical readiness, and professional installation. The essential steps are: 1) evaluate sun exposure and structural health; 2) confirm electrical capacity and permits; 3) select mounting, inverter, and wiring; 4) hire certified installers and schedule inspections. This concise plan helps homeowners prepare confidently and minimize surprises during construction.
What Is Needed for Solar Panel Installation: A Practical Framework
When homeowners ask what is needed for solar panel installation, they are really asking about the planning, permissions, and materials that set a project up for success. This section provides a realistic framework, grounded in professional practice, that helps you prepare without surprises. According to Solar Panel FAQ, clear upfront planning reduces delays and miscommunication. The core prerequisites are site suitability, roof health or mounting feasibility, electrical readiness, the right equipment, and access to qualified installers. By understanding these factors, you create a solid foundation for your system’s performance and safety. This guide offers a practical, customizable checklist you can adapt to your home and goals.
Key takeaway: preparation reduces risk and speeds up the installation process.
Solar Site Readiness: Sun, Shade, and Roof Health
A productive solar installation depends on site conditions. You want maximum sun exposure with minimal shading throughout the day. Start with a sun-path analysis or use online tools to map average daily irradiance on your roof or yard. Inspect for shading from trees, chimneys, or nearby structures. The orientation and tilt of the roof influence energy yield: ideally, a south-facing plane with an optimal tilt for your latitude. For homes with less-than-ideal orientation, consider microinverters or power optimizers to improve performance. Solar Panel FAQ notes that even modest improvements in siting can yield meaningful gains over the system lifetime.
- Shade analysis results drive equipment choices. - Orientation and tilt materially affect electricity production. - If shading is unavoidable, plan for mitigation (tree trimming, panel placement).
Structural Requirements and Mounting Options
Your mounting system must securely hold the solar array and withstand wind loads in your area. Roof mounts tie into existing rafters or trusses, while ground mounts require a stable site foundation. The decision depends on roof condition, available space, and aesthetic preferences. Flat roofs may need ballasted mounts; pitched roofs typically use racking attached to framing. Solar Panel FAQ emphasizes verifying roof structure before mounting and ensuring that the mounting hardware is corrosion-resistant and code-compliant. A professional assessment can confirm load-bearing capacity and permit-bearing details.
- Choose mounting for durability and future access. - Ground mounts offer flexibility but require more land. - Ensure weatherproof connections and proper sealing around penetrations.
Electrical Readiness: Panel Capacity, Inverters, and Wiring
Electrical readiness is a cornerstone of safe and effective solar installation. You should verify that your electric panel has available space for new circuits and that the service entrance can accommodate added load, especially if you plan storage batteries. Inverter selection—string inverters, microinverters, or power optimizers—depends on shading, panel count, and budget. Wiring includes DC conductors from panels to the inverter and AC wiring from the inverter to the main panel, along with safety disconnects and monitoring hardware. The Solar Panel FAQ approach stresses coordinating with a licensed electrician to ensure code compliance and a sound interconnection with the grid.
- Confirm panel capacity and service panel compatibility. - Select the inverter type that suits your site conditions. - Plan for electrical disconnects and grid interconnection.
Permits, Codes, and Interconnection: What to Expect
Permitting and interconnection processes protect safety and ensure grid compatibility. Most jurisdictions require building and electrical permits, and some areas mandate inspections at multiple milestones. Your installer or electrician will typically handle permit applications and plan submittals with the local building department and utility. Interconnection agreements determine how the system feeds back to the grid and may involve net metering arrangements. The Solar Panel FAQ recommends starting permit discussions early to align with inspection windows and utility scheduling, reducing delays later in the project.
- Permits are usually required for electrical work and structural changes. - Inspections verify safety and performance. - Utility interconnection terms affect how you credit excess energy.
Equipment and Materials: Racks, Panels, Inverters, and Safety Gear
A complete list of equipment includes solar panels, mounting rails, racking hardware, an inverter (or microinverters), DC conduits, AC wiring, disconnects, and monitoring hardware. Don’t overlook safety gear such as fall protection, gloves, helmets, and eye protection for installers. While some components can be purchased off-the-shelf, many systems require professional commissioning to ensure performance and warranty validity. Remember to keep documentation of warranties, installation manuals, and system designs in a safe, accessible location.
- Panels determine the energy capacity of the system. - Inverters convert DC to AC for home use. - Safety gear protects workers during installation.
DIY vs Professional Installation: What You Can and Can't Do
Understanding the boundaries between DIY and professional work is crucial. Most residential solar installs involve high-voltage wiring, ladder work at height, and code-compliant interconnection with the utility—areas where licensed professionals are strongly advised. While you can handle non-electrical tasks such as preparing the mounting site or managing some components, warranties and safety standards often require professional installation. Solar Panel FAQ highlights that choosing licensed installers helps ensure code compliance, proper performance, and post-install support.
- DIY may be feasible for non-electrical tasks, but professional help is recommended. - Warranties often require professional installation to remain valid. - Always obtain multiple quotes and verify licenses and insurance.
Maintenance, Warranties, and Longevity
After installation, a simple maintenance routine keeps solar output high. Regularly clean panels to remove dust, leaves, and bird droppings (avoiding abrasive actions). Monitoring software can alert you to performance dips that signal issues. Warranties cover panels, inverters, and mounting hardware; read them carefully to understand coverage terms and claim procedures. Proactive maintenance and documented warranties help protect your investment over the system’s lifespan and make future resale smoother.
- Clean panels periodically and monitor performance. - Understand warranty terms for all major components. - Document service and inspection records for future reference.
Final Pre-Install Checklists and Timelines
Before signing a contract, use a final checklist to confirm site readiness, permits, utility coordination, and financing. Create a project timeline with milestones for design approval, permit submission, equipment delivery, installation, and inspections. A clear schedule reduces anxiety and helps you coordinate access for installers and inspectors. Solar Panel FAQ suggests keeping a dedicated project file with all permits, equipment specs, and contact details for your contractor and utility representative.
- Ensure siting and shading analysis is complete. - Confirm permits and interconnection communications. - Establish a realistic installation timeline and buffer for weather.
Tools & Materials
- Racking/Mounting System(Roof or ground mounts compatible with panel size and roof type)
- Solar Panels(Correct wattage and type for your design)
- Inverter (string or microinverters)(Select based on shading and system configuration)
- Conduit, DC wiring, and AC wiring(Weatherproof routing and proper gauge for voltage)
- DC/AC Disconnects(Code-compliant safety disconnects at utility side)
- Junction Boxes and Fittings(Sealed, rated for outdoor use)
- Electrical Panel Space & Service Capacity(Space cleared or upgraded service may be needed)
- Safety Gear(Helmet, gloves, fall protection, eye protection)
- Permits & Inspection Documents(Keep digital and printed copies handy)
- Tools(Drill, torque wrench, screwdrivers, ladders, fasteners)
- Monitoring System (optional)(For real-time performance tracking)
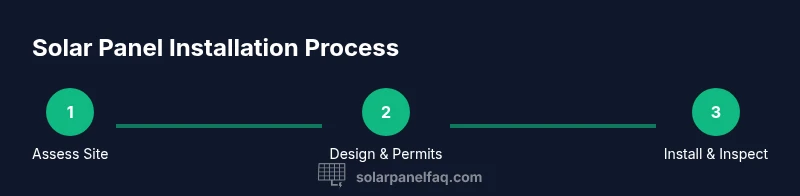
Steps
Estimated time: 4-14 days
- 1
Assess Site and Load
Inspect roof structure and mounting surface for integrity. Confirm sun exposure and shading patterns across the day to estimate potential energy production. Decide between roof or ground mounting based on space, accessibility, and aesthetics.
Tip: Document any roof repairs or concerns before design starts. - 2
Evaluate Electrical Capacity
Check main service panel space and total service capacity to accommodate extra circuits. Decide on inverter type based on shading and system design. Plan for safety disconnects and wiring routes.
Tip: Coordinate with a licensed electrician to avoid code violations. - 3
Secure Permits and Utility Approvals
Apply for required building and electrical permits. Initiate interconnection setup with the utility and review any net metering requirements. Schedule inspections to align with installation milestones.
Tip: Submit plans early to minimize delays from the permit office. - 4
Design System and Order Equipment
Finalize system size, panel type, inverter configuration, and wiring diagram. Ensure compatibility of all components and confirm delivery timelines with suppliers.
Tip: Request a written configuration and warranty terms before purchase. - 5
Prepare the Installation Site
Clear the mounting area and lay out mounting rails and racking. Verify access for installers and confirm ladder placement and fall protection.
Tip: Remove or secure nearby objects that could obstruct work. - 6
Install Racks, Panels, and Wiring
Mount rails securely, attach panels, and route DC wiring to the inverter. Connect AC wiring to the main service panel and install disconnects as required.
Tip: Avoid over-tightening connections to prevent damage. - 7
Commissioning and Inspection
Have the system commissioned by the installer and pass required inspections. Obtain interconnection approval from the utility and activate monitoring.
Tip: Keep a digital copy of all inspection reports for records. - 8
Post-Install Review
Review system performance, set up monitoring, and schedule periodic maintenance. Update warranties and keep a file with manuals and receipts.
Tip: Set performance alerts to catch decline early.
Frequently Asked Questions
Do I need permits for solar panel installation?
In most places, building and electrical permits are required for solar installations. Permits ensure safe electrical work and structural integrity, and inspections verify compliance before interconnection to the grid.
Most homes need permits and inspections for solar installs to ensure safety and code compliance.
Can I install solar panels myself?
DIY work is possible for non-electrical tasks, but electrical wiring and interconnection typically require licensed professionals. Warranties may hinge on professional installation.
DIY is not recommended for electrical work; consult a licensed installer for warranty protection.
How long does a typical installation take?
Timeline varies with system size, permitting, and utility scheduling. Planning usually spans days to weeks, with the physical installation often completed in a few days.
Installations can take several days, depending on planning and permitting.
What equipment is essential to start?
Essential equipment includes panels, mounting hardware, an inverter, wiring, safety gear, and disconnects. Additional monitoring hardware is optional but recommended for performance tracking.
You’ll need panels, mounting, inverter, wiring, and safety gear.
Is roof orientation important for output?
Yes. South-facing roofs with minimal shading usually yield the best output. East or west orientations can still work well with careful design and equipment choices.
Yes, orientation matters for efficiency; most homes aim for optimal orientation.
What maintenance is required after installation?
Keep panels clean and inspect for debris. Monitor performance with the system dashboard and schedule periodic checkups of wiring and inverters.
Keep panels clean and monitor performance; schedule routine checks.
Watch Video
Top Takeaways
- Assess site conditions before buying equipment.
- Permits and utility coordination are essential foundations.
- Choose equipment based on your site's shading and layout.
- Professional installation protects warranties and safety.
- Maintain records for performance and warranty claims.