How to Use Solar Panels: A Practical Home Guide 2026
Discover how homeowners can safely and effectively use solar panels. This comprehensive guide covers siting, system types, storage, monitoring, and maintenance for 2026.

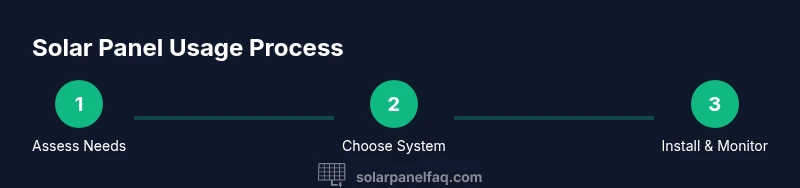
Steps to use solar panels start with sizing based on your home’s energy needs, roof orientation, and available sunlight. Then choose a grid-tied, off-grid, or hybrid setup and obtain any required permits. Have a licensed electrician install and connect to your main panel, install monitoring, and configure net metering or storage. Finish with regular maintenance.
Why homeowners use solar panels
According to Solar Panel FAQ, homeowners use solar panels to reduce energy costs, increase energy independence, and lower environmental impact. In 2026, solar adoption continues to grow as equipment becomes more efficient and tax incentives remain accessible in many regions. Solar panels convert sunlight into usable electricity, helping households power lighting, appliances, and climate control with less reliance on fossil fuels. This section highlights the main reasons people install solar and what a typical first year looks like, including potential savings, the importance of proper siting, and how performance depends on sun exposure, weather patterns, and system size.
How solar panels generate electricity
Photovoltaic (PV) cells produce electricity when sunlight excites silicon-based materials inside each panel. The panels generate direct current (DC) electricity, which a home inverter converts into alternating current (AC) for your lights, outlets, and appliances. Key factors include panel efficiency, tilt and orientation, shading, temperature, and overall array sizing. Grasping these concepts helps you estimate yearly production, plan charging for storage, and design a system that meets daily needs.
Key components of a residential solar system
A typical home solar setup comprises solar panels, an inverter, racking or mounting hardware, wiring, a combiner and disconnects, and a utility interconnection point. The inverter is essential because it converts DC to AC power the house can use. In grid-tied systems, a bi-directional meter tracks energy flow; in battery-backed configurations, you add storage controls and a battery bank. Understanding these parts makes it easier to compare proposals and evaluate performance expectations.
Siting and orientation: optimizing sun exposure
The sun’s arc changes with seasons, so proper siting maximizes energy production. Arrange panels to face within 15 degrees of true south in the northern hemisphere (or true north in the southern hemisphere) for optimal exposure. Avoid shading from trees, vents, or chimneys, and consider roof angle and mounting height to reduce dirt accumulation. A well-sited system can improve annual output and shorten payback time.
Grid-tied vs off-grid vs hybrid: choosing the right setup
Grid-tied systems feed solar energy into the home and export surplus to the grid, often with net metering. Off-grid systems rely on battery storage and require a larger storage capacity to cover night-time usage. Hybrid setups combine solar with storage while remaining connected to the grid. The right choice depends on your climate, energy goals, local incentives, and how much you want to rely on available battery storage.
Storage and net metering: using batteries and selling energy
Storage options let you store excess daytime energy for use after sunset, increasing resilience. Batteries add cost and complexity but improve reliability in cloudy regions or where net metering is limited. Net metering credits reduce your electricity bill by compensating for excess energy exported to the grid. Your utility program rules determine exact credits and interconnection requirements.
Monitoring energy production and consumption
A good monitoring setup shows real-time production versus household consumption and helps you optimize usage. Many systems offer apps or web dashboards that indicate panel performance, inverter status, and potential shading events. Regularly checking metrics helps catch underperforming components early and guides behavior changes—like shifting heavy loads to daytime.
Maintenance and safety basics
Keep panels clean and free of debris; light dust can be washed away with water. Schedule annual inspections of mounting hardware, wiring, and the inverter. For rooftop work, use fall-protection gear and avoid handling high-voltage components without professional training. Regular checks help sustain performance and reduce safety risks.
Common myths and practical considerations
Myths persist—such as solar panels failing in overcast weather or being prohibitively expensive. In reality, performance dips in shade or cloudy days, but modern panels still produce energy. Practical decisions like system sizing, professional installation, and choosing storage vis-à-vis net metering largely determine economic outcomes.
Tools & Materials
- Safety gear (hard hat, gloves, safety glasses)(For rooftop work, follow fall-protection guidelines)
- Non-contact voltage tester(Check circuits before handling)
- Multimeter(Measure voltage/current for troubleshooting)
- Screwdriver set (Phillips and flat-head)(As needed for mounting components)
- Temporary wiring and protective covers(For demonstrations and testing only)
- Instruction manual or manufacturer datasheets(Refer to electrical code requirements)
- Ladder and fall-protection gear(Safe rooftop access)
Steps
Estimated time: 2-6 weeks from planning to commissioning
- 1
Assess energy needs and roof suitability
Review your current energy usage, collect monthly utility bills, and examine roof orientation and shading. Use this data to estimate panel count and system size. A good estimate reduces excess capital and helps avoid over-investing in underperforming capacity.
Tip: Start with six- to twelve-month energy bills to capture seasonal variability. - 2
Choose system type and size
Decide between grid-tied, off-grid, or hybrid with storage. Size includes panel count, inverter capacity, and potential battery storage. Avoid over- or under-sizing to balance cost and production.
Tip: Consult a professional for accurate load calculations. - 3
Check incentives and permits
Research local incentives, rebates, and interconnection rules. Gather required documents to streamline processing. Incentives can significantly affect payback.
Tip: Visit official energy or utility websites for current programs. - 4
Plan installation with a licensed professional
Engage a licensed electrician or solar contractor to confirm electrical compatibility and safety. They will design the PV layout and ensure code compliance.
Tip: Never bypass licensed electrical work; this is a safety-critical step. - 5
Connect to your main panel and meters
The installer will tie the solar system into the main service panel and set up monitoring. A correct connection ensures safe operation and accurate net metering.
Tip: Ask about a monitor that can display real-time production vs. consumption. - 6
Set up monitoring and storage (if used)
Install a solar monitoring app or display to track production. If you have storage, configure battery management and determine charging/discharging behavior.
Tip: Test monitoring during peak sun hours for accuracy. - 7
Schedule maintenance and safety checks
Plan periodic inspections, clean panels if needed, and verify inverter performance. Address any shading changes from nearby growth or new structures.
Tip: Keep a maintenance log to detect gradual declines.
Frequently Asked Questions
What is the fastest way to start using solar energy at home?
Start with a home energy assessment and consult a licensed solar installer to size a system and arrange permits. Financing and incentives can accelerate your timeline.
Begin with an energy assessment and a licensed installer to size your system and handle permits.
Do I need batteries with solar panels?
Batteries are optional for most grid-tied systems. They provide backup power and storage for off-grid setups or where net metering is limited.
Batteries aren’t required for grid-tied systems, but they add backup power for off-grid or limited net metering areas.
Can I install solar panels myself?
No, installation involves high-voltage DC circuits and roof work. Hire a licensed professional to ensure safety and code compliance.
No—high risk; rely on a licensed professional to install solar panels.
How does net metering work for homeowners?
Net metering credits you for excess solar energy exported to the grid, reducing your bill. Your utility's program and interconnection rules determine specifics.
Net metering credits your excess solar output against your energy bill.
How long do solar panels last?
Most panels are designed for 25-30 years of performance, with gradual efficiency loss. Inverters typically have shorter warranties and may need replacement.
Panels often last 25-30 years; inverters may need replacement sooner.
Are there safety concerns to be aware of?
Yes, electrical, fall, and fire risks exist. Work with licensed professionals and follow local codes for safe operation and maintenance.
Safety matters; hire pros and follow local codes.
Watch Video
Top Takeaways
- Assess energy needs before buying
- Choose the right system type (grid/ storage)
- Get professional installation for safety
- Monitor production to optimize use
- Schedule regular maintenance