Procedure for Solar Panel Installation: A Complete How-To
Discover the procedure for solar panel installation with a practical, homeowner-friendly guide covering planning, permits, mounting, wiring, safety, and maintenance tips.

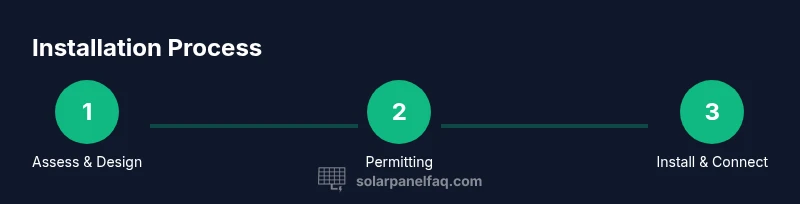
This guide outlines the procedure for solar panel installation for homeowners and buyers. You’ll learn planning, site assessment, permitting, mounting, electrical connections, and final inspection essentials to ensure a safe, compliant, and efficient solar system. We’ll cover design considerations, safety practices, and practical checklists to help you decide between DIY and professional help.
Assessing your site and setting goals
According to Solar Panel FAQ, the procedure for solar panel installation begins with a thorough site assessment and a clear plan. Start by evaluating roof orientation, slope, and structural capacity, plus shading from trees or nearby structures. This step defines whether a grid-tied or off-grid system makes sense, and it informs panel layout, tilt, and module selection. You'll also set goals: anticipated energy savings, space for future expansion, and whether you intend DIY tasks or hire professionals. Document existing electrical panel ratings and service capacity, because these will constrain system size and inverter type. Use sun-path diagrams and shade analysis tools to estimate potential output across seasons. This planning phase reduces surprises during installation and sets a realistic project timeline, ensuring your system will perform as expected under varying weather conditions.
Safety and code compliance groundwork
Safety is non-negotiable in solar installations. Begin with personal protective equipment (PPE) such as harnesses, gloves, safety glasses, and non-slip footwear. Establish fall protection when working on roofs and ladders, and ensure scaffolding or guardrails are secure. Electrical safety is paramount: de-energize the main service disconnect before any wiring, verify the absence of voltage, and follow established lockout/tagout procedures. Familiarize yourself with local building codes and the National Electrical Code (NEC) guidelines that apply to PV systems and roof penetrations. If a permit or inspection is required, factor those timelines into your plan. By laying a safety-first foundation, you minimize risk to you, your family, and your home, and you facilitate a smoother permitting process.
Designing the system for your roof
System design balances energy goals with roof characteristics. Evaluate roof orientation to maximize sun exposure, and identify any shading sources that might reduce efficiency. Decide on module type (e.g., monocrystalline vs polycrystalline) and consider whether microinverters or string inverters better suit your layout and budget. Panel placement should optimize space while allowing for expansion; account for clean air flow and drainage around mounting hardware. Consider future energy needs, battery storage options, and potential interconnection with the grid. A well-designed plan reduces the likelihood of hot spots, wiring congestion, or future rework. Keep a design notebook with diagrams and notes for installer reference and future maintenance.
Permitting, incentives, and scheduling
Before physical work begins, research permit requirements and interconnection rules with your local authority. Submit electrical and structural plans as required and obtain approval before procurement or installation. Investigate available incentives, rebates, or tax credits for solar installations in your area and note any eligibility criteria. Create a realistic schedule that accommodates permitting review, material transit, and weather windows. A clear timeline helps you coordinate with any contractors, electricians, or roofers involved and reduces the chance of delays. Document all approvals and keep copies of plans, warranty information, and inspection records for future maintenance or resale.
Selecting hardware: mounting, modules, and inverters
Choosing the right hardware is critical for performance and longevity. Select mounting rails and racking suited to your roof type (shingle, metal, tile) and structural integrity. Pick solar modules with a compatible warranty and efficiency profile for your climate and budget. Decide between microinverters for individual module optimization or a central/string inverter for a simpler setup. Ensure all components meet safety standards and are rated for outdoor use. Plan cable routing, junction boxes, and DC/AC disconnects with accessible labeling. A cohesive hardware package minimizes installation complexity and ensures consistent performance across the array.
Installation workflow: mounting, wiring, and connections
Follow a logical sequence to reduce risk and rework. Start by mounting rails securely to roof anchors and applying weatherproof sealant to penetrations. Place modules in the determined layout, secure with proper torque, and verify alignment. Run DC wiring from modules to the inverter location, keeping cables organized and away from heat sources. Connect inverters and combiner boxes as specified by the design, then route AC wiring to the main service panel, following local codes. Label all circuits clearly and document each connection for future maintenance. Perform a safe, methodical test of the system to identify faults before interconnection with the grid.
Inspection, interconnection, and commissioning
A successful installation concludes with inspections by the local building department and, if applicable, your utility. Ensure all mounting hardware, wiring, and inverters meet code requirements and pass safety checks. After passing inspection, complete the interconnection process to the grid and verify proper net metering functionality. Commissioning includes testing the system under real conditions, monitoring performance, and confirming alerts or monitoring software are functioning. Maintain thorough records of permits, inspection reports, equipment serial numbers, and warranty documents for future reference and potential resale.
Maintenance, monitoring, and optimization
Solar systems require periodic attention to sustain performance. Establish a routine for cleaning panels when dirt, pollen, or debris accumulate, avoiding cleaning during hot sun to prevent thermal shock. Regularly inspect mounting hardware for corrosion, loosening, or movement and check wiring for signs of wear or animal damage. Use a monitoring platform to track energy production versus estimates and identify shading changes, soiling, or panel aging effects. If performance drifts, reassess orientation, cleaning schedules, and potential shading sources. Proactive maintenance helps you maximize output and extend system life.
Authoritative sources and standards
For deeper guidance and official standards, consult established sources: Energy.gov’s solar guidance, the National Renewable Energy Laboratory (NREL) educational materials, and OSHA safety standards for working at heights and electrical work. These resources provide foundational knowledge on planning, installation best practices, and safety precautions to supplement homeowner decision-making and ensure compliance across jurisdictions.
Tools & Materials
- Safety gear (helmet, gloves, safety glasses)(Essential PPE before climbing or handling tools)
- Ladder and roof access equipment(Stable setup with fall protection if possible)
- Utility meter and electrical shut-off tools(Turn off main service disconnect before work)
- Mounting rails and racking hardware(Match roof type and structural layout)
- Solar panels (modules)(Check compatibility with inverter and mounting system)
- Inverters (microinverters or string inverter)(Choose based on system design and compatibility)
- Combiner box, disconnects, conduit, and wiring(Follow NEC wiring practices)
- Power drill, bits, rivets(For mounting rails and hardware)
- Torque wrench(Ensure proper bolt tension per spec)
- Voltage tester and multimeter(Test PV and AC circuits safely)
- Sealant and weatherproofing materials(Seal roof penetrations against leaks)
- Safety harness and fall arrest system(Reduce fall risk on slopes)
- Permitting documents and system schematics(Keep copies for reference and inspections)
Steps
Estimated time: several hours to complete, depending on system size and roof complexity
- 1
Assess site and design plan
Evaluate roof orientation, shade, and structure. Create a preliminary layout and identify potential constraints. Document measurements and take photos for reference.
Tip: Use a sun-path diagram and shade tools to refine panel placement. - 2
Obtain permits and approvals
Check local requirements and submit structural and electrical plans as needed. Schedule inspections to avoid delays.
Tip: Initiate permitting early; delays often occur at the planning stage. - 3
Prepare mounting structure and safety setup
Install anchors or brackets and set up fall protection. Verify roof integrity and waterproofing plan before penetrating shingles or tiles.
Tip: Never skip fall protection; secure ladders and use a harness on steep roofs. - 4
Mount rails and lay out modules
Attach rails per manufacturer specs, then position modules in the chosen layout. Leave space for expansion and airflow.
Tip: Check alignment with a chalk line before final tightening. - 5
Electrical wiring and inverter installation
Route DC cables from modules to the inverter, install the inverter in a suitable location, and connect to disconnects according to design.
Tip: Label all cables and avoid running DC lines near AC circuits. - 6
Connect to the electrical panel and inspect
Make AC connections to the service panel as specified by code. Check for proper grounding and insulation.
Tip: Have a licensed electrician review the critical interconnections. - 7
System test and monitoring setup
Power up the system, run initial checks, and configure monitoring software to verify performance and alerts.
Tip: Test under actual daylight to confirm expected output. - 8
Finalize documentation and maintenance plan
Record equipment details, warranty numbers, and inspection results. Schedule regular maintenance checks and weatherproofing reviews.
Tip: Keep an organized binder or digital folder for future reference.
Frequently Asked Questions
What is the typical sequence for installing solar panels on a residential roof?
Most installations follow assessment, design, permitting, mounting, wiring, interconnection, inspection, and commissioning. Planning ahead helps ensure safety and code compliance.
Typically, you assess and design first, then secure permits, mount the panels, wire the system, connect to the grid, and finally pass inspection and commission.
Do I need a permit to install solar panels?
In many jurisdictions, a permit is required for both structural and electrical work. Check with your local building department early in the process and obtain approvals before starting.
Yes, permits are usually required. Check with your city or county to confirm what approvals you need.
Can I install solar panels myself or should I hire a professional?
DIY can be feasible for select planning and mounting tasks, but electrical interconnection typically benefits from a licensed electrician and contractor for safety and code compliance.
DIY is possible for some parts, but many homeowners hire pros for electrical work and interconnection.
What maintenance do solar panels require?
Solar panels require periodic cleaning and inspection for shading, mounting integrity, and wiring wear. Monitor performance to catch drifts early.
Keep them clean, check for shading changes, and inspect mounting and wiring regularly.
How long does installation typically take?
Duration varies with system size and permitting timelines. Plan for planning, permitting, and installation phases, which differ by location and roof type.
It depends on size and permits, but you should plan for multiple phases from planning to commissioning.
What impacts the performance of a solar system after installation?
Shading, orientation, temperature, and inverter efficiency influence output. Regular maintenance helps sustain optimal performance.
Shading and orientation matter most; keep panels clear and verify inverters are operating efficiently.
Are there common mistakes to avoid in solar installation?
Rushing the planning phase, skipping permits, and improper wiring are frequent issues. Invest time in design and compliance to prevent costly fixes.
Avoid rushing; ensure permits and proper wiring to prevent future problems.
What should I keep after installation for future reference?
Store warranties, serial numbers, permit records, and inspection reports. This helps with maintenance and potential resale.
Keep all warranties and paperwork organized for easy access later.
Watch Video
Top Takeaways
- Plan first; site assessment drives system design.
- Safety and permitting are prerequisites, not afterthoughts.
- Choose hardware and inverter type based on roof and layout.
- Follow a clear installation sequence to prevent rework.
- Regular maintenance preserves performance and longevity.