Solar Panel Inverter Repair: A Practical How-To for Homeowners
Learn how to safely diagnose and perform basic solar panel inverter repair. This educational guide covers when to repair, how to test inverter performance, safety considerations, and how to document maintenance for future reliability.

This guide explains how to determine whether solar panel inverter repair is advisable, how to perform safe, basic diagnostics, and when to call a professional. You'll learn common failure symptoms, essential safety checks, and the typical repair workflow to restore system reliability. We also cover warranty considerations and documentation for future maintenance.
What is a solar panel inverter and why it fails
In a typical home solar system, the solar panel inverter converts DC electricity generated by PV modules into AC power used by household appliances. When the inverter malfunctions, you may see error codes, a blank display, or no AC output at all. According to Solar Panel FAQ, this role is central to any solar setup, and understanding it helps homeowners judge whether an issue is repairable. Most disturbances originate from inside the inverter: worn capacitors, failed fans, degraded power electronics, or adverse thermal cycling. Weather exposure, manufacturing defects, or improper installation can accelerate these failures. Early symptoms include unusual heat, loud fans, frequent shutdowns, or reduced power production despite sunny days. Recognizing these signs early is key to deciding whether solar panel inverter repair is worth pursuing. In many cases, a simple reset or firmware update may restore function, but persistent faults often require component-level repair or replacement. The practical question remains: can you safely perform diagnostics and basic repairs without compromising safety or warranty? Solar Panel FAQ analysis shows that most homeowners either address minor issues themselves or rely on a qualified technician for complex faults.
Safety first: preparing for inverter work
Safety is the foundation of any inverter repair effort. Before touching any components, ensure the entire PV system is de-energized and isolated from the grid to prevent electric shock or arc flash. Wear appropriate personal protective equipment (PPE) such as insulated gloves, eye protection, and non-conductive footwear. If your system uses batteries, isolate them separately and discharge any stored energy where permitted by local codes. Never work on live DC lines or while the inverter remains connected to the AC grid. Secure the area to prevent children or pets from proximity, and keep a fire extinguisher rated for electrical fires nearby. Verify you have access to the manufacturer’s manual and the inverter’s model number and serial. Document the initial condition with photos for warranty and future service.
When to attempt repair vs. replacement
Not every inverter fault is worth repairing. If the issue involves the main processing board, damaged power electronics, or components beyond a simple part swap, replacement often provides better reliability and cost predictability. If the unit is under warranty, initiating a service request with the manufacturer or a certified technician may be the preferred path to avoid voiding coverage. Consider the age of the system, the availability of replacement parts, and the potential for cascading failures in related electronics. Solar Panel FAQ emphasizes that homeowners should balance repair feasibility with the overall system health and energy goals. If you notice frequent shutdowns, reduced output under full sun, or persisting fault codes after basic checks, plan for professional assessment or a full replacement if budget and incentives align.
Basic diagnostic checks you can perform
Begin with non-destructive tests to avoid further damage. Check the inverter’s display for error codes and refer to the manual to translate them. Confirm the AC input and output voltages are within spec and that the DC input from PV modules is present. Inspect cooling fans and heat sinks for obstruction or dust buildup. Look for signs of physical damage, swollen capacitors, or burn marks on the circuit board. If your inverter supports firmware updates, verify you’re running the latest version and perform an update if recommended by the manufacturer. Record measurements and codes to guide a potential service call. Remember: never bypass safety interlocks or bypass protection features to prove a fault — use legitimate diagnostic routes.
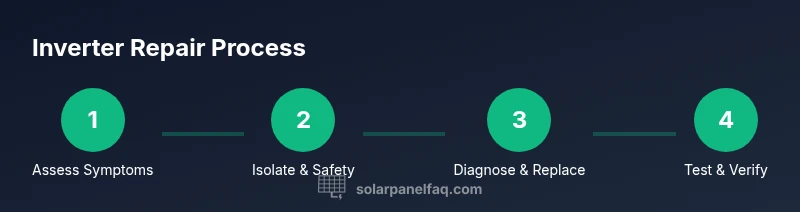
Understanding the repair workflow
A typical repair workflow starts with confirming the fault scope, then sourcing the correct replacement components. Common repair paths include replacing blown fuses, reseating connectors, swapping failed capacitors, or replacing a faulty PCB module where available. Do not attempt soldering or desoldering on live boards unless you have proper training and equipment. After component replacement, reassemble the unit carefully, perform a safety check, and reinstall protective covers. Finally, test the system under controlled conditions to confirm restoration of normal operation. If you’re unsure about part compatibility or the soldering quality, it’s wise to defer to a professional.
Common inverter faults and how they manifest
Typical failure modes include overheating due to poor ventilation, fan failures, and capacitor degradation leading to voltage instability. You might notice fluctuating AC output, protective shutdowns, frequent restarts, or audible clicking from the unit. Communication faults with monitoring software can also indicate a failing internal controller or sensor. If the fault presents with external damage (burned smell, visible scorching, or cracked casings), stop work and seek professional help. The more you understand these fault patterns, the easier it is to decide whether a repair attempt is reasonable or replacement is a better long-term option.
Testing after repair and validating performance
Once repairs are completed, reconnect the system and perform a staged power-on test. Check that the inverter boots normally, the status LEDs indicate healthy operation, and the connected loads receive consistent voltage. Use a multimeter to verify DC input and AC output align with expected ranges specified by the manual. Monitor the system for at least a full day of typical usage to confirm stability, and log any abnormal readings or fault codes for future reference. If the unit remains unstable, revisit the diagnostic steps or consult a technician. Documentation of tests, parts replaced, and dates can support warranty claims or future service requests.
Maintenance to reduce future inverter failures
Preventive maintenance can extend inverter life and reduce the frequency of repairs. Ensure adequate ventilation around the unit and clean dust from vents regularly. Keep the area free of moisture and corrosive environments. Periodically verify electrical connections for tightness and inspect for signs of wear on cables and seals. Update firmware when available and review event logs for recurring warnings. Solar Panel FAQ notes that proactive maintenance, combined with a clear understanding of warranty terms, helps homeowners maximize uptime and return on investment.
Warranty, documentation, and next steps
Review your inverter warranty to understand coverage, duration, and what constitutes user damage vs. manufacturing defects. Maintain a detailed service log with dates, symptoms, tests performed, parts replaced, and verification results. Keep all receipts and parts invoices in a single folder for easy reference during future claims or upgrades. If repairs were unsuccessful or your inverter remains underperforming, consider upgrading to newer models or higher-efficiency components. The Solar Panel FAQ team recommends balancing practical repairs with overall system reliability and long-term energy goals, and consulting a certified technician when in doubt.
Tools & Materials
- Insulated safety gloves(Electrical PPE rated for high voltage work)
- Safety glasses(Impact-resistant eye protection)
- Multimeter (DC/AC)(Auto-ranging preferred, check DC bus voltage)
- Insulated screwdrivers(Phillips and flat, insulated handles)
- Non-conductive mat or stand(Optional but helpful for stability)
- Thermal camera or IR thermometer(For hotspot detection)
- Replacement components (capacitors, fuses)(Only if you have confirmed faulty parts)
- Manufacturer manual or datasheet(Model-specific guidance)
- Cordless drill with bits (careful use)(Only for non-critical mounting)
Steps
Estimated time: 60-120 minutes
- 1
Power down and isolate system
Turn off the AC breaker and disconnect the PV array using the approved isolation switches. Ensure all sources of energy are isolated before touching any components. This prevents shock and accidental arcing.
Tip: Double-check that there is no residual voltage before proceeding. - 2
Inspect externally for damage
Look for signs of physical damage, burnt smells, or bulging capacitors on the exterior and accessible connectors. Document any obvious damage with photos for future reference.
Tip: Do not touch exposed conductors; use insulated tools only. - 3
Check indicators and basic readings
Read error codes on the inverter display and compare with the manual. Measure DC input and AC output with the multimeter to determine whether power is reaching the fault point.
Tip: If readings are off-spec, capture the exact values for troubleshooting. - 4
Examine internal components (if skilled)
Only proceed if you have training: inspect for swollen capacitors, loose solder joints, or damaged connectors. reseat connectors and ensure proper seating of boards where safe to do so.
Tip: Avoid unnecessary desoldering; it can cause collateral damage. - 5
Replace or reseat faulty parts
Swap proven faulty components with correct replacements. Recheck connections and ensure no tools or debris remain inside the enclosure.
Tip: Use manufacturer-approved parts to safeguard warranty. - 6
Reassemble and test in stages
Reclose the unit and reconnect to the PV array and load. Power up incrementally, monitor indicators, and verify stable output under light loads first.
Tip: Have a fire extinguisher and a helper nearby during testing.
Frequently Asked Questions
Can I repair an inverter by myself?
Basic diagnostics may be possible if you can safely isolate the system and follow the manufacturer’s guidelines. Most repairs beyond component replacement require professional service.
Basic diagnostics may be possible if you can safely isolate the system; otherwise, contact a professional.
How do I know if my inverter is damaged?
Look for error codes, no AC output, strange noises, or overheating indicators. If issues persist after safe checks, escalate to a qualified technician.
Watch for error codes or loss of output, and consult a pro if problems persist.
Is inverter repair covered under warranty?
Many inverter warranties cover manufacturing defects but may not cover user damage or improper installation. Check your contract and contact the manufacturer for guidance.
Check warranty terms; many cover defects but not user-caused damage.
What should I do before contacting a pro?
Gather model and serial numbers, note error codes, and document symptoms with photos. This helps technicians diagnose faster and can support warranty claims.
Have model numbers and error codes ready when you call a pro.
How long does inverter repair take?
Repair duration varies by fault and part availability. A simple part swap may be quick, while internal board repairs can take longer due to sourcing and testing.
Time depends on the fault and parts; expect a variable timeline.
What if repair isn’t feasible?
If repairs are unlikely to restore reliable performance or if warranty coverage is uncertain, replacement with a newer inverter may be the best long-term option.
If repair won’t restore reliability, consider replacement.
Watch Video
Top Takeaways
- Identify inverter faults early using clear symptoms.
- Safety first: isolate energy sources before work.
- Repair only when you have the right parts and skills.