Repair Solar Panels: A Practical DIY & Safety Guide
Learn safe, practical steps to diagnose and repair solar panels, when to DIY vs hire a pro, and how to protect your warranty and efficiency.

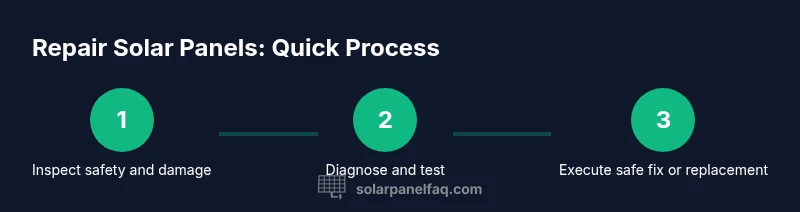
Steps to repair solar panels start with a safety-first inspection: 1) power down system and verify wiring continuity, 2) identify issues like microcracks or loose connections, 3) decide between replacing a panel, resealing, or DIY fixes such as cleaning terminals. Always consult the manufacturer guidelines. This approach helps prevent shocks, fire, or warranty voids.
What parts of solar panels can be repaired?\n\nSolar panels and their supporting electronics are built to endure outdoor conditions, but not all faults are repairable in the field. In general, repairable areas include loose or corroded DC connectors, damaged junction boxes, gasket seals around the module edge, and failing bypass diodes inside the protective circuitry. Minor glass or encapsulant issues can sometimes be addressed with resealing or targeted replacement if you have manufacturer guidance, but full cell replacement or front glass replacement is rarely practical for a typical homeowner. When damage is extensive—such as large cracks across cells, shattered glass, or widespread delamination—replacing the entire panel is usually the safer and more cost-effective option. If your system is part of a larger array with string configurations, fault isolation becomes more complex and may require professional evaluation. According to Solar Panel FAQ, repairs should be approached with safety and practicality.
Safety and warranty considerations\n\nSafety must come first when working with solar panels. Always disconnect the system and use proper PPE to prevent shocks or burns. If the system is under warranty, follow the manufacturer’s instructions; many brands require approved service to preserve warranty coverage. Check local codes and your installer’s terms before attempting any repair, especially on equipment connected to the grid. For complex or high-voltage situations, professional service is the safest and most reliable route. The Solar Panel FAQ team stresses that safety and warranty compliance are foundational to any repair effort.
Diagnosing common issues\n\nCommon signs of panel problems include a noticeable drop in output, visible cracks, hot spots, discoloration, or corrosion on connectors. Start with a visual inspection for physical damage, then consult your monitoring system for underperformance patterns across strings. If you have basic electrical skills, perform a non-contact voltage check and compare measured values with a healthy panel in the same string. Document findings and timing of the issue to help determine if weather, shading, or equipment faults are to blame. Solar Panel FAQ analysis shows that routine troubleshooting is often enough to identify non-catastrophic faults and avoid unnecessary replacements.
Testing procedures and measurements\n\nTesting should prioritize safety and non-destructive methods. Begin by powering down and isolating the array. Use a multimeter to verify continuity and check for open circuits on the suspected section. A non-contact infrared thermometer can help locate hot spots, which may indicate loose connections or defective diodes. Record results and compare against healthy neighbors in the same string. If measurements indicate abnormal behavior or high resistance, escalate to a professional assessment to prevent further damage.
Basic safe DIY fixes you can perform\n\nManual reseating of connectors, cleaning corrosion from terminal blocks with isopropyl alcohol, and tightening loose components are common, non-invasive fixes. Replace damaged junction box gaskets or seals with manufacturer-approved parts and reseal entry points to maintain weatherproofing. Do not attempt to repair damaged PV cells or replace front glass yourself unless you have specific training and manufacturer authorization. Always verify that all fixes are compatible with your system’s model and electrical specifications.
When to replace panels or strings\n\nIf a panel shows persistent underperformance after non-invasive fixes, or if physical damage is extensive, replacement is usually the most economical option. In a string, a single bad panel can drag down the entire output, so isolated replacement or string reconfiguration may be more practical than replacing an entire array. If the module is under warranty for workmanship or materials, contact the installer or manufacturer to determine coverage before proceeding with a replacement.
Maintaining performance after repair\n\nAfter any repair, re-test the affected string and monitor performance for several days to confirm stability. Reconnect the system according to manufacturer guidelines and verify that protective devices, disconnects, and combiner boxes are properly secured. Keep a repair log with dates, parts replaced, and test results to help future maintenance and warranty claims. Regular checks can catch loose wiring or degraded seals before bigger problems develop.
Documentation and warranty considerations\n\nKeep detailed records of all repairs, including parts used, part numbers, and installer guidance. This documentation helps with warranty claims and future maintenance planning. If you recently had a repair done by a third party, obtain a written report or receipt showing what was serviced. This makes it easier to demonstrate compliance with warranty terms and service requirements.
Final notes and next steps\n\nRepair solar panels should be undertaken with a clear understanding of what can and cannot be repaired safely. When in doubt, prioritize safety and consider professional evaluation, especially for high-voltage or structurally damaged systems. The Solar Panel FAQ team recommends starting with non-invasive fixes and escalating only when appropriate.
Tools & Materials
- Insulated gloves(ANSI/OSHA compliant and suitable for electrical work)
- Safety glasses(Impact-resistant, side protection)
- Non-conductive tools (plastic)(Screwdriver set with insulated handles)
- Multimeter or clamp meter(For continuity and voltage testing)
- Non-contact voltage tester(Useful for verifying energized parts before handling)
- Isopropyl alcohol (70% or higher)(Clean connectors and terminals)
- Lint-free wipes(For electrical contact surfaces)
- Silicone sealant compatible with PV modules(Used to reseal junction boxes or edge seals)
- Replacement junction box gaskets(Maintains weatherproofing when resealing)
- Manufacturer-approved replacement parts(Only if the part is specified for your model)
Steps
Estimated time: 60-120 minutes
- 1
Power down and isolate
Turn off the system at the main disconnect and at the inverter, then lock out/tag out to prevent re-energizing during inspection. This reduces shock risk and protects your equipment. Verify that no voltage remains in the array before proceeding.
Tip: Double-check that all bypass diodes and fuses in the circuit are de-energized before touching any components. - 2
Inspect visually for obvious damage
Look for loose wiring, burned connectors, cracked junction boxes, or cracked glass. Photograph any damage for insurance or warranty purposes and note the location within the string.
Tip: Take a close-up photo of any connectors before unplugging to aid correct reconnection. - 3
Test continuity and resistance
Using a multimeter, test for continuity along the harness and between connectors. Compare readings with a healthy panel if available. Document any abnormal resistance or open circuits.
Tip: Work quickly to minimize exposure time to moisture; wipe contacts clean before testing. - 4
Clean and reseat connectors
If corrosion or dirt is present, clean contacts with isopropyl alcohol and reseat connectors firmly. Replace gaskets or seals if they show wear to maintain weatherproofing.
Tip: Avoid excessive force when reseating to prevent terminal damage. - 5
Seal and protect repaired areas
Apply silicone sealant to edges or junction boxes as needed, ensuring compatibility with PV materials. Allow sealant to cure per manufacturer instructions.
Tip: Do not seal active vent slots or cooling paths; ensure ventilation remains intact. - 6
Reconnect and test the system
Restore connections according to the wiring diagram, then power up and monitor output. Check for any abnormal heat or arcing indicators during initial restart.
Tip: If you smell burning or notice discoloration, shut down immediately and seek professional help.
Frequently Asked Questions
Is it safe to repair solar panels yourself?
DIY repairs should be limited to non-energized components and simple maintenance. If you encounter high voltage, heat, or structural damage, seek professional help. Always follow safety guidelines and manufacturer instructions.
DIY repairs should stay within non-energized components; seek professional help for high voltage or structural damage.
Will repairing void my solar panel warranty?
Repair work can affect warranty if not performed by an approved technician or using approved parts. Check your warranty terms and contact the installer or manufacturer before proceeding.
Warranty terms often require approved service for coverage; contact the manufacturer before repairing.
What are common signs a panel needs repair?
Watch for steady power loss, visible cracks, hot spots, corrosion on connectors, or inconsistent output across a string. These signs warrant closer inspection and possible professional evaluation.
Look for power loss, cracks, hot spots, or corrosion indicating possible issues.
Can I repair bypass diodes or connectors myself?
You can inspect and reseat connectors and replace sealants if you have the right parts and guidance. Replacing bypass diodes is more technical and often requires technical manuals or a pro.
Inspecting connectors can be DIY, but diodes replacement is usually best left to pros.
When should I replace a panel or string instead of repairing?
If damage is extensive or ongoing performance is poor despite fixes, replacement is typically more reliable and cost-effective. Consider panel age, warranty status, and system design when deciding.
Replace when damage is extensive or performance can’t be restored reliably.
How long do repairs typically last?
Repair longevity varies by issue and component quality. Document repairs and monitor performance to determine if further work is needed.
Longevity depends on the repair quality and components; monitor performance after fixes.
Watch Video
Top Takeaways
- Prioritize safety and follow manufacturer guidance.
- DIY fixes are limited to non-invasive components.
- Call a licensed technician for major repairs or high-voltage work.
- Keep repair documentation for warranties and future service.
- Regular maintenance helps prevent recurring problems.