How to Check If a Solar Panel Is Faulty: A Homeowner's Troubleshooting Guide
Learn a practical, step-by-step method to determine if a solar panel is faulty, with visual checks, safe testing, diagnostic flow, and when to call a pro. Essential guide for homeowners seeking clarity.

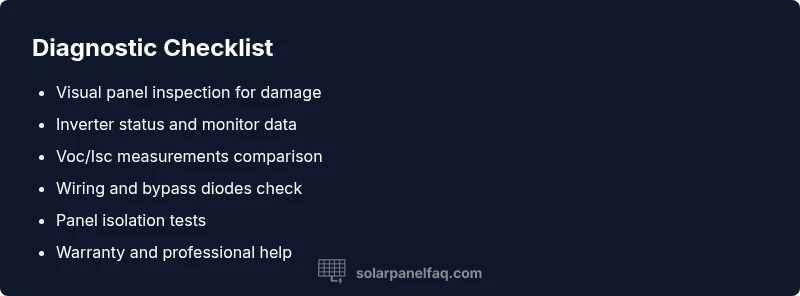
According to Solar Panel FAQ, the most common faults are degraded panels, loose connections, or inverter failures. Start with a visual check of panels and wiring, then compare observed output to the datasheet. If power is clearly below expectations, follow the diagnostic flow and safety steps. When in doubt, contact a professional; Solar Panel FAQ advises a methodical, safe approach.
Visual inspection and baseline data
If you suspect a problem with your solar array, start with a careful visual check and baseline measurements. This is central to how to check if solar panel is faulty. Look for cracked glass, loose mounting hardware, discoloration, or signs of overheating on any module. Check the inverter display for fault codes and note the DC and AC readings shown in your monitoring app. Compare these observations with the panel label and with how the system typically performs under current sun exposure. Solar Panel FAQ recommends documenting every observation, since a clear paper trail speeds up troubleshooting and protects you during warranty discussions. This baseline helps you distinguish temporary drops from true faults and provides the context needed for when to call a pro.
Measure electrical output safely and accurately
Next, collect data to quantify potential faults. Measurements should be done with safety in mind and following the manufacturer guidance. Use a properly rated multimeter to check open-circuit voltage (Voc) and short-circuit current (Isc) at the array or at the inverter input, depending on your setup. Record the values during stable daylight, ideally with a consistent irradiance level. Then compare the readings with the datasheet specifications printed on the panel label and with the inverter’s reported figures. If the numbers are consistently far from expectations, you likely have a fault that merits deeper checks. Remember to stay within safe limits and never force connections.
Inspect wiring, connectors, and bypass diodes
Damaged wires, loose connectors, damaged insulation, or degraded bypass diodes can cause unexpected losses without obvious visual damage to the panel. Inspect DC wiring for abrasion, pinching, or corrosion at connectors and in the combiner box. Ensure all DC fuses and breakers are intact and that the MC4 connectors click firmly. Bypass diodes inside the panels or in the junction box can fail silently, causing partial shading effects or reduced output. If you find corrosion or loose terminals, tighten or replace them following proper safety procedures and with the system powered down.
Check shading, dirt, and thermal hotspots
Even small shading from new growth, nearby equipment, or dirt can dramatically reduce panel output. Look for uneven hotspot patterns after a sunny period, and scan for new shadows during peak sun. Clean dusty surfaces with a soft brush or damp microfiber cloth, following manufacturer cleaning guidelines. Do not use harsh chemicals or abrasive pads that could damage the coating. After cleaning, review monitoring data for improvements and note whether the issue is resolved or persistent.
Test panels individually versus strings to isolate the fault
If your system uses multiple panels in series, the weakest unit can drag down the entire string. Test panels individually by isolating them from the string and rechecking Voc/Isc under the same daylight conditions. If one panel continues to underperform when isolated, it’s a strong sign of a fault in that unit. Compare its readings to its label and inspect for visible damage. If the isolated panel behaves normally, the fault lies in wiring, bypass diodes, or other components in the string.
Inverter performance and monitoring data
Inverter fault codes or warnings can masquerade as panel faults. Review the inverter status, health indicators, and any alarms logged in the system. Check the monitoring data for sustained low output, rapid fluctuations, or unusual temperature readings on the inverter itself. If the inverter reports errors or the output is inconsistent with the rest of the array, you may be dealing with an inverter problem rather than a panel issue. Correlate inverter health with panel tests to avoid unnecessary panel replacement.
What to do if you confirm a fault or cannot identify the cause
If tests point to a faulty panel or the source remains unclear, start with the warranty and replacement options from the panel manufacturer. If the panel is under warranty, contact the manufacturer or installer for guidance on replacement. For non warranty cases, consider a professional solar technician who can perform advanced diagnostics, infrared thermography, and safe isolation procedures. Avoid attempting risky repairs yourself.
Safety, common mistakes, and when to call a pro
Always power down the system before touching wiring. Never disconnect while under load, and wear personal protective equipment. Common mistakes include ignoring shading changes, skipping inverter checks, or attempting repairs without proper PPE. If you are not confident working with high voltage DC circuits, hire a qualified technician. A professional assessment often pays for itself by preventing further losses and ensuring safety.
Preventive maintenance to reduce future faults
Regular cleaning, timely inverter software updates, and scheduled inspections help prevent faults from turning into outages. Keep trees trimmed to minimize shading, monitor performance trends, and maintain a log of weekly checks. Although solar equipment is robust, proactive maintenance reduces risk and extends the life of panels and inverters. Solar Panel FAQ recommends ongoing monitoring as part of responsible ownership.
Steps
Estimated time: 60-90 minutes
- 1
Power down and prep safety gear
Begin by turning off the main DC disconnect and the AC supply. Wear insulated gloves, eye protection, and avoid touching exposed conductors. Gather a digital multimeter, a non-contact IR thermometer, and a clean dry workspace.
Tip: Double-check that the system is fully de-energized before handling cables. - 2
Conduct a visual scan
Inspect panels for cracks, discolored modules, or bent frames. Look at mounting to ensure no panels are loose. Note any visible damage or irregularities in the bypass diodes or junction boxes.
Tip: Take photos for your records to track progressive issues. - 3
Record baseline monitor data
Open the monitoring software and capture current DC and AC readings, as well as inverter status codes and ambient conditions. Document time, date, and irradiance if available.
Tip: Keep a log and compare over time to spot trends. - 4
Measure Voc and Isc at the array
With the system de-energized, use a multimeter to measure the panel string Voc and Isc at the array input. Compare to the label data and to yesterday’s readings to determine consistency.
Tip: Ensure probes are securely connected to avoid erroneous readings. - 5
Isolate a suspect panel
If you have multiple panels in a string, disconnect the suspect panel and test the string again. If output improves, you likely found the faulty unit.
Tip: Do not force panels to operate out of spec during testing. - 6
Check wiring and connections
Inspect DC wires, fuses, breakers, and connectors for corrosion or looseness. Reseat or replace as needed, verifying the system is off before touching.
Tip: Replace damaged components only with exact-rated equivalents. - 7
Review inverter health
Check the inverter status lights and error codes. Compare inverter data with panel test results to verify whether the issue is inverter-related.
Tip: Some faults show as inverter alarms even when panels are fine. - 8
Decide on replacement or professional service
If a panel is confirmed faulty or under warranty, initiate replacement through the manufacturer. If the cause remains unclear, schedule a professional diagnostic visit.
Tip: Preserve warranty documentation and service records. - 9
Document and monitor post-fix performance
After any repair or replacement, re-check outputs under similar conditions and update your maintenance log. Confirm that performance aligns with expected range.
Tip: Set up periodic checks to catch gradual degradation early.
Diagnosis: System output is significantly lower than expected under current irradiance
Possible Causes
- highShading or soiling reducing incident light on one or more panels
- mediumWiring damage or loose connections in a panel string or at the inverter
- mediumFaulty panel(s) such as microcracks or accelerated degradation
- lowInverter or monitor fault misreporting output
Fixes
- easyClean panels and remove shading sources; recheck outputs
- easyInspect wiring, connectors, and fuses; reseat connections and tighten if safe
- mediumIsolate panels and test individually; replace faulty panel(s) under warranty/negotiated terms
- mediumConsult a professional to verify inverter health and perform infrared thermography if needed
Frequently Asked Questions
What are the first signs that a solar panel is faulty?
Common indicators include a noticeable drop in output, visible panel damage, or inconsistent readings in the monitoring system. If these appear, proceed with a structured diagnostic flow before replacing parts.
Look for sudden drops in output or visible damage. Start a step by step check rather than jumping to replacements.
Can shading alone cause low output?
Yes, shading can dramatically reduce effect even if the panel itself is intact. Evaluate shading sources and cleaning needs as part of your diagnosis.
Shading can dramatically cut output; check for trees, debris, or new obstructions and address them first.
Should I test panels myself, or hire a professional?
Basic electrical checks can be done safely by homeowners, but high voltage DC work and infrared diagnostics should be performed by a professional to avoid risk and ensure accuracy.
You can do simple checks, but complex diagnostics are best left to a professional.
What should I do if my panel is under warranty?
If under warranty, contact the manufacturer or installer for guidance on replacement. Preserve proof of purchase and records of the fault.
If under warranty, contact the manufacturer and gather your records.
How can I tell if the inverter is at fault?
Check inverter status indicators and error codes, then compare with panel tests. If the inverter readings don’t align with panel performance, the inverter may be the issue.
Check the inverter indicators and compare with panel data to see if the inverter is likely at fault.
Watch Video
Top Takeaways
- Start with a visual check and baseline data.
- Isolate the fault by testing panels individually.
- Inverter health matters; don’t assume panel fault.
- Follow warranty paths and consult a pro when in doubt.