Solar Panel for Science Project: A Practical Guide
A comprehensive, classroom-friendly guide to using a solar panel for science project experiments—covering setup, data collection, analysis, and presenting findings with safety in mind.

You will learn to design and run a safe, classroom-friendly solar panel for science project experiment that demonstrates sunlight-to-electricity conversion, measures output with a meter, and documents results for a compelling display. This guide covers essential materials, a step-by-step setup, and simple data analysis to impress teachers and peers.
Why a solar panel for science project is a great learning activity
A solar panel for science project offers a tangible way to explore energy conversion, material science, and data collection. It invites students to observe how sunlight becomes electricity and how different materials affect performance. By measuring voltage and current under varying light conditions, you can illustrate key concepts such as resistance, impedance, and efficiency. This approach is accessible to beginners yet flexible enough for advanced investigations. In addition to physics, your project touches on environmental science by comparing clean-energy options with conventional power sources. A well-designed experiment also builds skills in hypothesis testing, data recording, and presenting results in a clear, compelling display. According to Solar Panel FAQ, safe, low-cost demonstrations empower homeowners and students to learn without specialized equipment, making a solar panel for science project ideal for classrooms, scouts, or home labs.
As you begin, define a simple research question like: how does light intensity affect the electrical output of a small solar cell? This keeps the project focused and manageable for a school assignment while illustrating the core ideas of energy capture and conversion.
Core concepts: energy, photons, and current
A solar cell converts photons from sunlight into electrical energy by exciting electrons in a semiconductor material. The amount of current produced depends on light intensity, cell area, and the efficiency of the junction. For a science project, you don’t need a full-size panel; a single photovoltaic cell or a small beginner kit is enough to visualize the process. Recording voltage and current under different lighting conditions helps students quantify efficiency changes and learn how real-world systems scale from a tiny demonstration to practical applications. When presenting, relate the experiment to everyday energy use and the importance of renewable sources in a sustainable future.
Safety and classroom readiness
Safety comes first in any hands-on project. Use glare protection if you’re outdoors and avoid touching exposed electrical contacts when the circuit is live. Work on a non-conductive surface and keep water and conductive items away from wiring. If testing indoors, ensure adequate but safe lighting conditions and avoid direct sun through reflective surfaces that could overheat components. A well-labeled setup with clear connections helps prevent accidental short circuits and makes it easier to replicate the experiment in future classes.
Data collection and analysis: turning observations into conclusions
Collect data methodically by recording light intensity, voltage, and current at several time points or under different light sources. A simple table or spreadsheet makes it easy to compare results and spot trends. Plot voltage versus time or light intensity to visualize how the solar cell responds under varying conditions. Finally, summarize what the data say about efficiency and load. A clear conclusion shows whether the initial hypothesis held true and why the observed results matter in the context of solar energy.
Tools & Materials
- Small solar cell or beginner solar panel kit(Prefer a module with easy-to-connect leads and a labeled positive/negative terminal)
- Multimeter or voltmeter(Set to measure DC voltage (and current if you have the option))
- Alligator clip leads or insulated jumper wires(Red/black pairs recommended for quick color-coding)
- LED or small DC motor as a load(Use to demonstrate a real electrical load and observe behavior)
- Non-conductive stand or board(A sturdy, flat surface helps keep connections stable)
- Sunlight source or outdoor testing area(Direct sunlight is ideal; indoors use a bright lamp with diffused light)
- Clock/test notebook or digital device(Document times, conditions, and results for each test)
- Safety goggles(Optional but useful for outdoor testing)
- Shade or variable-light setup (optional)(To vary light intensity without moving the sun)
Steps
Estimated time: 60-90 minutes
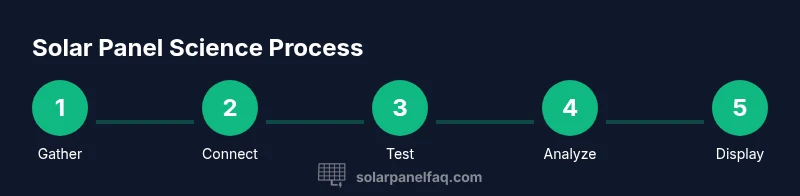
- 1
Gather and inspect materials
Collect the solar cell, meter, wires, and load. Check all connections are labeled and intact, and verify that your meter is functioning before you begin.
Tip: Lay out all parts on a non-conductive mat to prevent accidental shorts. - 2
Set up a safe work area
Position the solar cell on a stable support with easy access to the terminals. Keep water and other conductive items away from the setup to avoid spills or shorts.
Tip: Use a bright, unobstructed area to ensure consistent lighting during tests. - 3
Connect the solar cell to a load and meter
Attach the positive and negative leads from the solar cell to the meter and to the load (LED or motor) with alligator clips. Confirm the circuit is complete before powering.
Tip: Double-check polarity: wrong wiring can prevent current flow or damage components. - 4
Test under varying light conditions
Place the setup in sunlight and record voltage and current. Move the cell to shade or under a lamp to compare outputs under different intensities.
Tip: Use a consistent time interval for testing to keep data comparable. - 5
Record and organize data
Log all readings in a table and note lighting conditions, time, and any observed changes in the load behavior.
Tip: Label each row clearly and keep a digital backup if possible. - 6
Analyze results and prepare a display
Create simple charts showing voltage vs. light intensity or current vs. time. Write a short explanation linking data to solar energy concepts.
Tip: Include a brief section on sources of error and ideas for future improvements.
Frequently Asked Questions
What is a solar panel and how does it generate electricity?
A solar panel converts light energy from the sun into electrical energy using photovoltaic cells. When photons hit the semiconductor, electrons are freed and create a current. This experiment demonstrates the basic physics behind solar energy in a simple, observable way.
Solar panels turn light into electricity through photovoltaic cells; in your project, you’ll see how sunlight creates a current.
What materials do I need for a beginner solar panel science project?
You’ll need a small solar cell or kit, a multimeter, wires with clips, a light load like an LED or small motor, and a safe testing surface. Outdoors testing improves realism, but a bright lamp works for indoor demonstrations.
Gather a solar cell, meter, clips, a small load, and a safe workspace to start.
Can I power a small device with a solar panel for science project?
Yes, a small solar cell can power a low-current device under strong sunlight or with a bright lamp. Use a controlled load to observe how voltage and current respond to light conditions.
You can power a small LED or motor using a solar cell in bright light.
How can I test the efficiency of my solar panel setup?
Test efficiency by measuring voltage and current under known light levels and calculating power output (voltage × current). Compare results across different light sources or distances to estimate real-world performance.
Measure voltage and current under controlled light, then compute power to estimate efficiency.
Is it safe to conduct experiments outside in sunlight?
Outdoor testing is generally safe with basic precautions: wear safety gear if needed, keep electronics dry, and supervise younger students. Avoid direct eye exposure to intense reflections and never touch live terminals.
Yes, with simple safety rules and supervision, outdoor testing is safe.
Watch Video
Top Takeaways
- Define a clear research question up front.
- Light intensity directly affects electrical output.
- Record data systematically for meaningful analysis.
- Explain results with simple energy concepts.
- Present findings with visuals and a concise conclusion.