How to Remove Glass from a Solar Panel: Safe, Step-by-Step Guide
Learn how to remove glass from a solar panel safely with practical steps, PPE, and warranty considerations. This guide covers planning, tools, techniques, and disposal for professionals and informed homeowners.

According to Solar Panel FAQ, removing glass from a solar panel is a high-risk, specialized task best left to trained technicians. This quick answer confirms you should only attempt if you’re fully equipped and aware of safety and warranty implications. If you’re unsure, hire a certified pro to avoid electric shock, seal damage, or warranty voidance.
Why removing glass from a solar panel might be necessary
Removing the glass cover of a solar panel is not a routine maintenance task; it is typically required after severe impact, hail damage, delamination, or to replace a failed glazing seal. When you search for how to remove glass from a solar panel, you’re usually weighing the benefits of restoration against the risks of damaging encapsulated cells. This guide, informed by Solar Panel FAQ, aims to explain when removal might be necessary and how professionals approach the job to preserve performance and safety. You should understand that the glazing is bonded to a backsheet and encapsulated cells; forcing removal without proper tools can crack cells, fracture interconnects, or cause moisture infiltration. In most cases, replacement glass requires precise bonding and curing steps that are beyond DIY scope. If the panel is still under warranty, attempting removal without authorization can void coverage. Before proceeding, obtain a replacement pane that matches the exact model and bonding method, and consider whether replacement is more cost-effective than full module replacement.
Safety first: PPE and risk awareness
Safety is non-negotiable when tampering with solar panels. PPE should include safety glasses or goggles (ANSI Z87.1), cut-resistant gloves, and sturdy, non-slip footwear. A face shield adds protection if shards are likely to spray or if you’re working with damaged, brittle glass. Always verify that the PV system is completely de-energized before handling any wiring or components; residual voltages can persist and pose shock or arc risks. Consider weather conditions; rain or strong wind can destabilize the panel and create slip hazards. Remember that even when you think everything is off, stored capacitance or wiring can retain dangerous energy. Following a written safety plan reduces the likelihood of injuries and helps ensure you can document the process for future maintenance or warranty review.
Tools and materials you'll typically use
A careful preparation list helps prevent accidents and damage. Typical tools include: PPE (goggles, cut-resistant gloves, face shield), glass suction cups for controlled handling, a HEPA shop vacuum for fine shard cleanup, a rigid container to store glass, and a stable work surface with padding. A non-conductive footwear choice is important for electrical safety. Optional items might include a tape or marker to label glass pieces and an adhesive remover for stubborn bonding. Selecting appropriate tools minimizes the chance of cracks, scratches, or injury during removal and supports a safer, cleaner workspace.
Planning the removal: risk mitigation and documentation
Effective planning aligns with best practices in solar maintenance. Start by confirming the panel model, bonding method, and whether the glass is laminated or bonded to a frame. Draft a step-by-step plan that minimizes frame stress and prevents debris from reaching wiring or adjacent modules. Document the expected sequence, the coordinates of each pane, and the handling approach. Confirm who will assist, how waste will be collected, and how disposal will occur. This planning stage is critical for safety, cost control, and warranty considerations. A clear plan reduces the chance of accidental damage and helps you recover quickly if conditions change during the operation.
Accessing the panel: de-energization and preparation
Before any physical contact, power down and lock out the PV system according to local electrical codes. Use a multimeter or non-contact voltage tester to verify zero voltage at all accessible conductors. Create a clean, organized workspace and position a protective barrier if working outdoors to prevent wind gusts from shifting the panel. Ensure you have a second person available to provide guidance and assist with lifting and placement of glass fragments. This stage is essential for preventing electric shock and maintaining control over glass pieces that could shatter during removal.
Handling and removing the glass carefully
Apply the suction cups to distribute load evenly along the glass surface, avoiding any pressure points. Gently separate the glass from the bonding layer using a plastic tool to minimize scratching. Lift slowly and keep the pane as level as possible to avoid edge cracking. Place removed glass into a padded rigid container, with cushioning to absorb impact. If the glass is damaged or laminated, take extra care as shards can be sharp and unpredictable. Throughout this process, maintain good communication with your helper and pause if you notice any unexpected movement or cracking.
Post-removal handling: storage and disposal
Once the pane is removed, inspect the edges for micro-cracks and check the frame for any structural damage. Clean the area using a vacuum to collect fine particles, then wipe surrounding surfaces with a mild cleaner. Store glass pieces securely to prevent accidental cuts or theft, and label containers for recycling or disposal according to local regulations. Document the process, noting pane positions, model numbers, and any anomalies observed during removal. Proper disposal and record-keeping support warranty compliance and future maintenance needs.
Resealing options and reassembly considerations
If replacement glass is necessary, ensure the new pane matches the original model and bonding method. Follow the manufacturer’s specifications for bonding agents, curing times, and any primers required for proper adhesion. Reassemble the panel’s frame evenly to reduce stress concentrations that can cause micro-cracks. After reassembly, restore power and perform a functional test in accordance with the manufacturer’s instructions. If anything seems off—unusual heat, smell, or visual defects—pause and consult a qualified technician.
Warranty, liability, and alternatives
Glass removal can affect warranty coverage. Many manufacturers treat disassembly as voiding the warranty, particularly if encapsulated cells or seals are damaged. If the panel is under warranty or you lack the required tools and training, consider replacing the entire unit or hiring a certified technician who can work within warranty terms. A professional assessment helps protect your investment and reduces liability for personal injury or property damage.
Maintenance tips to prevent future issues
Regular inspection and prompt repair after hail or impact reduces the likelihood that you’ll need to remove glass again. Keep the surface clean, inspect edges for signs of moisture ingress, and verify that bonding remains intact. If you notice sealant degradation or cracking, schedule an inspection to determine whether resealing or component replacement is warranted. Proactive maintenance improves long-term performance and lowers total ownership costs.
Authority sources
- U.S. Department of Energy, Solar Energy Technologies Office: https://www.energy.gov/eere/solar
- National Renewable Energy Laboratory (NREL): https://www.nrel.gov
- Occupational Safety and Health Administration (OSHA): https://www.osha.gov
Curtain call: final guidance and the Solar Panel FAQ verdict
In most cases, removing glass from a solar panel is best left to trained professionals to maintain safety and warranty protections. The Solar Panel FAQ team recommends seeking certified assistance when damage is suspected or if you are uncertain about bonding methods. Careful planning, proper PPE, and adherence to manufacturer guidance yield safer outcomes and preserve system performance.
Tools & Materials
- Safety goggles (ANSI Z87.1)(Protect eyes from shards)
- Cut-resistant gloves(Level 5 or higher; keep dexterity)
- Face shield(Extra protection for possible shattering)
- Non-conductive footwear(Sturdy boots with good grip)
- Glass suction cups(Controlled lift of glass panes)
- HEPA shop vacuum(Cleanup fine shards)
- Rigid container for glass(Padding to prevent breakage)
- Sturdy stand or sawhorses(Support panel during work)
- Adhesive remover (optional)(For stubborn sealants; test first)
- Warning signage and barrier tape(Contain area and protect others)
Steps
Estimated time: 4-6 hours
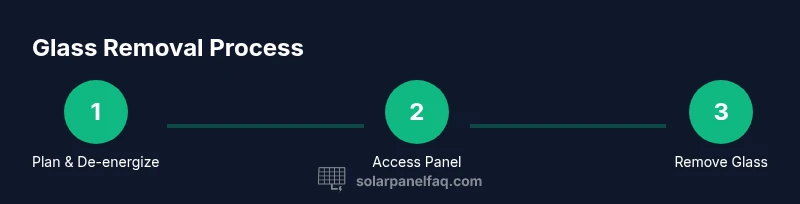
- 1
Prepare and isolate the system
Power down the PV system at the main DC disconnect and lock out the circuit. Confirm with a multimeter that there is no residual voltage before touching any wires.
Tip: Double-check that all inputs are de-energized; assume a stored charge may remain. - 2
Assess glazing condition and plan removal
Visually inspect the glass for cracks, delamination, or moisture intrusion. Develop a removal plan that minimizes frame stress and avoids damage to encapsulated cells.
Tip: Document the exact pane position and bonding method before removal. - 3
Set up workspace and safety zone
Move the panel to a level, stable surface and lay protective padding. Establish a barrier to keep bystanders away and place a container for glass fragments.
Tip: Have a partner ready to assist and monitor for movement. - 4
Attach suction cups and secure glass
Apply glass suction cups in a pattern that distributes load evenly. Ensure the edges are supported and protect the surface with a shim to prevent edge cracking.
Tip: Test suction on a small area before full lift. - 5
Loosen sealant and lift glass slowly
Gently work around the perimeter to release bonding without applying excessive force. Keep the glass level to avoid edge chipping.
Tip: Use a plastic blade to avoid scratching the glass. - 6
Remove glass and store safely
Lift the glass pane and place it into a padded, rigid container. Keep glass flat and avoid stacking to prevent damage.
Tip: Secure the container to prevent tipping during transport. - 7
Inspect frame and plan reassembly
Examine frame and backsheet for damage; decide whether to reseal with existing or replacement glass. Follow manufacturer guidelines for reassembly.
Tip: If any doubt arises, pause and consult a professional. - 8
Re-energize and test
Reconnect protective barriers, restore power, and perform a basic functional test in accordance with the manufacturer’s instructions. Observe for abnormal heat or visible damage.
Tip: Document test results and monitor the first hours of operation.
Frequently Asked Questions
Is it safe to remove glass from a solar panel yourself?
Removing glass is hazardous and requires specialized tools and training. If you lack experience, hire a certified technician to avoid electric shock and frame damage.
It's hazardous to remove solar panel glass yourself; hire a professional if you're not trained.
Will glass removal void the panel's warranty?
Yes, many manufacturers consider disassembly a warranty breach. Always check your model’s policy and consult the installer before attempting removal.
Glass removal can void warranties; contact the manufacturer first.
What PPE is essential for glass removal?
At minimum, wear safety goggles, cut-resistant gloves, and sturdy boots. A face shield adds protection if shards are likely to fly.
Wear eye protection, cut-resistant gloves, and sturdy boots at all times.
What should I do with broken or damaged glass?
Place shards in a rigid container with padding and dispose of them per local regulations. Do not pick up shards with bare hands.
Carefully collect shards in a rigid container and dispose of them safely.
Can I reuse the same frame after removing glass?
Frame reuse depends on damage; if the sealant and bonds are compromised, replacement may be necessary. Consult the manufacturer or a professional.
Frame reuse depends on integrity; seek professional advice if unsure.
Watch Video
Top Takeaways
- Always de-energize the system before work
- Use proper PPE and controlled lifting methods
- Follow manufacturer guidance to avoid warranty issues
- Store glass safely and dispose of shards responsibly
- Consider professional help for warranty and safety