Solar Panel Removal Service: A Step-by-Step Guide for Homeowners
A practical, safety-focused guide for planning and executing solar panel removal, including permits, contractor selection, logistics, and aftercare for future reinstallation.

This guide helps homeowners understand when to hire a solar panel removal service, what to expect during the process, and how to choose a qualified provider. You’ll learn safety steps, typical timelines, and key questions to ask. From obtaining permits to securing storage or reinstallation options, this quick answer sets you up for a smooth project with less downtime and surprises later.
What is a solar panel removal service and why homeowners need it
A solar panel removal service is a specialized process that safely detaches, lowers, and stores or transports solar modules and associated hardware from a roof or ground mount. It is performed by trained technicians who understand electrical isolation, roof safety, and proper handling of fragile modules. Homeowners may require removal for roof repairs, warranty work, equipment relocation, or end-of-life disposal. In many cases, a professional team can complete disconnection, dismounting, and packaging in a controlled sequence that minimizes risk to people and the roof. According to Solar Panel FAQ, removal services are essential when panels need relocation, maintenance, or disposal, and when reinstallation will occur at a later date. This reduces downtime, protects your investments, and helps ensure compliance with local safety standards.
Key takeaway: removal is not just about unplugging panels; it involves planning, safety, and coordination with other home projects to avoid damage.
Common scenarios requiring removal
There are several legitimate reasons to schedule a removal service. If you’re planning roof replacements, you’ll need to move or temporarily store panels to access underlying structure. Relocation or reorientation of solar arrays for better shading or zoning compliance can also necessitate removal. Major renovations, expansion projects, or changes to electrical service may require the system to be disconnected first. In some cases, a property sale triggers panel removal for transfer documents or appraisals. Regardless of the reason, professional removal ensures proper disconnect, labeling, and documentation so reinstallation goes smoothly.
For homeowners, the most important step is to obtain a clear plan with timelines and responsibilities from your contractor and, if needed, your roofing team. The Solar Panel FAQ analysis shows that coordinating multiple trades often reduces delays and protects warranties when done with a qualified crew.
noteStartTimeStamptbd":null,
],
Tools & Materials
- Ladder with stable footing(Choose a ladder tall enough to reach the mounting rails with at least a 3-point contact on the roof)
- Fall-arrest harness and lanyard(Proper fall protection per local regulations; attach to a secured anchor point)
- Insulated voltage tester / multimeter(Used to confirm DC isolation before touching wiring)
- Insulated gloves (Class 2)(Protect hands from sharp edges and electrical components)
- Safety glasses or face shield(Eye protection for debris and dust)
- Non-conductive tooling (rubber mallet, nylon wedges)(Avoids conduction and damages to panels)
- Safety banners and barrier tape(Mark the work area for pedestrians and pets)
- Panel transport bags or blankets(Protects modules during lowering and transport)
- Labeling tools (marker, zip ties)(Label each cable and panel for reinstallation)
- Tool belt or pouch(Keeps small tools accessible on the roof)
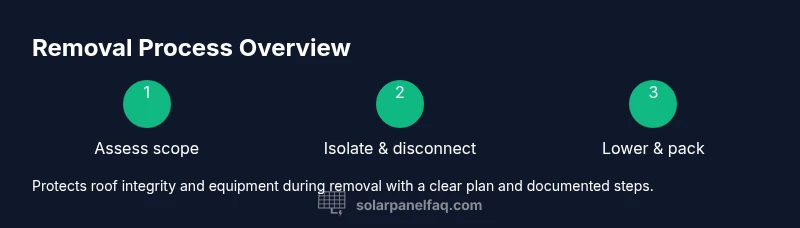
Steps
Estimated time: 2-6 hours
- 1
Assess project scope and risk
Review the system layout, mounting type, and access points. Confirm the reason for removal and identify neighboring trades that may be affected (roofers, electricians, or inspectors). Document work area boundaries and required PPE. Ensure permits are in order if your locality requires them.
Tip: Take a quick photos log of the array state before touching anything. - 2
Notify stakeholders and secure permissions
Inform household members and neighbors of scheduled work. If the removal affects shared structures or HOA covenants, obtain written approval. Ensure access routes for equipment are clear and that the scheduling aligns with weather windows.
Tip: Communicate a rough timeline to minimize surprises for residents. - 3
Isolate and de-energize the system
Shut down the DC disconnect at the combiner box or inverter per manufacturer guidance. Verify there is no live voltage using a tester before any contact with cables or modules.
Tip: Double-check inverter and main service panel status to avoid backfeed.” - 4
Dismount solar modules from the mounting rails
Carefully detach modules from racking supports using appropriate tools. Avoid dropping panels and keep faces protected with blankets or soft debris catchers.
Tip: Work with a partner to control panel lowering and prevent damage. - 5
Disconnect wiring and label all cables
Unplug or detach the module harnesses and feed lines. Label each cable and connector for reinstallation and keep connectors and fasteners organized.
Tip: Keep a labeled parts map to speed reinstallation later. - 6
Secure components for transport
Wrap panels and pack hardware to prevent movement or abrasion during lowering. Use transport bags or blankets and secure with straps away from edges.
Tip: Plan the path of descent to avoid obstacles on the way down. - 7
Lower panels safely to ground
Slowly lower each panel or bundle with a partner, maintaining control at all times. Keep panels oriented to prevent rock chips or edge damage.
Tip: Never carry panels by the edges; support the center.” - 8
Conduct a post-removal inspection
Check for mounting surface damage, insulation wear, or loose connectors. Photograph the site and panels for records and warranty needs.
Tip: Document any existing issues to strip risk from future work. - 9
Plan storage, disposal, or reinstallation
Decide whether panels will be stored in a dry, ventilated area or prepared for future reinstallation. If disposal is planned, follow local recycling guidelines and document chain-of-custody.
Tip: Create a reinstallation checklist to streamline future work.
Frequently Asked Questions
Do I need a permit to remove solar panels?
Permit requirements vary by location. In many areas, licensed installers handle permits as part of the removal project. Check with your local building department or HOA for specifics before scheduling.
Permit requirements vary by location; check with your local building department for specifics before scheduling.
Can I remove solar panels myself to save money?
DIY removal is not recommended unless you have electrical training and fall protection expertise. Improper handling can cause injury or roof damage, and may void warranties.
DIY removal isn’t advised unless you’re trained for electrical work and roof safety.
How long does a typical removal take?
Time varies with system size and roof access. A typical project may take several hours, and larger or hard-to-access installations can extend the timeline.
It can take several hours, depending on system size and roof access.
What happens to the panels after removal?
Panels can be stored for future reinstallation, relocated, or recycled. A reputable operator will document disposition options and ensure safe transport.
Panels can be stored, relocated, or recycled depending on the plan and condition.
Will removal affect roof warranty?
Removal can impact the roof warranty if flashing or mounting points are damaged. Work with a certified contractor who follows manufacturer guidelines to protect warranties.
Yes, improper removal can affect roof warranties; choose a qualified contractor.
Watch Video
Top Takeaways
- Plan carefully before starting to minimize downtime
- Hire licensed professionals for safety and compliance
- Label and document everything for easier reinstallation
- Protect panels and roof to avoid damage during removal
- Coordinate with other trades to prevent project delays