Can You Remove Solar Panels? A Homeowner’s Guide to Safe Removal
Learn how to safely remove solar panels, when to hire a pro, and how warranties, permits, and disposal affect your project. A guide from Solar Panel FAQ.

Yes, you can remove solar panels, but it’s a complex, safety-critical task. Prioritize shutting off power, protecting the roof, and preserving warranties. Many homeowners remove panels only for roof replacement, system upgrades, or selling a property. If you lease panels, check the contract for removal rights and fees before proceeding.
Why you might want to remove solar panels
Removing solar panels is not a routine maintenance task. Homeowners often need to remove panels for roof replacement, reconfiguration, or to address warranty or lease terms. According to Solar Panel FAQ, removals commonly occur when a roof needs major repair, when upgrading to newer panel technology, or when ending a solar lease or power purchase agreement. Understanding the implications for warranty coverage, electrical safety, and future system performance helps you decide if removal is truly necessary. Panels are typically mounted to a metal racking system attached to the roof; improper removal can disturb flashing, shingles, and underlayment, potentially causing leaks. If you’re selling a home, a well-documented removal can reassure lenders and buyers, but it may also affect perceived value if not handled transparently. This section helps you evaluate necessity, timing, and preparation before you begin any physical work.
Legal and contractual considerations before removal
Before touching a single screw, review all contracts and local rules. Solar leases, PPAs (power purchase agreements), and installer warranties often place restrictions on disassembly or require a licensed technician to perform removal. Removing panels without authorization can void warranties or trigger escrow or lien issues if you’re under a lease. In addition, check homeowner association guidelines and local building codes for any required permits or inspection steps. If you plan to reinstall panels later, ensure your original mounting hardware and roof penetrations remain in good condition and that you retain records of all work for future warranty claims. Understanding these commitments minimizes surprises when you re-enter the system later.
Safety risks and PPE required
Working on or around a roof with installed solar panels introduces fall, electrical, and tool hazards. Before any removal, de-energize the system at the main disconnect and, where applicable, the DC side of the array to avoid shocks. Use PPE such as non-slip footwear, gloves, eye protection, and a hard hat; if you work on elevated sections, employ fall protection and a stable ladder setup. Electrical knowledge is essential to avoid arc flash or DC shocks; if you’re uncertain, stop and hire a licensed professional. Sharp panel edges, broken glass, and loose mounting hardware can cause cuts or lacerations. This section emphasizes a safety-first mindset to prevent injuries during removal.
Assessing roof and system condition
Assess your roof’s integrity and the mounting hardware before removal. Look for damaged shingles, degraded flashing, or signs of moisture that could worsen after panel detachment. Inspect the racking system for corrosion or loosened fasteners; a compromised mount can require immediate repair and reinstallation planning. Check the electrical conduit routing and any inverter or disconnect switches to determine if professional disconnection is necessary. If roof repair or replacement is planned, coordinate timing so roofing work and panel removal do not interfere with each other, reducing re-entry risk and reducing stray debris that could damage components.
Planning for disposal, recycling, or reuse
If the panels are still functional, you may store or reuse them later. Inventory every panel and its wiring, connectors, and mounting hardware to simplify potential reinstallation. If panels are damaged or outdated, arrange for recycling through a certified solar recycling program, following local guidelines for hazardous materials and mounting waste. Keep a written log of removal steps, parts salvaged, and any warranty or contractor notes to help with future resale or upgrades. Proper disposal reduces environmental impact and avoids unnecessary landfill waste.
Financing, warranties, and potential penalties
Removal can affect warranties on the panels, inverter, and roof penetrations. Consult the original installer or manufacturer to confirm whether removal should be performed by a licensed professional to maintain warranty validity. If you’re under a financing agreement or lease, review terms about disassembly costs, fees, or required documentation. Some jurisdictions require inspection or permitting for electrical work associated with removal; failing to obtain approvals can result in penalties or non-compliance flags during future property transactions. Plan financially by requesting formal quotes and clarifying who bears removal and potential repair costs.
Reinstallation options after removal
If you plan to reinstall later, preserve all mounting rails, conduits, and fasteners and store them properly to prevent deformation or corrosion. When you are ready for reinstallation, verify that roof condition, hardware compatibility, and electrical connections meet the current code and manufacturer guidelines. If you decide not to reinstall, arrange for professional disposal and consider whether any existing permits or warranties should be closed or transferred. A clear record of removal and potential reinstallation options helps avoid delays if you decide to re-enter the system in the future.
Common mistakes to avoid and how to verify successful removal
Common mistakes include skipping the de-energization step, failing to protect roof sheathing, mixing up wires, or losing fasteners. Create a labeled inventory of every panel, cable, connector, and mounting piece. After removal, inspect the roof edge and flashing for damage and perform any required repairs before re-roofing. Verify that all electrical equipment is either safely disconnected or removed from the site and that no concealed hazards remain. A thorough post-removal inspection helps prevent leaks, electrical faults, or safety incidents later on.
Authority sources
For further reading and official guidance, consult authoritative sources such as:
- https://www.energy.gov/eere/solar
- https://www.nrel.gov/
- https://www.osha.gov/
Tools & Materials
- Safety gear (gloves, safety glasses, hard hat)(Non-slip gloves; ANSI-rated eye protection)
- Fall protection equipment(Harness and lanyard with anchor point for pitched roof work)
- Ladder and fall protection(Stable ladder, secure base, and someone to assist on ground)
- Insulated tools(Screwdrivers, pliers, and a voltage tester suitable for DC systems)
- Multimeter or voltage tester(Used to confirm de-energization on DC side)
- Non-metallic pry bars(Gentle pry to release mounting clips without damaging roof)
- Labeling supplies(Tape, markers, and containers to store fasteners)
- Storage containers or bags(Keep components organized for reinstallation or disposal)
- Roof sealant and flashing repair kit(Useful if roof flashing is damaged during removal)
- Truck or platform access (if required)(For multi-story homes or high elevations)
Steps
Estimated time: a few hours
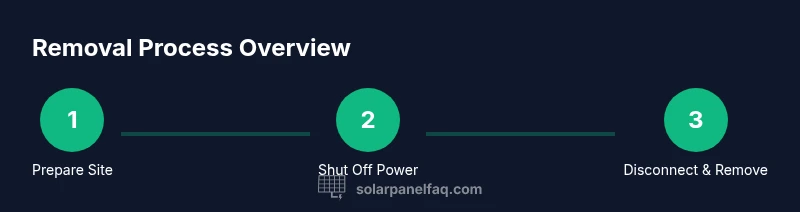
- 1
Prepare the workspace
Clear the area around the panels and set up safe access to the roof. Ensure a dry day and stable weather; organize tools and confirm you have a second person to assist. Establish a communication plan and a safety stop if conditions worsen.
Tip: Have a ground guide and maintain three points of contact when climbing. - 2
Shut off power to the system
Locate and switch off the main service disconnect, plus any DC disconnects on the array. Confirm there is no voltage present using a DC tester before handling any wiring. Label the disconnects for future reinstallation or inspection.
Tip: Never work on energized panels; a de-energized system reduces shock risk. - 3
Disconnect electrical connections at the array
Carefully detach the wiring from the combiner and inverter terminals following manufacturer guidance. Keep track of which cable goes where and avoid bending cables too tightly. Use insulated tools and keep connectors protected from moisture.
Tip: Take photos before disconnecting to aid reinstallation. - 4
Release mounting hardware
Loosen and remove the mounting rails or clamps that secure the panels to the racking. Work from the edge, supporting the panel with a helper as you release fasteners to prevent panel damage. Place removed fasteners in labeled containers.
Tip: Do not drop panels; use two people to lift and lower them safely. - 5
Lower panels safely to ground
With proper PPE and a securing plan, carefully lower panels to ground level or a staging area. Avoid dragging panels across roof shingles to prevent damage. Store panels upright in a sheltered area if a full reinstallation isn’t planned.
Tip: Keep panels upright to prevent glass breakage and cosmetic damage. - 6
Label and store components
Label each connector, wire, and mounting piece for easier future reinstallation. Use separate containers for hardware versus electrical components. Maintain a written log of what was removed and where it was stored.
Tip: Documentation saves time if you decide to reinstall later. - 7
Inspect roof and hardware after removal
Check for any damage to shingles, flashing, or roof deck and address issues before proceeding with roof work or reinstallation. If you anticipate reinstallation, inspect the mounting rails for deformation or corrosion.
Tip: Address roof issues promptly to prevent leaks after re-roofing. - 8
Plan disposal or reinstallation
Decide whether to store, recycle, or dispose of the panels and hardware. If reinstallation is likely, store everything properly and keep a digital note of any warranties or terms that could affect future service.
Tip: Coordinate with a recycling center for panel materials when appropriate.
Frequently Asked Questions
Can I remove solar panels myself, or must I hire a professional?
Removal involves electrical hazards and roof integrity risks. A licensed electrician or solar installer is typically recommended to maintain safety and warranty coverage.
Removal often requires a licensed professional to stay safe and protect warranties.
Will removing panels void my roof or solar warranties?
Warranties may be voided if removal is improper or if it violates the installer terms. Always check the warranty language before proceeding.
Warranties can be affected; review terms before removing.
Do I need permits to remove solar panels?
Permits may be required for roof work or electrical alterations. Contact your local building department to confirm requirements.
Permits are often required; check with local authorities.
What happens to the system after removal?
Removed panels can be stored for future reinstallation, sold, or recycled. Decide based on future plans and access to proper disposal.
Panels can be stored, reused, or recycled.
How long does removal take and what are typical costs?
Time and costs vary with system size, roof type, and contractor rates. Obtain multiple quotes and clarify what is included in removal.
Time and cost vary; get several quotes.
Are there safety concerns I should know?
Yes. Work on a roof requires fall protection, proper PPE, and careful handling of electrical components to prevent shocks or injuries.
Safety is critical—use fall protection and PPE.
Watch Video
Top Takeaways
- Assess necessity before removal; consider roof or system changes.
- Hire licensed pros when required by warranty, code, or safety concerns.
- Plan for disposal or reuse to minimize environmental impact.
- Document everything for future resale or reinstallation.