How to Make a Solar Panel with Glass: A Step-by-Step DIY Guide
Learn how to make a solar panel with glass using safe, beginner-friendly steps. This guide covers materials, assembly, safety, testing, and practical tips for DIY enthusiasts.

With glass as the protective cover, you can assemble a basic DIY solar panel by layering a photovoltaic cell array, encapsulant, and a backing, then sealing it. This quick guide outlines essential steps, safety considerations, and material choices to help homeowners explore a glass-covered solar panel project. It emphasizes safety, durability, and testing practices.
Understanding Glass-Covered Solar Panels: Feasibility and Trade-offs
Glass-covered solar panels sit between the sun and the cells to protect them from the elements while letting light reach the PV cells. The use of glass adds durability and weather resistance, but it also increases weight and potential heat buildup if not vented. In DIY contexts, homeowners explore glass-panel concepts as a way to extend panel life or integrate glass aesthetics into a project. The keyword how to make a solar panel with glass guides you through material choices, lamination methods, and safety considerations. According to Solar Panel FAQ analysis, 2026, these designs are feasible but demand careful planning, proper lamination, and adherence to electrical safety standards. The Solar Panel FAQ team notes that while glass yields excellent protection, DIY glass panels tend to fall short of factory modules in long-term efficiency and reliability, especially without industrial lamination facilities. This reality check helps set expectations and focuses on learning and safe experimentation.
Essential Materials and Safety Considerations
Before starting any glass-covered solar panel project, gather the right materials and commit to strict safety practices. The goal is to learn and experiment safely, not to rush to a finished commercial product. Always work in a well-ventilated, dry area with a non-slip surface, and wear PPE (safety glasses, gloves, long sleeves). This section outlines key components and safety steps so you can make informed choices when you learn how to make a solar panel with glass. For context, Solar Panel FAQ analysis notes that glass-covered designs are more complex and safety-critical than standard modules, so plan accordingly and document results for future improvements.
Glass Types, Encapsulation, and Durability
The glass in a paneled system acts as a shield against weather, UV exposure, and physical impact. Opt for tempered or laminated glass with high light transmission to minimize losses. Encapsulation films, such as EVA or PVB, seal the cells from moisture while allowing light to pass. The durability of a glass-based panel depends on how well the edges are sealed and how the lamination layers are bonded. When you’re learning how to make a solar panel with glass, choose materials that balance optical clarity, mechanical strength, and resistance to temperature cycling. Proper lamination reduces micro-cracks in PV cells and extends panel life.
Design Options: Cell Arrangements and Wiring
Cell configuration determines voltage and current output. Common approaches include series connections for higher voltage and parallel connections for higher current, with bypass diodes to protect cells from shading. In glass-covered designs, wiring must be carefully routed to avoid micro-cracks and maintain waterproof seals. Color-coded bus bars simplify assembly and troubleshooting. If you’re new to this, start with a small test array and gradually scale, ensuring correct polarity and safe insulation between conductive paths.
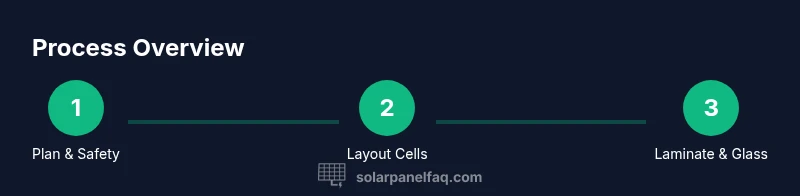
Assembly Process Overview and System Integration
This section provides a high-level roadmap for integrating PV cells with glass and encapsulation, without stepping through every micro-detail. Start by preparing a clean, dry workspace, then lay out cells in the chosen configuration on a backing board. Apply encapsulant, position a glass sheet, and seal the edges with UV-resistant silicone to protect from moisture ingress. Attach a backsheet and a junction box, then connect output leads. Because glass-based panels involve multiple lamination steps, a properly ventilated setup and quality control checks are essential for success.
Testing, Performance, and Practical Benchmarks
Testing is critical when you’re learning how to make a solar panel with glass. Use a multimeter to measure open-circuit voltage (Voc) and short-circuit current (Isc) under bright, sun-like conditions. Compare results against your design expectations and document temperature effects. For DIY projects, performance will depend on cell quality, lamination integrity, and glass transmission. Record measurements over several days to evaluate stability and identify any degradation patterns. Remember that glass increases durability but may add dead-space that reduces total area efficiency compared with factory modules.
Maintenance, Longevity, and Environmental Impact
Glass-covered panels require minimal cleaning if glass is kept free of heavy dirt or sand. Use a soft cloth with water or a mild detergent for occasional cleaning, avoiding abrasive cleaners that could scratch the surface. Inspect seals and edges annually for moisture ingress and reseal as needed. From an environmental perspective, glass and encapsulation films are relatively stable but require proper disposal at end of life. Keeping a maintenance log helps track performance, safety checks, and any observed changes in output.
Common Mistakes and How to Avoid Them
Common missteps include rushing the lamination process, inadequate edge sealing, and improper wiring polarity. Always verify cell alignment before lamination, test welds and connections with a continuity tester, and avoid bending PV cells beyond their tolerance. Failing to vent heat or ignoring weather sealing can lead to accelerated degradation. Take time to dry-fit parts, double-check measurements, and conduct safety reviews before each step.
Next Steps for DIY Enthusiasts
If you’re excited about glass-covered solar panels, start with a small, safe prototype and gradually scale. Seek local maker spaces or community labs with lamination capabilities to gain hands-on experience. Record your results, compare different glass types and lamination films, and consider consulting a professional for outdoor testing and compliance checks. This is a learning journey with incremental milestones rather than a single miracle panel.
Tools & Materials
- Solar PV cells (monocrystalline or polycrystalline)(Ensure cells are intact; handle with care to avoid micro-cracks)
- Tempered or laminated safety glass pane(Prefer low-iron glass for higher light transmission)
- PVB or EVA encapsulation film(For lamination layers to seal cells from moisture)
- Encapsulation backing board (rigid substrate)(e.g., fiberglass-reinforced panel)
- Backsheet or weatherproof polymer film(Waterproof barrier and insulation layer)
- Junction box and outdoor-rated wiring(IP-rated components recommended)
- Bus bars, tab wires, soldering equipment(If not using pre-tabbed cells, connect manually)
- UV-resistant silicone sealant(Edge sealing to prevent moisture ingress)
- Clear protective coating (optional)(Add extra protection against UV aging)
- Tools: screwdriver, wire stripper, multimeter(For wiring, testing and adjustments)
- Personal protective equipment (PPE)(Safety glasses, gloves, long sleeves)
- Flat, clean work surface and measuring tools(Ruler, calipers, and a straight edge)
Steps
Estimated time: 12-18 hours
- 1
Plan workspace and safety setup
Choose a dry, well-ventilated area with a flat surface. Establish a safety plan, align safety PPE, and review local regulations for DIY solar projects. This planning reduces risk and clarifies the scope before any cut or lamination occurs.
Tip: Document the plan and safety checks before starting the build. - 2
Gather and verify materials
Collect PV cells, glass, encapsulation film, backing board, and all wiring components. Inspect each item for damage and verify that the glass size matches the backing board and lamination plan.
Tip: Keep components organized and labeled to prevent mix-ups. - 3
Lay out PV cells in the chosen configuration
Position cells face-down on the backing board according to the desired series/parallel configuration. Mark polarity and verify spacing to allow lamination and edge sealing without shorting cells.
Tip: Use non-conductive spacers to maintain alignment. - 4
Connect cells with correct polarity and insulation
Solder or attach tab wires between cells as planned, ensuring positive to negative connections follow your circuit design. Insulate exposed conductors to prevent shorts during lamination.
Tip: Test continuity and polarity before moving to lamination. - 5
Laminate with encapsulant and place glass
Apply encapsulation film over the cell stack, place the glass atop, and align carefully. Use even pressure during lamination to eliminate air pockets and ensure strong bonding at edges.
Tip: Work slowly to avoid trapping air; a lamination press helps. - 6
Seal edges and attach backsheet
Apply UV-resistant silicone around the edges to seal against moisture and attach the backsheet for weather resistance. Check seals for uniform coverage and no gaps.
Tip: Let sealant cure fully per manufacturer guidelines. - 7
Install junction box and external wiring
Mount the junction box on the back, route output leads, and seal entry points. Test insulation resistance and verify the enclosure remains weatherproof.
Tip: Use outdoor-rated connectors and weatherproof grommets. - 8
Test electrical output in controlled conditions
Measure Voc and Isc under bright light with a multimeter. Compare results to expected ranges and check for voltage drop across wiring and connectors.
Tip: Document test results for future iterations. - 9
Mount panel for field testing
If planning outdoor use, mount securely with proper framing and consider angle optimization for sun exposure. Plan for data logging and safety clearances.
Tip: Consult local codes before outdoor installation.
Frequently Asked Questions
Is it safe to make a solar panel at home?
Home fabrication involves electrical and glass-handling risks. Use PPE, follow step-by-step instructions, and work in a ventilated area. If unsure, seek professional guidance before proceeding.
Yes, but proceed with caution. Always wear PPE and consult guidance before starting.
Can a glass-covered panel be as efficient as factory modules?
DIY glass panels can work, but they typically don’t reach factory module efficiency or long-term reliability without specialized lamination and testing facilities. Use them for learning and prototyping rather than as a primary power source.
DIY glass panels can work, but rarely match commercial modules in efficiency or durability.
What are the main materials needed for this project?
Key components include PV cells, safety glass, encapsulation film, a backing board, a weatherproof backsheet, wiring, a junction box, and edge-sealing materials. Quality lamination and sealing are crucial for durability.
PV cells, glass, encapsulant, backing, wiring, and sealing materials are essential.
How long does the build and test take?
A careful DIY build with testing can span a full day to a weekend, depending on tools and experience. Allow extra time for lamination curing and edge sealing.
Plan for a full day or more, including setup and curing time.
Do I need special tools beyond basic electronics gear?
Basic electronics tools plus safety equipment are needed. A lamination press or heat source is helpful for quality lamination, but not strictly required if you’re learning.
You’ll need basic tools and some lamination options; a press helps but isn’t mandatory.
What maintenance is required for a glass-panel DIY setup?
Keep the glass surface clean, inspect seals for moisture ingress, and check wiring connections periodically. Replace any damaged components promptly to maintain safety.
Clean the glass and inspect seals regularly; fix damaged parts as needed.
Watch Video
Top Takeaways
- Plan safety and workspace before any assembly.
- Glass adds durability but increases weight and thermal considerations.
- Correct lamination is essential for long-term performance.
- Thorough testing validates DIY glass panels before outdoor use.
- DIY glass panels are educational tools, not factory-grade replacements.