How to Make Solar Panel at Home: Safe DIY Guide
A practical, safety-first guide to powering your home with solar by using off-the-shelf panels and components. Learn planning, mounting, wiring, testing, and maintenance for a compliant, scalable system.

Interested in how to make solar panel at home? This guide focuses on safe, practical options: use off-the-shelf solar modules and complete systems rather than building cells from scratch. You’ll plan, size, mount, wire to an inverter, and verify code compliance for a reliable home setup. This approach emphasizes safety, reliability, and future expandability.
What You Can and Cannot DIY in Solar
If you’re researching how to make solar panel at home, this section sets expectations. It’s not practical or safe to attempt fabricating photovoltaic cells or glazing from raw materials in a typical residence. High-efficiency solar cells require controlled environments, specialized equipment, and strict quality controls. Instead, you can achieve meaningful savings and reliable performance by using off-the-shelf solar modules, inverters, and properly rated mounting hardware. This approach reduces fire risk, simplifies electrical work, and helps you meet local electrical code requirements. Throughout this guide, Solar Panel FAQ emphasizes safety, legal compliance, and long-term reliability. If you want to pursue hands-on learning, focus on understanding system components, electrical sizing, and safe installation practices rather than cell fabrication.
Why DIY Solar Is Popular—and When to Skip It
Many homeowners are drawn to DIY for cost control and learning, but the most impactful DIY step for most homes is not fabricating panels. It’s selecting the right combination of modules, inverters, and safety devices, and installing them in a way that matches your roof or yard layout. A well-designed kit can be scaled over time to meet growing energy needs, while minimizing risk and warranty concerns. The key is to separate the theoretical planning from hazardous electrical work, and to respect local permitting requirements. Solar Panel FAQ’s guidance: plan first, then purchase a complete kit from a reputable supplier, and only perform the non-electrical tasks yourself if you’re confident in safety practices.
The Bottom Line for Beginners
For beginners, the most reliable path to a home solar setup is to use prefabricated modules and a properly sized inverter system rather than attempting to build cells at home. While it’s tempting to imagine a DIY solar panel project, real-world results come from proven components, certified safety features, and professional installation when needed. This approach still empowers homeowners to reduce utility costs and increase energy independence, while keeping safety and compliance at the forefront.
How We’ll Proceed in This Guide
We’ll cover system sizing concepts, component selection, site assessment, mounting considerations, electrical wiring at a high level, commissioning, and maintenance. Each topic emphasizes safety, efficiency, and code compliance. By the end, you’ll have a clear, actionable plan to deploy a home solar system that fits your goals without attempting dangerous fabrication.
Tools & Materials
- Pre-made solar panels (array)(Choose a reputable model with a suitable wattage rating for your goals.)
- Racking and mounting hardware(Roof-compatible rails, brackets, and sealant; ensure weatherproofing.)
- DC disconnect and main AC disconnect(Code-compliant safety disconnects for isolation during maintenance.)
- String or microinverters(Select based on system design; string inverters handle multiple panels, microinverters are individual per panel.)
- Conduit, cable, and wiring (DC & AC)(Use UV-rated, outdoor-rated wire of appropriate gauge per code.)
- Combiner box and fusing(Necessary for safe parallel connections and protection.)
- Junction boxes and weatherproof seals(Maintain enclosure integrity for outdoor use.)
- Inverter sizing calculator or metering(Helps match panel output to inverter capacity and electrical load.)
- Safety gear (gloves, goggles, non-conductive footwear)(Personal protective equipment for all handling and wiring tasks.)
- Multimeter or clamp meter(For voltage, current, and continuity checks during setup.)
- Roof sealant and weatherproofing supplies(Helpful for long-term protection around mounting feet.)
- Permitting and inspection documents(Check local regulations and scheduling with utility if grid-tied.)
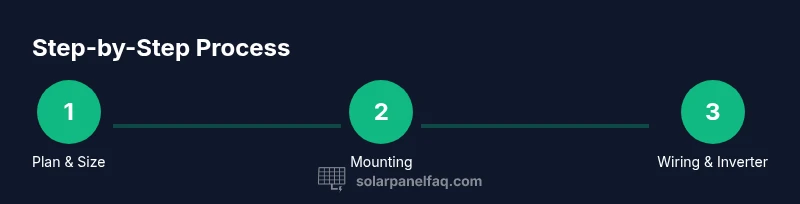
Steps
Estimated time: 6-12 hours (excluding inspections or permit processing)
- 1
Define goals and size your system
Assess your electrical load, daily sun hours, and budget to estimate a target system size. Use reputable calculators to translate kilowatt-hours per day into panel wattage and array count. This step ensures you don’t overspec or undersize the installation.
Tip: Document your current electricity bills and typical monthly usage to align system size with real needs. - 2
Select panels and a compatible inverter
Choose between a string inverter or microinverters based on shade, layout, and budget. Verify panel wattage and temperature coefficients to ensure performance in your climate. Confirm warranty coverage and certifications (e.g., UL, IEC).
Tip: If shading is a concern, consider microinverters for better performance under partial shade. - 3
Plan mounting and orientation
Map the roof or ground mount area, considering prevailing sun path and potential shading. Ensure a tilt angle that maximizes annual energy production for your latitude. Prepare a drainage plan to avoid roof leaks or ground erosion.
Tip: Angle and orientation can be adjusted over time; start with a conservative, safe mounting plan and leave room for optimization. - 4
Install mounting hardware
Secure rails or mounting frames using manufacturer-recommended fasteners. Seal penetrations with appropriate flashing and sealant to maintain weatherproofing. Check structural load limits and compliance with local codes.
Tip: Double-check alignment with a level and use temporary supports before final fastening. - 5
Mount panels and route wiring
Attach panels to the mounting system, then run DC wiring to a combiner box or inverter location. Keep cables organized in conduits and avoid sharp bends or contact with edges. Label positive and negative conductors clearly.
Tip: Use cable clips or ties to maintain tidy routing and prevent movement in wind. - 6
Install protection, disconnects, and metering
Install DC disconnects near the array and an AC disconnect near the service panel. Integrate overcurrent protection and a meter or monitoring device to track performance. Follow manufacturer instructions for enclosure mounting and venting.
Tip: Never bypass protective devices; they are essential for safety and warranty validity. - 7
Connect to the inverter and utility grid
Connect the DC side to the inverter according to the wiring diagram. If grid-tied, coordinate with your utility for interconnection and any required inspections. Ensure there is no backfeed when performing electrical work.
Tip: Have a qualified electrician review the final wiring and utility interconnection plan. - 8
Test, Commission, and document
Power up the system and verify voltage, current, and energy output at the inverter. Check for insulation resistance and verify monitoring devices are reporting correctly. Document serials, warranties, and installation dates for future reference.
Tip: Take initial performance readings at several times of day to establish a baseline.
Frequently Asked Questions
Is it legal to install solar panels yourself in my area?
Legality varies by location. Many regions require permits, inspections, and utility interconnection approvals for grid-tied systems. Check your local building department and utility policies before starting.
Check local permits and utility policies, as many places require an inspection for grid-tied solar installations.
Do I need a professional to install solar panels?
For safety and compliance, a licensed electrician or solar installer is often recommended, especially for wiring to the service panel and interconnection with the grid.
A professional helps ensure safety and code compliance for wiring and interconnection.
What is a typical cost range for a home solar setup?
Costs vary widely based on system size and incentives. A common range covers several thousand dollars for a modest system to well over ten thousand for larger installations, before incentives.
Costs vary a lot, but many homes see meaningful savings over time with a properly sized system and applicable incentives.
Can DIY panels power my whole house?
It’s possible with a properly sized, design-appropriate grid-tied system and reliable equipment, but it largely depends on roof area, local sunlight, and utility interconnection terms.
A well-planned system can meet a large portion of your needs, but it depends on your home and grid connection.
What maintenance does a home solar system require?
Regular inspections, cleaning dust or debris, and monitoring system performance are typical. Look for loose connections or shading changes that reduce output.
Keep an eye on performance and inspect mounting and wiring every year or after severe weather.
What safety gear should I use during installation?
Always wear protective gloves, goggles, and non-conductive footwear. Use insulated tools and follow lockout/tagout procedures when working near electrical components.
Wear proper safety gear and follow electrical safety guidelines at all times.
Watch Video
Top Takeaways
- Plan before purchasing components
- Use prefabricated panels, not DIY cell fabrication
- Prioritize safety, mounting integrity, and code compliance
- Size and configure for real energy needs
- Test and document system performance