How to Check Solar Panel Voltage: A Step-by-Step Guide
Learn step-by-step how to safely check solar panel voltage, understand Voc and Vmp readings, interpret results, and troubleshoot common issues to ensure your solar system operates at peak performance.

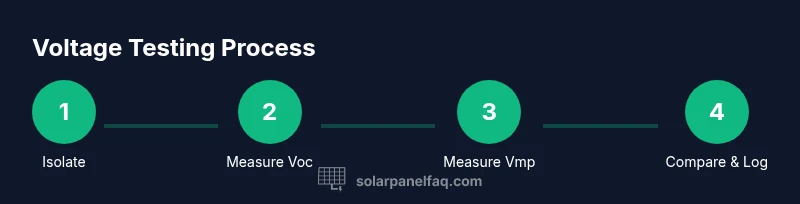
To check solar panel voltage, isolate the array, then use a multimeter to measure terminal voltage. Record open-circuit voltage (Voc) when panels are unconnected and under-load voltage (Vmp) when the system is energized. Compare readings to the panels’ specs and wiring configuration. This quick guide from Solar Panel FAQ helps homeowners test safely and accurately.
Why voltage matters for solar panels
Voltage is a fundamental electrical parameter that indicates how much push the photovoltaic cells produce when illuminated. For homeowners, knowing the voltage helps verify panel health, confirm wiring configurations, and assess whether the system is delivering expected power. A healthy voltage reading within the expected range suggests internal wiring and diodes are functioning correctly, while significant deviations can signal shading, loose connections, degraded cells, or mismatched components. According to Solar Panel FAQ, understanding Voc and Vmp—open-circuit and maximum-power voltage respectively—gives you a practical window into system performance without expensive testing equipment. Regular voltage checks also support safe operation by ensuring that wiring insulation and protection devices remain within safe limits as weathering and aging occur.
Safety first: isolation and precautions
Before you touch any panel, ensure your work area is safe. Turn off the system at the main disconnect, and if you have a grid-tied setup, switch off the AC breaker to prevent backfeed. Wear insulated gloves and eye protection, and keep your hands dry. Use insulated tools and stand on a non-conductive surface to minimize shock risk. Keep the battery bank (if you have one) isolated and understand the sequence for turning devices on and off. These precautions reduce the chance of electrical shock and arc flashes, which are hazards even with low-voltage DC systems. Always work with a partner when possible to assist in an emergency.
Tools and environment: what you need—and why
A digital multimeter capable of DC voltage measurement is essential. You’ll also need appropriate test leads or alligator clips, insulated gloves, safety glasses, and a non-conductive mat or platform. Choose a dry, well-lit area with stable footing and minimal wind to keep you steady when handling live wires. If you’re testing inside a combiner box or an accessible junction, ensure there’s enough clearance to operate safely without bending panels or cables. An organized workspace reduces the chance of accidental contact with live conductors and helps you record readings accurately for future reference.
Open-circuit voltage (Voc): what it tells you
Voc is measured with the panel(s) disconnected from any load. It shows the maximum voltage the cells can produce when not drawing current. To measure Voc, place the multimeter probes on the positive and negative terminals of the panel or string, ensuring the circuit is open. A Voc reading that closely matches the panel’s rated value under standard test conditions indicates good health, while a significantly lower Voc can reveal degraded cells, poor connections, or shadowing effects. Remember that Voc values can vary with temperature and solar irradiance, so consider short-term fluctuations when interpreting results.
Loaded voltage (Vmp) and why it matters
Vmp is the voltage when the system is supplying current into a load (e.g., during normal operation). Unlike Voc, Vmp reflects real-world performance under sunlight and cable losses. To measure Vmp, keep the load engaged and measure across the same terminals while the system is producing power. The Vmp value typically sits below Voc, and the difference gives you a sense of system efficiency and wiring quality. If Vmp is markedly lower than expected, investigate wiring errors, underperforming cells, or high resistance connections that introduce drop under load.
Testing across a single panel vs. a string
Residential solar installations frequently combine panels in series or parallel configurations. In a series string, Voc and Vmp multiply with the number of panels, so testing at the string level requires careful handling to avoid overload. When testing a single panel, you isolate only that panel to obtain baseline Voc and Vmp readings. For strings, you’ll test at the string output while still observing safety practices, and you may need to measure partial strings if full disconnection isn’t feasible. Document readings for each panel or string to identify underperforming components quickly.
Interpreting readings and tolerance ranges
Voltage tolerances vary by panel type and manufacturer. Start by comparing Voc and Vmp to the rated values in the installation documentation. Small deviations due to temperature, age, or panel shading are common; larger gaps often indicate a problem. If readings drift consistently across multiple tests or panels, check for loose connections, degraded bypass diodes, or degraded junction boxes. Solar Panel FAQ emphasizes maintaining a consistent testing routine to distinguish normal variation from actual faults. When in doubt, consult a professional engineer or your installer for a formal evaluation.
Shade, temperature, and wiring influence on voltage readings
Shade dramatically reduces voltage in shaded portions of panels, and temperature can increase or decrease voltages depending on cell chemistry and wiring. Long cable runs add resistance, lowering Vmp under load. Worn insulation or corroded connectors cause poor contact and voltage drop. Always test under similar weather conditions—ideally with panels unobstructed by shade and with consistent irradiance—to obtain comparable results across sessions. Document environmental factors alongside readings to improve interpretation accuracy.
Common mistakes and how to avoid them
Avoid measuring voltage with wet hands or standing on damp surfaces. Don’t touch live conductors while the system is energized, even if the readings seem small. Never rely on a single measurement to declare health; take at least duplicate readings and compare Voc and Vmp under similar conditions. When wiring seems uncertain, refer to the system schematic and ensure the correct polarity before testing. If you encounter unusual readings, stop and re-check the isolation steps and tool connections.
Next steps: what to do with your readings
Record all measurements, including date, time, weather, panel string configuration, and equipment used. If readings align with expectations, schedule periodic checks (seasonally or after major weather events) to maintain system health. If discrepancies appear, escalate to your installer or Solar Panel FAQ's guidance for troubleshooting and potential service. A proactive testing routine helps catch issues before they become costly problems.
Tools & Materials
- Digital multimeter(Capable of measuring DC voltage; verify range suitable for your system)
- Test leads with clips(Insulated leads rated for DC use; connect securely to terminals)
- Insulated safety gloves(Electrical-rated gloves for protection against shock)
- Safety glasses(Eye protection in case of sparks or accidental arcing)
- Non-conductive mat or stand(Helps keep you off the ground and reduces slip risk)
Steps
Estimated time: 45-90 minutes
- 1
Prepare safety gear and workspace
Put on gloves and safety glasses. Clear the area of water, metal objects, and animals. Verify you have dry hands and dry footwear, and set up a dry testing spot away from flammable materials.
Tip: Never rush this step; even a small lapse can cause an arc or shock. - 2
Isolate the PV array
Turn off the solar array at the main disconnect and, if applicable, open the DC isolator. Confirm no direct sunlight is heating cables during testing. A cold, shaded panel is safer to handle and reduces the risk of thermal shock.
Tip: If you cannot fully isolate the array, do not proceed; contact a licensed electrician. - 3
Set up the multimeter and probes
Configure the multimeter to the DC voltage setting with an appropriate range. Attach test leads to the meter, ensuring red to positive and black to negative; keep hands behind the probe tips.
Tip: Double-check probe polarity before touching terminal points. - 4
Measure Voc on a single panel
With the panel disconnected from the load, connect the leads to the positive and negative terminals and record the Voc reading. Do not touch both leads at once; keep the meter in a safe position.
Tip: Take multiple Voc readings if the sun is changing; average them for reliability. - 5
Measure Vmp under load
Reconnect the panel to the system or apply a known load and measure the voltage while the system is producing power. Document how Vmp compares to Voc and expected tolerance.
Tip: Ensure you’re measuring under typical operating conditions for meaningful results. - 6
Record and compare readings
Log Voc and Vmp readings, panel configuration, date, time, and weather. Compare with manufacturer ratings and previous tests to identify trends or anomalies.
Tip: Keep a labeled notebook or digital log for easy reference in future checks. - 7
Address any discrepancies
If readings diverge from expectations, inspect for loose connections, damaged cables, or degraded bypass diodes. Do not attempt repairs beyond your scope; consult a professional if issues persist.
Tip: Document any suspected problems with photos before actions.
Frequently Asked Questions
What do Voc and Vmp mean in solar panels?
Voc is the open-circuit voltage when no load is connected; Vmp is the voltage under load when the system is delivering power. Both values help evaluate health and performance against manufacturer specs.
Voc is the voltage with no load, while Vmp is the voltage under typical running conditions. They help assess health and performance against specs.
Can I test voltage while the system is connected to the grid?
Testing voltages while the system is live and connected to the grid can be dangerous due to backfeed and shock hazards. Isolate the array before testing to stay safe.
Testing with the system live can be dangerous. Always isolate the array before testing.
What readings indicate a healthy panel?
Read Voc and Vmp close to the manufacturer’s ratings under similar conditions. Minor deviations are common; large or persistent deviations warrant inspection.
Read Voc and Vmp near the rated values under similar conditions. Large deviations mean you should inspect the system.
Why do voltages vary between panels?
Variations occur due to shading, panel age, temperature, and wiring losses. Testing each panel or string helps pinpoint mismatches that affect overall performance.
Voltage varies due to shade, age, temperature, and wiring. Test each panel or string to locate issues.
What should I do if a reading seems off?
Re-check connections, re-isolate the array, and retake readings. If the problem persists, consult a qualified technician or your installer for a formal diagnostic.
If readings seem off, re-check connections and re-test. If it remains off, contact a technician.
Watch Video
Top Takeaways
- Start with safety and isolation before testing
- Measure Voc with panels open and Vmp under load
- Compare readings to rated specs and note environmental factors
- Document results for trend analysis and maintenance
- Escalate issues to a professional when readings deviate