How to Test Solar Panel Watts: A Homeowner’s Guide
Learn how to test solar panel watts with safe, step-by-step methods. This guide covers tools, measurements, STC considerations, and interpreting results to verify real-world performance for homeowners interested in solar.

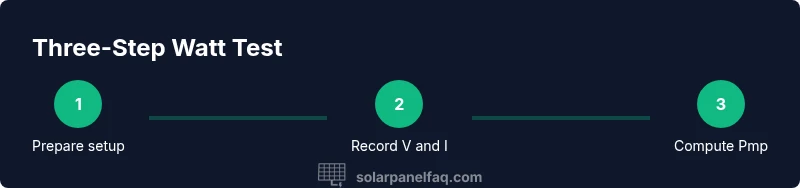
To accurately determine the watts a solar panel produces, you’ll measure voltage and current under a known load and multiply V by I. Use a proper DC wattmeter or a solar panel analyzer to capture V and I at the panel’s operating point, ideally under standard test conditions. This step-by-step approach helps you verify performance against the rating.
Why Testing Watts Matters
Understanding how to test solar panel for watts helps homeowners verify real-world performance and detect issues before they affect energy bills. According to Solar Panel FAQ, rigorous watt testing provides a practical check against the manufacturer’s rating and helps you plan maintenance or replacements. In this guide we break down what watts mean for solar panels, why ratings can differ from daily output, and how consistent testing builds confidence in your system. Grab a notebook and a meter, and you’ll gain a clear sense of your system’s health over seasons and weather patterns.
Real-world watt testing isn’t about chasing perfect lab numbers. It’s about understanding how temperature, shading, wiring losses, and panel age influence actual power generation. This knowledge empowers you to optimize orientation, reduce shade-caused losses, and communicate expectations with installers or energy providers. With practice, you’ll move from guessing to data-driven decisions that align with your home’s energy goals.
Safety First: Protect Yourself and Your Equipment
Testing solar panels involves DC electrical measurements, which can be hazardous if done improperly. Always wear non-conductive gloves, eye protection, and suspend work during wet or windy conditions. Ensure all connections are secure, and never touch live terminals with bare hands. If your system uses high voltage or big current, consider having a qualified technician supervise or perform the measurements. Solar Panel FAQ emphasizes safety as the foundation of confident testing.
Before you begin, disconnect nonessential loads, turn off related equipment, and establish a clear work area. Keep metal jewelry away from terminals, and use insulated tools designed for electrical work. After you finish each measurement, recheck connections for heat or discoloration, which can indicate a loose contact or overload. These precautions protect both you and your panels while you gather accurate data.
Understanding the Key Measurements You’ll Use
To evaluate watts, you need three core measurements: voltage (V), current (I), and the resulting power (P). Watts are calculated as P = V × I. In solar testing, you’ll encounter Voc (open-circuit voltage), Isc (short-circuit current), Vmp (voltage at maximum power), and Imp (current at maximum power).
Panel ratings assume standard test conditions (STC): a specific irradiance level, cell temperature, and air mass. Real-world testing introduces variation, so readings are typically lower or higher depending on sun, temperature, and shading. Keeping track of STC versus real-world conditions helps you understand how your panel performs day to day.
How to Set Up a Watt Measurement (Overview)
Begin with a safe, controlled load for the panel and a meter capable of reading DC volts and amps. You’ll connect the load to the panel through a wattmeter or a dedicated solar analyzer to capture V and I as you vary the load. Take multiple readings at different loads to locate the maximum power point (the point where V × I is highest). This middle-chord method mirrors what manufacturers report as the rated wattage, but it reflects actual conditions rather than idealized data.
Real-World Testing: STC vs Real Conditions
Testing under STC provides a baseline, but real conditions vary widely. On a bright, cool day you may approach the rating, while in hot weather you often see lower output because panel efficiency drops with temperature. Shade, dust, and aging components also reduce watts. Practically, perform tests at several times of day and in different seasons to build a practical performance profile for your home.
Document your results with date, time, irradiance if you can estimate it, and ambient temperature. Over months, you’ll notice trends that help you optimize placement or plan maintenance.
Interpreting Results: What the Readings Say About Your System
If measured watts consistently fall short of the label, investigate common causes: dirty panels, shading from nearby trees, loose or corroded connections, or degraded cells. If readings vary widely with the sun’s angle, consider optimizing orientation or adding microinverters for better partial shading tolerance. Remember, the rating is a best-case figure under STC, not a guaranteed output in every situation. Use tests as a diagnostic tool and a baseline for future comparisons.
Quick Reference: Simple Formulas and Example Calculations
The basic formula P = V × I gives the raw watts at a given moment. For maximum power, look for Vmp and Imp during a live test, then calculate Pmp = Vmp × Imp. If you want a practical checkpoint, compare your Pmp to the panel’s listed watt rating and note the percentage difference. For example, if a panel is rated at 320 watts and your test shows Pmp of 275 watts, that’s a real-world performance of roughly 86% under those conditions. Use this as a baseline for future tests and maintenance planning.
Tools & Materials
- Digital multimeter (DMM) capable of DC voltage and current measurements(Check DC range and accuracy; ensure it can read up to the panel’s Voc and Isc values.)
- DC wattmeter or solar panel analyzer(Preferred for direct P measurements and MPP tracking.)
- Known-load resistor bank or adjustable resistive load(Used to vary current and locate maximum power point.)
- Appropriate test cables and clamps(Use weatherproof, rated for DC currents; keep connections tight.)
- Safety gear (gloves, eye protection)(High DC current can be hazardous; PPE is essential.)
- Solar panel rating sheet or datasheet(Keep refer back to nominal watt rating and STC conditions.)
- Documentation notebook or device for logging(Record conditions: irradiance, temperature, date, time, and readings.)
- Weather-appropriate footwear and dry work surface(Optional but helps prevent slips; avoid wet conditions.)
Steps
Estimated time: 45-90 minutes
- 1
Inspect safety and readiness
Check the panel surface for dirt or shading. Confirm all equipment is rated for the expected voltage and current. Decide on a safe load range before connecting anything.
Tip: Document the panel’s orientation and shading at measurement times to correlate with results. - 2
Set up the measurement circuit
Arrange the panel, load, and meter in a clear, dry workspace. Ensure all connections are tight and protected from weather.
Tip: Use a temporary test setup that allows quick disconnection in case of fault. - 3
Connect meters and load
Connect the wattmeter in series with the load and panel to capture current, and place the voltmeter across the load or panel as appropriate.
Tip: Double-check polarity before powering the circuit. - 4
Take initial readings at a low load
Start with a low load to see the panel voltage behavior and verify system safety.
Tip: Note Isc and Voc as references for later comparison. - 5
Sweep loads to locate the maximum power point
Gradually increase the load and record voltage and current at several points to identify the peak P = V × I.
Tip: Aim for at least 4–6 data points around the expected MPP. - 6
Calculate watts and compare to rating
Compute P at the maximum power point and compare with the panel’s rated wattage. Consider temperature and irradiance notes.
Tip: If Pmp is significantly lower, inspect for shading, dirt, or wiring issues. - 7
Repeat under different conditions if possible
If you can, repeat measurements at different times of day or with varying sun exposure to understand variability.
Tip: Record outdoor conditions and panel temperature for context. - 8
Document results and plan next steps
Summarize findings in a simple report and schedule maintenance if needed. Decide if professional inspection is warranted.
Tip: Keep a monthly log for performance trends over the year.
Frequently Asked Questions
What is the difference between Voc, Vmp, Isc, and Imp?
Voc is the voltage with no load. Vmp is the voltage at maximum power. Isc is the current with a shorted output. Imp is the current at maximum power. Together they describe the panel’s electrical behavior under load.
Voc is the no-load voltage, Vmp and Imp define the panel’s maximum power point, and Isc is the short-circuit current. These define how the panel behaves under real-world loads.
Can I test watts with a regular multimeter?
A standard handheld multimeter can measure voltage and current, but you should use a wattmeter or solar analyzer for direct watt readings and MPP tracking. A DMM alone may be unsafe or imprecise when measuring at panel operating points.
A regular multimeter can measure volts and current, but a wattmeter is safer and more accurate for watts and maximum power.
Why do test results differ from the rated watts?
Ratings assume standard test conditions. Real-world factors like temperature, irradiance, shading, and aging reduce actual watts. Testing helps you understand performance under your specific conditions.
Panels are rated under standard conditions, so real watts often vary due to sun, temperature, and wear.
Should I test indoors or outdoors?
Outdoor testing under sun provides realistic results. Indoor or shaded tests can misrepresent performance due to low irradiance. Use outdoor tests when possible and document weather conditions.
Test outdoors under sunlight to get realistic results, and note the weather when you test.
What safety steps are essential when testing?
Wear PPE, avoid wet conditions, ensure secure connections, and never touch live terminals with bare skin. If you’re unsure, hire a professional.
Wear protective gear, keep connections secure, and avoid wet conditions. If unsure, hire a pro.
How often should I test solar watts?
Test annually or after major system changes, such as panel cleaning, shading changes, or component replacements. Regular checks help confirm ongoing performance.
Test at least once a year or after any major changes to the system.
Watch Video
Top Takeaways
- Measure voltage and current under load to estimate watts.
- Use a wattmeter or solar analyzer for accuracy.
- Compare results to rating while accounting for STC differences.
- Document conditions to track performance over time.