DIY Solar Cell Guide: Safe, Hands-On Learning at Home
A practical, safety-first guide to exploring diy solar cell concepts at home. Learn how photovoltaic cells work, what you need, a step-by-step demo, and how to measure results with a multimeter.

DIY solar cell experiments teach photovoltaic basics safely. Use a beginner kit to assemble a simple demonstration cell, test with a multimeter, and compare outputs under varying light. See our detailed step-by-step guide for all the actions.
What is a DIY solar cell?
A diy solar cell is a beginner-friendly, at-home way to explore how photovoltaic devices convert light into electricity. Rather than installing a full solar array, you use a safe, educational setup—often a kit designed for learning—to observe the basic physics, such as electron flow and voltage generation, in a controlled environment. These projects emphasize understanding concepts like light absorption, material interfaces, and how current changes with light intensity. For homeowners, this is a practical introduction to solar science that clarifies what real solar panels do and why efficiency matters. The goal is curiosity-driven learning, not production-scale power. By working with a small demo cell, you can visualize the photovoltaic effect without dealing with high voltages or large systems, making it accessible to beginners and families exploring green tech.
Why a hands-on approach helps
Hands-on experiences reinforce theory. When you connect a tiny diy solar cell to a simple load and observe voltage under different lighting, you witness the direct relationship between light, material properties, and electrical output. This experiential learning also helps you make informed decisions about future solar investments, such as understanding panel specs, installation considerations, and maintenance needs. Throughout, safety and clear expectations keep the project educational rather than risky.
How a DIY solar cell fits into home learning
Homeowners can use this kind of project to demystify solar energy. It’s not a substitute for a roof installation, but it provides a tangible glimpse into PV science. Students, hobbyists, and curious homeowners gain intuition about efficiency, coverage area, and the impact of light quality on performance. You’ll also learn measurement basics—voltage, current, and power—and how to interpret data, which translates to more confident decisions about real-world solar choices.
Realistic expectations for home projects
A typical at-home solar cell demo generates only a few milliwatts to a few tens of milliwatts, enough to power a tiny LED or a micro-load. The purpose is learning, not powering appliances. Materials chosen for educational kits are designed to be safe and forgiving, with minimal risk if used as directed. As you gain experience, you can compare different cell types or configurations, but always start with manufacturer safety guidelines and avoid attempting high-energy experiments without proper facilities.
What you can realistically build at home
Most DIY solar cell learning kits include a small cell, wires, a load (like an LED or resistor), and a basic multimeter. With these, you can demonstrate the basic PV effect, test under sunlight versus indoor lighting, and observe how orientation and brightness affect output. Some kits provide pre-fabricated cells to minimize chemical handling, which is ideal for families and classrooms. The emphasis remains on observation, data collection, and interpretation rather than building a large, functional power source.
Choosing a safe DIY setup for learning
Prioritize kits that come with clear safety instructions and built-in safeguards. Look for components with low voltage and current, color-coded connectors, and easily replaceable parts. A well-designed kit reduces risk and simplifies data collection. Before starting, review the included safety sheet, wear protective eyewear if recommended, and set up your workspace away from water or heat sources. This deliberate setup helps ensure a smooth, educational experience.
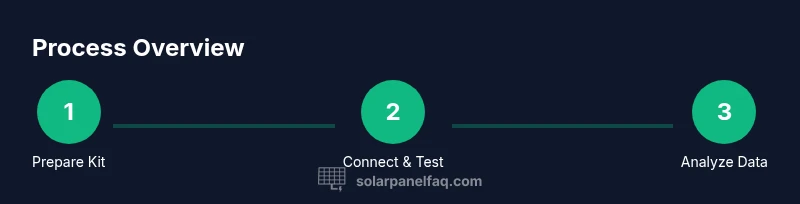
Step-by-step overview for a safe at-home demo
This section provides a high-level map of a safe learning exercise. You’ll receive a kit, verify contents, connect the cell to a small load, and use a multimeter to capture voltage and current readings under different lighting conditions. Keep a log of observations, including light intensity and distance from the light source. The aim is to develop a practical sense of how light, materials, and configuration influence output, rather than to maximize power.
Measuring performance: tests and metrics
Use a multimeter to measure open-circuit voltage (Voc), short-circuit current (Isc), and, if possible, calculate the fill factor and efficiency with your data. Compare readings under sunny daylight with those under indoor lamps to illustrate how lighting affects performance. Record environmental factors such as light quality, distance, and angle. Interpreting these numbers teaches you to distinguish between ideal conditions and real-world performance while reinforcing critical thinking about data reliability.
Common mistakes and troubleshooting
Avoid overestimating small readings or assuming linear behavior from light changes. Ensure all connections are secure, avoid touching conductive surfaces with bare hands, and keep components protected from moisture. If readings are unexpectedly low, check for loose leads, incorrect polarity, or a damaged cell. When in doubt, refer to the kit’s troubleshooting guide and re-check connections step by step.
Where to learn more and upskill
Beyond safety-focused kits, pursue beginner-friendly resources that explain PV concepts, material science, and real-world installation considerations. Look for reputable tutorials, community college courses, or solar energy organizations that offer hands-on labs. The goal is to translate hands-on experience into deeper understanding and informed decision-making for future solar investments.
Tools & Materials
- diy solar cell educational kit(Includes cell(s), connectors, load, wires, and instruction sheet)
- multimeter(For measuring voltage (V) and current (A); retain safe probe tips)
- alligator clip leads(Set of insulated clips to connect components securely)
- safety goggles(Protect eyes when handling components; recommended for all users)
- protective gloves(Optional for handling any kit components; not strictly necessary for safe kits)
- non-conductive mat or tray(Helps organize parts and prevent short circuits)
- notebook or digital log(Record readings, light conditions, and observations)
- low-watt light source (optional)(Useful for indoor demonstrations when sunlight is limited)
Steps
Estimated time: 60-75 minutes
- 1
Gather materials and safety setup
Lay out all kit components on a clean, dry surface. Read the safety instructions and ensure your workspace is away from water and heat sources. Verify you have a multimeter, wires, and a load ready for immediate use.
Tip: Double-check polarity on the cell leads before connecting to avoid misleading readings. - 2
Arrange the light source and reference setup
Position the light source at a fixed distance from the cell to create a repeatable test condition. If using daylight, note the time and weather. If indoors, ensure the light is stable and dims are controlled.
Tip: Use a daylight measurement as a baseline, and avoid changing lighting mid-measurement. - 3
Connect the cell to the multimeter through a load
Connect the diy solar cell to the multimeter with the load in series to observe current flow. Confirm all connections are secure and polarity is correct before powering the load.
Tip: Start with a very small load to prevent overloading the cell. - 4
Take open-circuit and short-circuit readings
First measure Voc with the circuit open, then Isc by shorting the output through the meter. Record both values under the same lighting condition.
Tip: If Voc seems unusually low, re-check connections and ensure no shading on the cell. - 5
Vary light and record data
Move the light closer or increase intensity to observe how voltage and current respond. Record at least three distinct lighting levels for comparison.
Tip: Keep a consistent note of distance and lamp type to ensure valid comparisons. - 6
Analyze data and reflect on learning
Calculate rough efficiency using the formula for educational purposes and compare results across lighting conditions. Write a short reflection on what affects performance and what you’d explore next.
Tip: Focus on concepts (light intensity, material interfaces) rather than exact power figures.
Frequently Asked Questions
What is a DIY solar cell and what will I learn from it?
A DIY solar cell is a beginner-friendly demonstration that shows how photovoltaic cells convert light into electricity. It emphasizes safety and data collection to teach the basics of PV science.
A DIY solar cell is a beginner-friendly demonstration showing how light turns into electricity, with a focus on safe learning and data collection.
Is it safe to build a DIY solar cell at home?
Yes, when using a proper educational kit designed for beginners and following the safety instructions. The focus is on observation and learning, not high-energy outputs.
Yes. Use a beginner kit and follow safety instructions. It’s meant for learning, not power generation.
Do these DIY cells generate meaningful power for devices?
Educational cells produce small amounts of power suitable for lighting an LED or a tiny sensor. They are not meant to run household devices or provide grid power.
They generate only tiny amounts of power, enough for an LED or sensor, not for big devices.
What equipment do I need besides the kit?
A multimeter, safe test leads, and a lightweight load are typical. A notebook for data logging helps you compare readings across conditions.
You'll usually need a multimeter, some leads, a load, and a notebook for data.
Can I expand this into a larger project later?
Yes. After mastering basic concepts, you can explore other cell types, different materials, or simple series/parallel configurations to learn more about PV performance.
Yes, you can expand to different cell types and configurations as you learn more.
Where can I find reliable information about DIY solar cells?
Start with reputable educational resources, manufacturer guides for beginner kits, and university-level PV overview articles to deepen understanding.
Look for educational resources from universities and reputable solar kit makers to learn more.
Watch Video
Top Takeaways
- Understand the core PV concept: light-to-electricity conversion.
- Use a safe, beginner kit to observe results and practice data collection.
- Lighting conditions dramatically affect output, illustrating real-world PV behavior.
- Document readings and reflect on how materials influence performance.
- Advance learning by exploring different cell types and configurations.