Dimensions of Solar Panel: Size, Fit, and Installation
Explore how panel dimensions affect installation, planning, and performance. Learn typical footprints, measurement tips, and layout strategies for 60-cell and 72-cell modules, with practical guidance for homeowners.

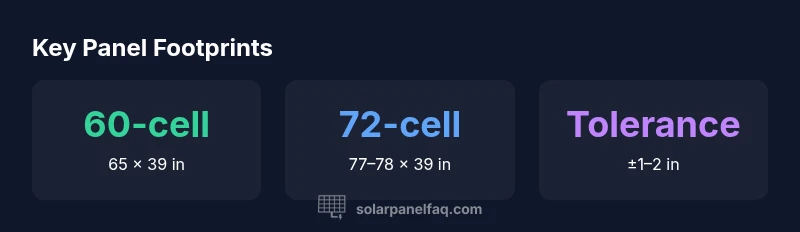
The typical dimensions of a standard 60‑cell solar panel run about 65 inches by 39 inches (approximately 1650 mm by 990 mm), while 72‑cell panels are usually around 77–78 inches by 39 inches (about 1950–1980 mm by 990–1000 mm). Sizes vary by manufacturer and cell layout, so always check the exact measurements in the product data sheet before ordering or planning a roof install.
What dimensions mean for solar panels and your project
When homeowners talk about the dimensions of solar panel, they’re not just counting length and width. They’re assessing how a module will fit on a roof, how much shade might be cast, and how mounting rails will connect to your rafter grid. The term spans footprint, thickness, frame depth, and even the spacing between panels in a string. According to Solar Panel FAQ, dimensions are a primary constraint in the early planning phase because they determine how many modules you can install in a given roof area, how much daylight your array will capture, and how easily a system can be expanded later. In practice, you’ll encounter two common footprints: the compact 60-cell footprint and the larger 72-cell footprint. While the electrical specifications (watts, efficiency) are crucial, the physical size governs layout, roof penetrations, and aesthetics. Therefore, in addition to estimating your expected kilowatts, you should map a grid on your roof showing panel centers and required clearances.
Standard sizes and what 60‑cell vs 72‑cell mean
The solar industry has settled on two mainstream formats for residential installations: 60‑cell and 72‑cell modules. The 60‑cell standard is the most common on the market and typically measures about 65 inches by 39 inches (roughly 1650 by 990 mm). The 72‑cell family is larger, commonly around 77–78 inches by 39 inches (1950–1980 by 990–1000 mm). In theory, bigger panels offer more watts per unit, but the gap between 60‑ and 72‑cell footprints is not merely a matter of length. The frame depth, corner cutouts, and the busbar layout can add a few inches in width or height. Both formats come in various thicknesses, usually around 1.5 inches, and can include different mounting hole patterns. When you select a panel, ensure you’re comparing the product datasheets for exact dimensions, as even within the same cell-count category there can be subtle variations from manufacturer to manufacturer. Solar Panel FAQ’s analysis for 2026 shows that the footprint remains the most visible difference between formats, with electrical performance following cell geometry rather than just size.
How dimensions influence system design and roof planning
Roof space planning is a dimension problem. The footprint of each module determines how many panels will cover a given area, how much shading occurs, and how neatly you can align rows along the eave line. If your roof has limited length, tall, narrow panels may reduce the total number of modules required, but you’ll trade off in terms of mounting hardware and airflow around the array. Conversely, wider panels fit into broader surfaces but can crowd installation zones near chimneys or vents. When evaluating dimensions, you should also consider the clearances recommended by installers—typically a few inches between panels and edges of the roof to prevent wind uplift and to allow for thermal expansion. The Solar Panel FAQ team emphasizes that dimension planning is not a cosmetic concern; it directly affects performance consistency, shading losses, and future expansion potential. In some homes, homeowners opt for microinverter layouts that can tolerate more aggressive tiling if module width varies.
Measuring your roof and choosing the right layout
Start with a roof plan: note total usable area, prevailing sun orientation, and any obstructions. Measure the length and width of usable panels’ rows, then subtract required setbacks for ventilation and roof penetrations. Use a simple grid to estimate how many modules of each footprint will fit, then model shading from nearby features at peak sun times. If you’re near the edge of a roof where space is tight, consider a combination layout that alternates 60‑cell and 72‑cell modules to optimize fit without sacrificing electrical performance. Always confirm exact dimensions from datasheets before buying; even slight deviations can alter mounting rail lengths and rail-to-rail spacing. The A‑frame racks or flush-mounted rail systems your installer uses are designed around standard footprints, but a few manufacturers offer alternative hole patterns to accommodate non-standard sizes. A precise measurement will minimize surprises during installation and help you avoid costly rework.
Aesthetics, wind load, and mounting hardware considerations
Panel size influences more than the look of a solar array. Larger footprints can improve aesthetic uniformity but may appear more pronounced on smaller rooftops. The surface area also interacts with wind load, where broader modules can impose higher uplift forces if not properly anchored. When evaluating dimensions, factor in rail length, end clamps, and between-panel gaps; many systems require uniform gaps of about 0.5–1 inch to allow for expansion and to reduce soiling. Shared mounting hardware patterns across the field can simplify future replacements, but you should verify hole patterns and frame depth in the product sheet. The Solar Panel FAQ analysis notes that the practical effect of dimension differences is often installation time and roof compatibility rather than energy yield. In environments with heavy snowfall or debris, slightly smaller footprints can reduce overhang risk and simplify snow shedding around edges.
Non-standard sizes and why you might see them
Some roof shapes or retrofit projects necessitate non-standard panel footprints. Custom or semi-custom modules can appear with unusual lengths or widths, or with different mounting hole configurations to fit specific racking systems. While non-standard sizes can solve a tight fit, they can also complicate warranty transfer, component compatibility, and service parts access. If you encounter a non-standard option, request the exact outside dimensions, thickness, and hole spacing, and verify that the rail system you plan to use supports the model. Solar Panel FAQ recommends comparing datasheets across models to ensure the overall width and height align with your rails and shading constraints. Remember that non-standard sizes rarely deliver meaningful performance gains; the value usually lies in fit and installation practicality.
Reading datasheets and validating dimensions before purchase
Datasheets are your primary source for exact panel dimensions, mounting patterns, and frame depth. Create a side-by-side comparison grid of at least three models you’re considering, listing length, width, thickness, and the distance between mounting holes. Confirm that your chosen racking system has adjustable rails to accommodate any variations within an expected tolerance. If you’re unsure about on-roof fit, consult with a professional installer who can run a quick mock layout using your roof measurements. In the end, the most important guidance is to start with accurate dimensions and work backward to electrical specifications like wattage and efficiency. As Solar Panel FAQ notes, a careful reading of datasheets reduces the risk of post-purchase surprises and ensures compatibility with future system upgrades.
Practical steps and planning checklist
- Gather roof measurements for usable area, orientation, and shading risks.
- List exact dimensions from datasheets of your shortlisted models.
- Verify mounting hole patterns with your chosen rails and clamps.
- Model two layouts: all60-cell, all72-cell, and a mixed-fit scenario.
- Confirm expansion options for future upgrades during the planning phase.
Representative panel footprints by cell count
| Panel Type | Approx. Dimensions | Cell Count |
|---|---|---|
| 60-cell standard | 65 x 39 inches (1650 x 990 mm) | 60 |
| 72-cell large-format | 77–78 x 39 inches (1950–1980 x 990–1000 mm) | 72 |
Frequently Asked Questions
What are the most common dimensions for today’s solar panels?
Most panels today follow two main footprints: about 65 inches by 39 inches for 60‑cell modules and about 77–78 inches by 39 inches for 72‑cell modules. Exact numbers vary by model, so always check the datasheet. The difference in footprint is the primary dimensional consideration for layout.
Most panels today come in two common footprints: roughly 65 by 39 inches for 60-cell and about 77 to 78 by 39 inches for 72-cell modules.
Do panel dimensions affect energy production?
Dimensions influence the total area available for light capture, which can affect total watts in a given layout. Individual panel efficiency and cell count determine watts per panel, not the footprint alone. Larger panels often yield more watts, but layout and shade losses are crucial to overall production.
Bigger panels usually yield more watts, but layout and shading matter as much as size.
How should I measure for a roof installation?
Start with usable roof area, measure length and width of potential rows, and mark setbacks for ventilation and penetrations. Use a grid to estimate how many panels of each footprint fit and model shading at peak sun. Validate with datasheets before buying.
Measure your roof area, factor setbacks, and model shading to choose the right footprint.
Are there non-standard panel dimensions I should expect?
Yes, some roofs may require non-standard footprints or mounting patterns. When encountered, obtain exact outside dimensions, thickness, and hole spacing, and confirm rail compatibility with your racking system. The best approach is to compare datasheets across models.
Non-standard sizes exist; verify exact measurements and rail compatibility.
Will choosing smaller dimensions affect warranty or performance?
Footprint choice typically does not affect the panel warranty. Warranty is more closely tied to module quality, degradation, and installation conditions. Always review the warranty terms for the specific model you select.
Smaller footprint usually won’t hurt the warranty; focus on model quality and installation.
How do mounting rails fit with different panel sizes?
Rail systems come in configurations that cover common footprints; some rails are adjustable to accommodate variations within manufacturer tolerances. Confirm rail length, end clamps, and attachment points using the datasheet and your installer’s recommendations.
Make sure rails match the module footprint and mounting hole pattern.
“Panel dimensions are not just about size; they determine installation feasibility, mounting hardware compatibility, and layout efficiency when combined with roof space.”
Top Takeaways
- Always verify datasheet before purchase.
- 60-cell and 72-cell footprints differ in length by roughly a foot.
- Measure roof space and plan clearances for installation.
- Consider mounting hardware compatibility with panel footprint.
- Non-standard sizes are for fit, not performance.