Where to Install Solar Panels: A Practical Homeowner's Guide
Discover where to install solar panels for maximum efficiency. Compare roof and ground mounts, assess orientation, shading, and structure, and plan a safe, code-compliant installation.

You’ll learn a step-by-step approach to deciding where to install solar panels: evaluate roof orientation and shading, verify structural support, and compare roof-mounted vs ground-mounted options. We’ll cover roof types, mounting choices, and safety and permit considerations to help homeowners maximize energy production and minimize installation risks. This quick guide also flags common pitfalls and dependencies like trees and local codes.
Why location matters for solar panels
Location is the single most influential factor in how much energy your solar system will generate over its lifetime. The goal is to maximize sun exposure while minimizing losses from shade, orientation, and equipment constraints. In practice, the decision of where to install solar panel involves assessing roof condition, structural support, weather exposure, and local regulations. As you evaluate options, keep in mind how the chosen spot will perform across seasons and weather events. According to Solar Panel FAQ, homeowners who carefully map sun paths, shade intervals, and mounting options tend to achieve higher production and longer system life. The keyword here is placement: the right spot reduces losses from partial shading, hot spots, and mismatched modules. A thoughtful site selection helps you unlock the system’s full potential and protects your investment in solar energy.
In this guide you will learn how to translate that placement knowledge into concrete choices you can act on this season, with practical checklists and clear decision criteria. If you are asking where to install solar panel on your home, this section will outline the core considerations and how to balance aesthetics, safety, and performance for a durable, code-compliant installation.
Key site options: roof, ground, and hybrid mounts
Most homes start by considering roof-mounted solar panels as the default option because they leverage the existing structure and can minimize land use. Roof mounting requires evaluating roof type, pitch, and condition, as well as the orientation that yields the best sun exposure for your hemisphere. Ground-mounted systems offer a flexible layout, easier maintenance, and potentially better shade control, but they require sufficient land area, a sturdy foundation, and often more perimeter fencing or setback rules. Hybrid approaches combine roof racks with ground racks to accommodate oversized systems or space constraints. When deciding where to install solar panel, compare installation complexity, allowable setbacks, permitting requirements, and future roof changes. This section guides you through a side-by-side assessment and helps you map out a preferred plan based on your site, climate, and budget.
Roof orientation and tilt fundamentals
Orientation and tilt determine how much sun your panels capture throughout the day and year. In the Northern Hemisphere, a south-facing orientation typically yields the highest annual production, while the tilt angle should align with your latitude to balance winter and summer sun. If your roof has limited south exposure due to dormers, chimneys, or shade, you may compensate with a slightly adjusted tilt or by adding alternating rows to reduce shading impact. East- or west-facing roofs can still perform well, especially with tracking systems or optimized module spacing, but they require careful layout planning to avoid daytime efficiency losses. When evaluating where to install solar panel, model sun angles for typical days in your location and compare projected output across options.
Tools & Materials
- Safety gear (helmet, gloves, non-slip shoes)(Essential for any roof or ground work.)
- Ladder with roof access anchoring(Stable, weather-rated ladder plus roof anchors.)
- Fall protection: harness and lanyard(Required for any elevated work per safety standards.)
- Roof anchors and mounting rails(Match with roof type (shingle, tile, metal).)
- Torque wrench and socket set(Accurate fastener torque to prevent leaks and movement.)
- Drill with appropriate bits(For mounting hardware and sealant applications.)
- Measuring tape and angle finder(Precise layout to optimize spacing and tilt.)
- Sealant or flashing kit(Waterproof sealing around penetrations.)
- Ground-mount hardware (if applicable)(Post anchors, rails, and ballast as needed.)
- Electrical tools: multimeter, wire cutters, stripper(For safe wiring and circuit verification.)
- Mounting hardware: rails, clamps, brackets(Appropriate for your panel type and roof material.)
- Grounding equipment and PPE(Electrical safety compliance and insulation.)
Steps
Estimated time: 2-3 days
- 1
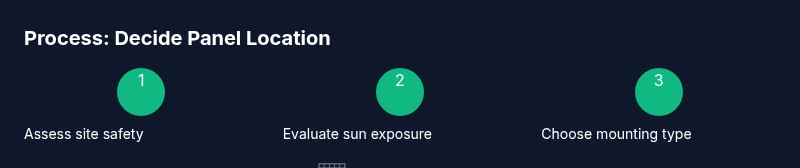
Assess the site and safety readiness
Conduct a visual inspection of the roof and surrounding area. Check for loose shingles, sagging rafters, or signs of water damage. Confirm access routes and ensure you have the proper fall protection equipment before climbing. This initial assessment helps determine whether you can safely proceed with installation in that location.
Tip: Document any roof weaknesses and plan to address safety issues before you install. - 2
Analyze sun exposure and shading
Map sun path across seasons using a sun chart or mobile app. Identify sources of shading such as trees, chimneys, or neighbor structures. If shading is likely during peak production hours, you may need to trim trees or relocate panels to a less shaded area. This step narrows down the best mounting zone on the roof or yard.
Tip: Track shading for at least one full sun cycle (seasonal changes matter). - 3
Decide between roof vs ground mounting
Weigh the pros and cons of roof-mounted versus ground-mounted systems based on space, aesthetics, maintenance, and future roof changes. If you anticipate roof work or replacements, a ground mount might offer easier future upgrades. For sloped or tile roofs, a hybrid approach may make practical sense.
Tip: Consider future home improvements when choosing mounting type. - 4
Evaluate roof type and structural compatibility
Identify roof material (shingle, tile, metal) and verify roof structure supports solar loads. For tile roofs, special mounting solutions are often required to avoid cracking. For flat roofs, ensure a stable substructure to maintain panel angles and drainage.
Tip: Consult a structural professional if you’re unsure about load capacity. - 5
Check local codes, permits, and HOA rules
Research permitting requirements for electrical and building work in your area. Some HOAs restrict rooftop installations or require separations from property lines. Having documentation ready in advance prevents delays. Always plan for inspections and compliance with energy codes.
Tip: Contact your local building department early to avoid last-minute issues. - 6
Plan layout and spacing for wiring routes
Sketch a layout that minimizes cable runs and avoids crossing walkways or windows. Ensure panel spacing allows heat dissipation and future expansion. Decide on string configuration and where inverters and disconnects will be installed.
Tip: Label wires clearly to simplify future maintenance. - 7
Prepare mounting and fastening plan
Choose mounting hardware suited to your roof type and climate. Apply flashing and sealant to prevent leaks. Preassemble rails and clamps at ground level to speed up installation on the roof.
Tip: Double-check alignment before lifting panels onto the roof. - 8
Install modules and wiring
Mount the rails, attach the panels, and connect wiring routes to protect from weather and pests. Use proper torque settings and weatherproof connectors. Verify polarity and continuity as you go.
Tip: Keep conductors organized with cable clips or raceways. - 9
System test, grounding, and final checks
Perform a full electrical test, confirm grounding, and ensure all safety clearances are met. Inspect flashing, sealant, and mounting integrity. Schedule a professional inspection if required by local codes.
Tip: Do a final check after a rain to ensure no leaks were created.
Frequently Asked Questions
What is the best location for solar panels on a typical home?
In most cases, a south-facing roof with minimal shade delivers the highest annual production. If that isn’t available, east or west orientations can work with careful layout to reduce shading losses. Always account for seasonal sun paths and local climate when deciding.
The best location is usually a south-facing roof with little shade; other orientations can work with proper planning.
Can I install solar panels on a flat roof?
Yes. Flat roofs are common for ground and rooftop mounting. You’ll tilt the panels to optimize sun exposure and use ballast or pedestals to secure them. Ensure proper drainage and flashing to prevent leaks.
Yes, flat roofs can work with the right tilt and mounting system.
Is a ground-mounted system better than a roof-mounted one?
Ground-mounted systems offer flexible layout and easier access for maintenance but require more land and space planning, plus fencing or setbacks in some areas. Roof mounts save land but rely on roof condition and orientation. The best choice depends on site conditions and your goals.
Ground mounts are flexible but need space; roof mounts save land but depend on your roof.
Do trees affect solar panel performance?
Yes. Trees can cast shading that reduces output. Pruning or removing shading sources, or choosing mounting locations with minimal shade, can significantly improve performance.
Yes, tree shade lowers production; manage shading to protect efficiency.
How do I know if my roof has enough structural support?
A professional assessment is essential. An engineer or qualified installer will check rafters, trusses, and deck integrity to ensure they can safely support solar equipment.
Have a qualified pro assess the roof structure before install.
What permits are usually required for solar installation?
Most installations require local electrical and building permits. Codes vary by location, so contact your building department early and plan for an inspection after installation.
Usually you’ll need electrical and building permits; check with local authorities.
Watch Video
Top Takeaways
- Choose roof or ground mounting based on space and shade
- Prioritize south-facing orientation and minimal shading for best output
- Ensure structural support and permits before installation
- Plan for future expansion and maintenance from day one
- Use proper safety gear and follow local codes