How to Put Solar Panel on Roof: A Complete Step-by-Step Guide
A comprehensive, safety-first guide for homeowners to install rooftop solar panels, covering planning, mounting, wiring, weatherproofing, and inspection to ensure a durable, code-compliant system.

Goal: Learn how to install a solar panel on your roof safely and effectively. This guide covers site assessment, mounting selection, securing panels, wiring routes, and final inspection. Essential items include a ladder, harness, mounting kit, weatherproof conduit, sealant, and basic electrical tools. We also discuss permits, warranties, and common pitfalls to help you succeed.
Why roof mounting matters
Roof-mounted solar panels are a practical way to maximize sun exposure while keeping installation clean and centralized. According to Solar Panel FAQ, rooftop installations require careful planning, attention to roof integrity, and strict adherence to local building codes. The mounting method must account for roof type (shingle, tile, metal), wind loads, and weight distribution to prevent leaks or structural damage. If mismanaged, water intrusion, panel misalignment, and accelerated wear are risks. The goals are secure attachment, waterproof penetrations, and accessible maintenance. In this section, we explore how structural factors, roof orientation, and climate influence the mounting approach. We also outline common roof types, typical flashing needs, and how to avoid pitfalls like improper sealant or poorly aligned rails.
Planning your rooftop layout and permits
Effective rooftop installation starts with careful planning. Conduct a site survey to map roof dimensions, identify strongest mounting points (preferably over rafters), and assess shading throughout the day. Analyze panel orientation for optimal sun exposure, with tilt informed by latitude and module design. Simultaneously, verify permit requirements with your local building department and utility for interconnection rights. HOA rules, if applicable, should also be checked. Create a simple schematic showing panel positions, wiring routes, and access paths for maintenance. Documenting these decisions early saves time and reduces the chance of rework later in the project.
Choosing mounting hardware and wiring paths
Select a mounting system compatible with your roof type and local climate. Rail-based racks offer flexibility for adjustments, while tile roofs may require specialized flashing and standoff brackets to avoid penetrating the roofing surface excessively. Plan wiring routes that follow existing attic or crawlspace access, minimize exposure to the elements, and keep conductors away from sharp edges. Use weatherproof conduit where wiring traverses exterior walls, and ensure modules are wired in strings sized to your inverter input. Always consider warranty terms for selected hardware and the roof surfaces involved.
Safety first: fall protection and work area setup
Safety cannot be optional. Before you begin, establish fall protection: wear a harness attached to an approved roof anchor, use a sturdy ladder with stabilizers, and never work alone. Check weather conditions; avoid rain, strong winds, or icy surfaces. Clear the work area of debris and maintain three points of contact when climbing. Keep tools tethered to prevent them from falling. A clear, well-lit project zone reduces the risk of mistakes and injuries.
Installing rails or brackets on the roof
Begin by marking drilling points (aligned with rafters for strength) and applying appropriate sealant at each penetration. Install brackets or rails with manufacturer-supplied fasteners, ensuring they sit flush and square. Use a level to verify alignment along the eave line and maintain consistent spacing between supports. After mounting, recheck all fasteners for snugness. Proper flashing and sealant around every penetration prevent leaks and extend roof life. Take photos during setup for future maintenance records.
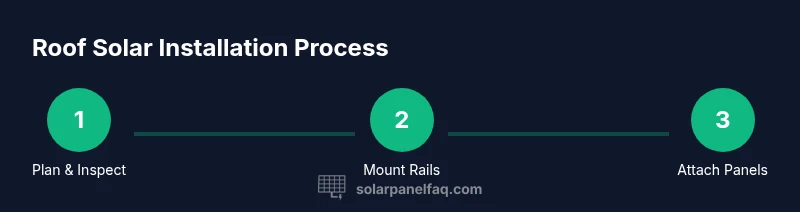
Attaching solar panels to rails and securing modules
Place panels on the rails with gentle handling to avoid frame damage. Attach each panel with clamps or bolts per the mounting kit instructions, keeping a uniform gap between modules for thermal expansion. Tighten hardware to the recommended torque using a calibrated tool. Ensure panel orientation maximizes sun exposure and avoids undue shading. Consider anti-theft measures for outdoor installations if you live in high-risk areas. Inspect each connection visually and by gently wiggling the panel to confirm a solid fit.
Wiring, DC safety, and inverter connection
Route DC cables along rails or through conduits to a combiner box or disconnect as required by code. Keep conductors protected from the elements and away from high-traffic regions. Ground the array per local electrical code and use appropriate overcurrent protection. Do not connect to the utility grid until you have obtained interconnection approval and completed all required safety tests. A licensed electrician should handle high-voltage and service disconnect tasks to ensure code compliance and safety.
Weatherproofing, testing, and final inspection
Seal all penetrations with roof-specific sealants and flashing accessories suitable for your roof material. After installation, test electrical continuity, insulation resistance, and module performance under sun exposure. Verify that no penetrations cause leaks and that drainage remains unobstructed. Compile as-built documentation, including panel serials, wiring diagrams, and warranty details. Schedule inspections with local authorities or the utility as required. Proper documentation helps with warranties and future resale.
Documentation and maintenance planning
Maintain a simple maintenance log: note panel cleaning intervals, visual inspections, and any anomalies. Plan periodic checks for corrosion, loose fittings, and shading changes from growing trees or debris. Keep a copy of permits, warranty certificates, and interconnection agreements in a dedicated folder. Regular reviews with a licensed installer or Solar Panel FAQ can help ensure ongoing safety and optimal performance.
Tools & Materials
- Ladder with stabilizers(Rated for height and with non-slip feet; stable base)
- Safety harness and roof anchors(Full-body harness; anchor points securely installed)
- Roof mounting rails/brackets(Compatibility with roof type; include flashing for tiles)
- Solar panels(As specified for system size and mounting layout)
- Conduit, weatherproof junction box(Outdoor-rated components; correct gauge)
- Roof sealant compatible with roof type(Flashing sealant with suitable roof material)
- Screwdriver set and drill(Phillips and flathead; cordless preferred)
- Torque wrench or torque screwdriver(Manufacturer-specified torque values)
- Wrench set and alignment tools(Ensure rails are square and level)
- Electrical safety gear (gloves, goggles)(Insulated gloves for DC work)
Steps
Estimated time: 4-8 hours
- 1
Plan and inspect the roof
Survey roof health, confirm rafter locations, assess shading, and verify permit requirements. Create a rough layout showing panel positions and wire paths. This step reduces rework and ensures structural integrity.
Tip: Get a second pair of eyes on the plan; a coworker or contractor can spot issues you missed. - 2
Select mounting system
Choose between rail-based, tile-compatible, or non-penetrating options based on roof type and climate. Ensure compatibility with the inverter and electrical layout.
Tip: Check wind load ratings and compatibility with your roof material before purchase. - 3
Prepare safety setup
Set up fall protection, hoist gear, and work zone signage. Verify weather conditions and ensure a co-worker is available to assist.
Tip: Never work alone; keep a rescue plan ready in case of a fall. - 4
Mount rails/brackets
Secure rails or brackets to rafters using appropriate fasteners. Seal penetrations with flashing and roof-rated sealant to prevent leaks.
Tip: Use a level to keep rails straight and evenly spaced. - 5
Attach panels to rails
Place panels on rails, attach with clamps or bolts per the kit instructions, and tighten to the specified torque. Leave even gaps for expansion.
Tip: Handle panels by the frame to avoid edge damage. - 6
Route wiring and connect
Run DC cables through conduits, attach to combiner or disconnect, and bond to the system per code. Keep conductors protected and dry.
Tip: Have a licensed electrician review the interconnection plan before energizing. - 7
Seal penetrations and test
Apply sealant around all penetrations, perform safety tests (continuity, insulation), and confirm no leaks. Document as-built details.
Tip: Document everything with photos for future maintenance and warranty claims.
Frequently Asked Questions
Do I need a permit to install solar panels on my roof?
Most installations require permits for structural work and electrical connections. Check with your local building department and utility before starting.
Most homeowners will need permits for roof work and electrical connections; verify with your local authority.
Is it safe to install solar panels myself?
Roof work and electrical connections can be hazardous. DIY is possible for experienced homeowners with the right safety gear, but many projects should involve a licensed installer.
Roof work and wiring can be dangerous; consider hiring a pro if you're not experienced.
How do I choose mounting hardware for my roof type?
Select mounting hardware compatible with your roof (shingle, tile, metal) and wind conditions. For tile roofs, use flashing and standoffs to avoid leaking.
Pick hardware that fits your roof and climate; flashing is key for tiles.
What maintenance is required after installation?
Regularly inspect for loose fittings, corrosion, and shading changes. Clean panels as needed and keep drainage paths clear.
Inspect fittings, keep panels clean, and monitor shading and drainage.
Can I connect to the grid immediately after mounting?
No. Interconnection requires approval and a proper safety test. Do not energize the system until permitted.
Don’t energize until you have interconnection approval.
What affects the roof warranty after mounting?
Drilling or penetrations can affect warranty. Review manufacturer and roof warranty terms before installation.
Check warranty terms; penetrations can void roof warranties.
Watch Video
Top Takeaways
- Plan thoroughly, including permits and roof type.
- Choose the right mounting hardware for your roof.
- Prioritize safety and waterproofing at every penetration.
- Coordinate with a licensed electrician for interconnection.
- Keep detailed documentation for warranties and future resale.