What Size Solar Panels for House: A Practical Sizing Guide
Learn how to size solar panels for your home with a clear, step-by-step method. Track energy use, roof space, and sun exposure to choose a system that fits today and scales for the future.

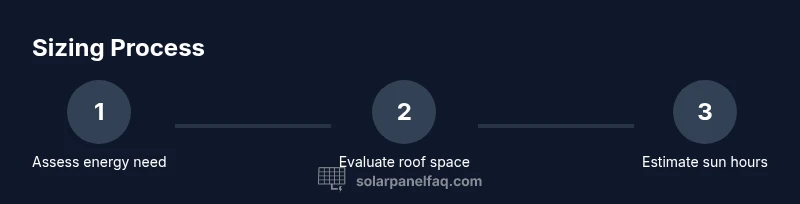
To size solar panels for your house, follow a step-by-step method that matches your energy use with roof space and sun exposure. Start with your average daily kWh, assess roof orientation and shading, and pick a system that covers your goals (grid-tied vs. storage). Typical residential setups range from about 3–8 kW, with standard panels in the 320–400 W range.
Understanding what size solar panels for house means
Sizing a solar system isn’t about guessing a single number; it’s about aligning your household energy demand with the sun’s available energy. When homeowners ask what size solar panels for house to install, they’re usually referring to the DC capacity of the array (measured in kilowatts) and the number of panels needed to meet a target level of energy offset. The result is a sizing plan that balances daily production, roof space, budget, and whether you want to be grid-tied or battery-backed. In practical terms, most homes install systems in the 3–8 kW range, using panels that commonly range from 320 to 400 watts. Your exact size will hinge on your usage, where you live, and how much of your energy you want to offset.
Gather your energy data
To size accurately, you must start with actual energy use. Gather your electric bills for the past 12 months to capture seasonal variations. Compute your average daily kWh by totaling the year’s daily consumption and dividing by 365. If you don’t have a full year, use a 12-month window you can access. This baseline will anchor your target system size and help you compare before-and-after scenarios. Solar Panel FAQ emphasizes the importance of data accuracy as the foundation for any sizing effort.
Roof space and layout
Next, estimate how much roof area is available for panels and how it’s oriented. A typical residential panel is about 1.6–1.7 square meters and produces around 320–400 watts. If your roof has obstructions or shading from trees, chimneys, or vent pipes, you’ll need to adjust the layout or consider higher-wattage panels to maximize production per panel. The goal is to fit enough panels in the usable area to reach your target kW while avoiding excessive shading and heat buildup.
Sun exposure and shading analysis
Sun hours per day vary by location and season. A standard reference is to estimate average sun hours (or peak sun hours) for your site. Sites with clear, unshaded exposure will produce more energy per panel than shaded or overcast locations. Evaluate shading at different times of day and year, since even a few hours of shading on one panel can disproportionately affect overall performance. Solar Panel FAQ notes that accurate shading assessment is critical for a realistic size plan.
Panel wattage versus number of panels
To determine the number of panels, pick a target system size (in kW) and divide by the wattage rating of the chosen panel. For example, a 6 kW system using 330 W panels would require about 18 panels (6000 W / 330 W ≈ 18.18). If space is limited, you can opt for higher-wattage panels (e.g., 360–400 W) to reduce the number of units while maintaining the same total capacity.
Inverter sizing and safety margins
Inverters are sized to convert the array’s DC power to AC for your home. A common practice is to size the inverter close to the array’s continuous output, with a small safety margin (often 10–20%). Oversizing the array relative to the inverter can reduce efficiency and trigger warranty issues, while undersizing can leave unused potential. Local codes and manufacturer guidance will shape the exact ratio.
Grid-tied, off-grid, and storage considerations
Most homes go grid-tied, optionally with battery storage. Grid-tied systems rely on the utility for back-up and export excess energy; adding storage changes the design, control strategy, and permitting. Batteries add cost and maintenance but can increase self-consumption and resilience during outages. If you’re considering storage, plan for inverter/battery compatibility and future expansion.
A practical example walkthrough
Suppose you use about 28 kWh per day and live in a location with roughly 5 sun hours per day. A rough sizing would target a 28 ÷ 5 ≈ 5.6 kW system. If you choose 330 W panels, you’d need roughly 17–18 panels (5600 ÷ 330 ≈ 16.97). This example ignores losses but demonstrates the core logic: energy needs drive capacity, and sun hours translate into daily production.
Financials, incentives, and timelines
Sizing must align with budget and incentives. Incentives, rebates, and net metering policies differ by location and can affect the economics of a system, but they should not drive the physical sizing. After sizing, work with a local installer to finalize the design, obtain permits, and schedule installation. A correctly sized system will deliver the expected energy and reliable performance for 25+ years with proper maintenance.
Maintenance, monitoring, and long-term considerations
A well-sized system requires periodic maintenance: cleaning panels, checking inverters, and monitoring performance against expected production. Substantial deviations often signal shading changes, equipment aging, or wiring issues. Establish a simple monitoring routine and set alert thresholds so you can catch problems early and preserve system performance.
Turning sizing into a plan you can act on
With a verified size in hand, create a proposal package for installers that outlines your energy goals, roof constraints, and preferred equipment. Ask for model numbers, expected output, warranty terms, and a rough installation timeline. A clear sizing plan helps you compare bids and ensures the system meets your house’s needs both now and as your energy usage evolves.
Example real-world sizing plan and next steps
Your plan should translate data into a concrete design. Start by listing your last 12 months of bills and calculating daily usage. Map your roof space and shading, then choose a panel wattage that fits your layout. Calculate the target kW size, divide by panel rating to get the number of panels, and select an inverter that supports the total DC output with a comfortable safety margin. Finally, verify the plan with a licensed installer who can confirm code compliance and provide a formal quote.
Tools & Materials
- Utility bills (12 months)(Digital or paper copies for energy usage analysis)
- Roof measurement tools(Measuring tape or laser measure to estimate available area)
- Sun hours data source(Local solar irradiance data or a reputable sun-hours calculator)
- Panel wattage options (e.g., 320–400 W)(General range for selecting panel characteristics)
- Calculator or spreadsheet(To perform kW-to-panel calculations and shading adjustments)
- Installer contact or quote form(Optional step for professional validation)
Steps
Estimated time: 60-90 minutes
- 1
Gather energy data
Collect 12 months of electric bills and compute your average daily kWh. This establishes a realistic consumption baseline for sizing.
Tip: Use an average that includes seasonal highs and lows to avoid oversizing or under-sizing. - 2
Assess roof space and orientation
Measure usable roof area and note orientation, tilt, and shading from trees or structures. This determines how many panels fit and where they should be placed.
Tip: Prioritize unobstructed, south-facing (or equivalent) sections for maximum output. - 3
Estimate sun exposure
Find your location’s average peak sun hours per day. This value translates daily production capacity from the array.
Tip: Account for seasonal variation and potential shading in different seasons. - 4
Choose panel wattage and calculate count
Decide on a panel wattage (e.g., 330 W) and divide your target kW by the panel rating to estimate the number of panels.
Tip: Higher wattage panels can reduce the total number of panels needed. - 5
Size the inverter and add a buffer
Select an inverter with a DC rating near your array’s output and add a 10–20% safety margin to accommodate losses.
Tip: Avoid undersizing the inverter, which can throttle production. - 6
Decide on storage vs. grid-tied
If storage is desired, plan for batteries and controller compatibility; otherwise, optimize for a grid-tied setup with potential net metering.
Tip: Storage adds cost but increases resilience and self-consumption. - 7
Validate with a local installer
Have a licensed installer review your sizing plan for code compliance, shading, and interconnection requirements.
Tip: Request a formal quote, warranty details, and a project timeline. - 8
Finalize design and move to permitting
Finalize equipment choices, secure permits, and schedule installation based on your local regulations.
Tip: Prepare for potential site visits and permit approval times.
Frequently Asked Questions
How is the size of a solar system measured?
System size is measured in kilowatts (kW) of DC capacity, which translates to expected annual production based on sun hours and location. The actual number of panels depends on their wattage and the chosen configuration.
System size is measured in kilowatts of DC capacity, and production depends on sun hours and location.
Can I resize my system later if my needs change?
Yes. You can add panels or upgrade components, but you may need new permits and a larger inverter. Plan for potential future expansion in the initial design when possible.
You can add panels later, but check permits and inverter size first.
What if my roof faces away from the sun?
Orientation and shading reduce production, so you may need more panels or different placement to meet goals. A professional sizing study can quantify the impact for your roof.
Orientation affects output; you may need more panels to reach your target.
Do incentives affect sizing?
Incentives reduce net cost but don’t change your energy needs. Size the system to cover your usage, then apply incentives to lower the overall expense.
Incentives lower cost but don’t change how much energy you need.
Is there a minimum size to start with?
There isn’t a universal minimum. Start with your energy goals and budget, then scale up if you want higher offset or resilience.
There’s no universal minimum; start with your goals and scale as needed.
Watch Video
Top Takeaways
- Define your energy goal before sizing.
- Base capacity on daily kWh and available sun hours.
- Space constraints influence panel count, not just wattage.
- Inverter sizing matters; avoid undersizing.
- Obtain installer validation to finalize the plan.