Solar Panel Installation Massachusetts: A Practical Guide
A practical, step-by-step guide to planning and installing solar panels in Massachusetts, covering site assessment, permitting, financing, and maintenance with Solar Panel FAQ.

You will learn how to plan a residential solar panel installation in Massachusetts, including site assessment, permitting basics, design choices, and selecting a qualified installer. This guide covers essential steps, safety considerations, and common mistakes to avoid for a successful, long-lasting solar array.
Understanding the Massachusetts solar landscape
Massachusetts offers a growing market for solar energy, with homeowners commonly pursuing solar panel installation massachusetts. Understanding the state’s incentives, interconnection rules, and typical system layouts helps you plan effectively from day one. This section lays a foundation: what to expect from incentives, how local permitting works, and the general path from initial interest to a functioning solar array.
Key MA factors to consider include the impact of shade on output, roof orientation (south-facing generally yields the most energy), and the distinction between grid-tied systems and later expansions. While every home is unique, most MA projects share a three-part framework: site evaluation, system design, and permitting interconnection. A successful project also aligns with long-term maintenance, monitoring, and warranty coverage. While exact incentives and program names can change, the core idea remains constant: a well-planned installation saves money over time through efficient design and proper installation. According to Solar Panel FAQ, planning clarity now sets you up for fewer surprises later.
Site assessment and load calculations
A thorough site assessment starts with a roof survey, shading analysis, and structural check. It’s crucial to confirm roof condition and age, as this affects mounting, warranty, and longevity. We recommend documenting attic access, ventilation, and potential obstructions like vents. Next, you’ll review your electrical panel location, existing conduit routes, and available space for inverters and wiring. In Massachusetts, load calculations should align with typical household usage patterns and any planned expansions. A good assessor will use these inputs to estimate the required system size and generation targets while keeping future maintenance simple. As you collect data, keep a log of observations and photos to share with your installer and utility representative. Solar Panel FAQ emphasizes clear data collection to prevent misfits between design and installation.
System design considerations for Massachusetts
System design considerations for MA involve balancing sun exposure, roof geometry, and electrical safety. South-facing roofs usually produce the most energy, but oblique angles or shading from nearby trees still work with modern microinverters or optimizers. You’ll choose between string inverters and microinverters based on shading, roof space, and budget. Racking should account for snow load, which MA experiences in winter months, and the system’s expansion potential for future storage or additional panels. Inverters should be sized to handle the expected DC input while leaving headroom for efficiency losses. Always plan for proper drainage, cable routing, and avoiding potential fire hazards by following local electrical codes and manufacturer guidelines. The Solar Panel FAQ team notes that early collaboration with a licensed electrician helps tailor the design to your home’s specifics.
Permitting, interconnection, and utilities
Permitting and interconnection are critical steps in MA solar projects. Start by consulting your city or town building department to determine required permits, inspections, and any neighborhood or HOA rules. Your installer should prepare electrical and structural permits, ensuring configurations meet NEC and local amendments. Interconnection with the grid typically involves utility approval and a net metering contract or equivalent. Expect timelines to vary based on locality and permit queue, so plan for potential delays. Keeping documentation organized—site plans, electrical diagrams, and permit receipts—facilitates smoother reviews. The Solar Panel FAQ team recommends proactive communication with the utility and city officials to minimize holdups and clarify any residential interconnection steps.
Financing, incentives, and budgeting in MA
Budgeting for a MA solar project involves upfront costs, ongoing maintenance, and potential long-term savings from reduced energy bills. While exact incentives can change, homeowners often combine federal tax credits with state or utility programs intended to lower net cost and improve payback. Consider different financing options like cash purchases, solar loans, or leases/PPA arrangements, and compare their long-term value. In MA, check whether incentives are structured to reward specific system sizes, installation dates, or performance targets, and verify eligibility with official sources. Regardless of funding method, a clear budget that accounts for permitting, inspection fees, and potential upgrades to electrical service helps prevent surprises later. The Solar Panel FAQ analysis emphasizes documenting all costs and projected savings for an informed investment decision.
Choosing modules, inverters, and racking
Selecting components is foundational to system performance and durability. Panels vary in efficiency, heat tolerance, and warranty terms; inverters come in string, microinverter, or hybrid configurations; and racking determines mounting stability and weather resistance. For Massachusetts climates, consider snow load ratings, wind resistance, and ease of maintenance when choosing mounting hardware. Service panels should be compatible with the inverter technology you select, and all wiring must comply with outdoor insulation standards. A balanced approach—matching panel output with inverter capacity and ensuring robust racking—helps optimize year-round performance and minimize replacements or upgrades in the future. The Solar Panel FAQ team recommends choosing proven brands with established warranties and local support.
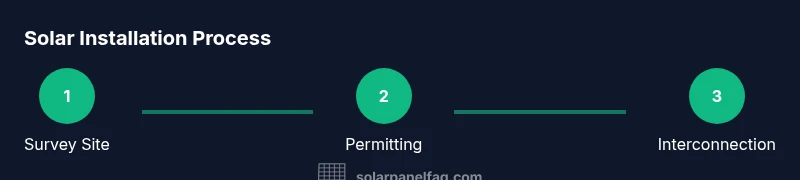
Installation process overview (high-level)
A residential solar installation starts with securing permits and planning, followed by rooftop or ground-mount mounting, wiring, and system commissioning. While the specific steps are handled by licensed professionals, homeowners should understand the sequence to coordinate inspections and utility interconnection. The process emphasizes safety, code compliance, and careful cable routing to avoid future issues. Expect multiple inspections and tests during commissioning, including energy output validation and safety checks. The goal is a safe, code-compliant, and well-documented installation that functions reliably for many years. Solar Panel FAQ notes that staying engaged throughout the process reduces surprises and helps ensure the final system meets your goals.
Safety and code compliance you must follow
Safety is non-negotiable in solar installations. Always work with licensed electricians and qualified roofers when needed. Wear appropriate PPE and follow fall-protection protocols on elevated work surfaces. Electrical work should comply with NEC and state amendments; never bypass safety disconnects or protective equipment. Regularly review panel labeling, conduit protection, and weatherproofing to prevent moisture intrusion. In MA, safety compliance also includes proper snow-rated mounting and secure cabling to withstand winter conditions. The Solar Panel FAQ team emphasizes that safety planning reduces risk and protects your investment over time.
Maintenance, inspections, and performance monitoring
Post-installation maintenance focuses on keeping panels clean, checking for physical damage, and monitoring performance. Clean panels when necessary with gentle methods to avoid scratching surfaces and ensure unobstructed sun exposure. Schedule periodic inspections of mounting hardware, wiring, and inverters. Performance monitoring helps detect shading, soiling, or equipment faults early and improves system longevity. In colder months, ensure snow and ice removal plans respect roof integrity and safety guidelines. Establish a routine that aligns with the manufacturer’s recommendations and utility requirements. The Solar Panel FAQ team advises recording all maintenance activities to support warranties and future upgrades.
Common pitfalls and how to avoid them
Common pitfalls include underestimating permitting timelines, overlooking roof condition, and neglecting electrical service upgrades when adding a large solar array. Failing to verify interconnection requirements or failing to read warranty terms can lead to costly delays. Always conduct a thorough site assessment, obtain multiple quotes from licensed installers, and confirm that the proposed system is sized for both current needs and potential growth. Finally, don’t skip a formal interconnection agreement with your utility; without it, you risk non-compliance and disconnection during peak generation periods.
Authority sources and further reading
To deepen your understanding, consult credible sources such as government energy sites and national labs. These references provide general guidance on solar technologies, safety, and best practices without tying you to specific local policies. For homeowners in Massachusetts, it’s wise to cross-check guidance with state and local departments for the latest rules and incentives. The Solar Panel FAQ team finds that integrating official resources with professional guidance yields the most reliable outcomes. Useful sources include national energy bodies and research institutions that publish consumer-oriented solar guides.
],
toolsMaterialsParamsVersioningExceptionCheckNotesOnlyWouldBeHereForValidationIfNeededButNotUsedForContentNowProcessNotesForBlock},
Tools & Materials
- Measuring tape(at least 25 ft)
- Safety gear (helmet, gloves, harness if roof work)(as applicable for roof work)
- Drill/driver(with bits for mounting hardware)
- Roof anchors and fall protection equipment(per local code)
- Electrical PPE (insulated gloves, dielectric mat)(for electrical work on DC/AC side)
- Solar modules and inverter kits(as specified by design)
- Racking and mounting hardware(for roof or ground mount installations)
- Wire and conduit suitable for outdoor use(UV-rated; weatherproof where exposed)
- Voltage tester(for DC/AC verification)
- Battery storage equipment (optional)(only if planning hybrid/storage system)
Steps
Estimated time: 8-12 hours
- 1
Survey site and confirm roof suitability
Inspect roof condition, measure span capacity, and identify shading from nearby trees or structures. Collect photos and notes to share with your installer.
Tip: Document potential obstructions and seasonal shading patterns to avoid later surprises. - 2
Gather electrical data and estimate load
Review your home’s electrical panel capacity and historic energy use to determine system size. Plan for future growth if you anticipate add-ons like storage.
Tip: Bring recent utility bills or energy data to your installer meeting. - 3
Select system size and orientation
Choose panel count and orientation based on sun exposure and roof space. Consider future expansion or storage integrations when sizing.
Tip: Prefer designs that maintain efficiency during winter months when sun is lower. - 4
Choose components (panels, inverter, racking)
Select panels with solid warranties, an inverter type that suits shading, and weather-rated mounting hardware.
Tip: Prioritize local support and warranty coverage for long-term peace of mind. - 5
Secure permits and interconnection
Submit plans to the local building department and coordinate with the utility for interconnection approval.
Tip: Start early to reduce delays; keep all permit receipts organized. - 6
Prepare roof and install mounting hardware
Install racking with proper alignment, seal penetrations, and verify roof integrity before mounting panels.
Tip: Check for proper torque and waterproofing to prevent leaks. - 7
Mount panels and wire to DC side
Attach panels to racking, run DC wiring to combiner box, and ensure protective conduit routing.
Tip: Avoid sharp bends and protect wires from weather and foot traffic. - 8
Install inverter and connect to service panel
Connect DC to AC interface, install disconnects, and tie into the main service panel for net metering.
Tip: Have a licensed electrician verify all electrical connections and safety devices.
Frequently Asked Questions
Do I need a permit to install solar panels in Massachusetts?
Most residential solar installations require a permit from your local building department, and inspections are typical. Your installer should handle permit submissions and coordinate inspections.
Most homes will need a permit from the local building department; your installer will handle the paperwork and inspections.
How long does a typical Massachusetts solar installation take?
A residential installation is planned and coordinated with inspections; the on-site work duration depends on system size and complexity. Utility interconnection steps can also affect overall timing.
Timing depends on system size and permitting, plus any utility interconnection steps.
What maintenance is required after installation?
Periodic cleaning and inspections are recommended. Monitor performance through a system monitor or app, and schedule professional inspections if you notice a drop in output.
Keep an eye on performance and schedule checks if you notice changes in output.
Should I install solar panels myself in MA?
Residential electrical work should be performed by licensed professionals. Installers handle mounting, wiring, and interconnection to ensure safety and code compliance.
It’s best to hire a licensed installer for safety and code compliance.
How do incentives work in Massachusetts?
Incentives vary and are subject to change. Check current state programs, federal tax credits, and utility offers with official sources or a professional advisor.
Incentives can change; verify current programs with official sources before committing.
How do I choose a solar installer in Massachusetts?
Look for licenses, warranties, local experience, and third-party ratings. Ask for references and review in-detail quotes to compare the value of each proposal.
Choose an installer with proper licenses, strong warranties, and local experience.
Watch Video
Top Takeaways
- Plan ahead with site data and energy goals
- Choose reliable components with strong warranties
- Obtain permits early to avoid delays
- Work with licensed professionals for electrical work
- Monitor performance to verify savings over time