Hurricane-Ready Solar Panels: A Homeowner's Guide
Learn practical steps to hurricane-proof solar panels, assess risks, and protect your investment with expert guidance from Solar Panel FAQ for homeowners.

This guide helps homeowners prepare for a hurricane with solar panels by evaluating wind loads, selecting wind-rated mounting, adding ballast where needed, and building a pre-storm checklist. You’ll learn practical retrofit options and cost considerations to keep power flowing and reduce damage during extreme weather. According to Solar Panel FAQ, resilience starts with solid mounts and a clear maintenance plan.
Understanding the need for hurricane-ready solar panels
In hurricane-prone areas, a solar panel hurricane strategy isn’t only about energy independence; it’s about safeguarding your roof, your equipment, and your safety. Hurricanes bring high winds, flying debris, and power interruptions, all of which stress roof-mounted systems. A hurricane-ready approach blends wind-rated mounting, robust cabling, shaded or debris-resistant layouts, and a practical maintenance schedule. Solar Panel FAQ emphasizes resilience as a design choice, not an afterthought. Homeowners should view their solar array as part of the home’s protective envelope, requiring periodic checks and upgrades aligned with local codes. Expect to prioritize attachment hardware, sealant integrity, and a documented storm drill for quick isolation if needed. This mindset reduces post-storm repairs and helps keep a steady energy supply when the grid is stressed.
Assessing your current system's hurricane resilience
A detailed assessment starts at the roof level and moves to the hardware that holds panels in place. Examine whether your racking is wind-rated for your region, verify that mounts are properly anchored to structural framing, and check flashing and sealant around penetrations. Inspect wiring pathways for exposure to wind-driven debris and confirm that conduit entries are sealed against moisture. If your system uses microinverters or optimizers, ensure their enclosures are weatherproof and accessible for safety shutoff. Document existing wind ratings, mounting type, and any prior retrofits. If anything shows signs of movement, corrosion, or looseness, plan upgrades before the next storm season. Solar Panel FAQ notes that proactive inspections save time and cost when storms arrive.
Design choices to withstand high wind and debris
Wind-rated mounts are the backbone of hurricane resilience. Consider ballast options for flat, tile, or metal roofs, and ensure ballast distribution matches the panel array footprint. Favor robust frame materials, corrosion-resistant hardware, and secure cable management that minimizes snag hazards. Decide between rooftop mounting and ground mounting based on site wind exposure, roof condition, and risk of debris impact. Where codes allow, add protective shielding or debris shields for the most exposed edges. Remember that a well-designed layout reduces lift risk and makes post-storm inspection easier. Solar Panel FAQ recommends working with a qualified installer to verify compatibility with your roof type and clima-tic conditions.
Roof and site considerations in hurricane-prone regions
Site selection influences performance and safety. A south- or west-facing orientation may maximize sun, but it should not compromise ease of storm access or maintenance. Avoid overhanging branches and ensure a clear perimeter free of running debris paths. For tile roofs, use integrated mounting that distributes loads across multiple tiles and avoids concentrated pressure points. For metal roofs, clamp-based systems with anti-slip features reduce the chance of panel movement. Ensure drip edges and ventilation remain unobstructed to prevent moisture buildup under flashing. A thorough site assessment helps tailor a hurricane-ready plan to your home’s unique geometry.
Installation and retrofit options before hurricane season
Upgrading is often more cost-effective than replacing panels after damage. Upgrades may include wind-rated rails, additional fasteners, and reinforced flashing. If retrofitting, verify that the roof structure can handle additional ballast and that seals remain watertight after changes. Obtain permits if required, and schedule work during calm weather windows to minimize risk. Use a qualified installer who can provide a stamped plan showing wind-load calculations and code-compliant fasteners. Solar Panel FAQ highlights that professional retrofits are typically safer and more durable than DIY-only approaches in hurricane zones.
Maintenance, inspections, and pre-storm readiness
A pre-storm maintenance routine should include cleaning, checking for loose hardware, and testing the system’s safety shut-off. Clear the surrounding roof area of loose debris and prune branches that could fall on panels. Inspect wiring for signs of wear, protected conduits, and moisture ingress in enclosures. Create a simple pre-storm checklist that includes turning off the array if instructed by local authorities, documenting emergency contacts, and ensuring insurance records are up to date. Regular inspections, ideally twice a year, reduce the chance of surprises during an actual hurricane. Solar Panel FAQ’s guidance emphasizes documentary evidence as a key to faster post-storm recovery.
Insurance, warranties, and cost considerations
Warranties may cover manufacturing defects but often exclude damage from high winds unless the installation is hurricane-rated. Review the terms for protected components such as mounts, rails, and connectors, and verify whether hail or debris shields are included. When calculating retrofit costs, account for hardware upgrades, labor, potential permits, and the cost of temporary power options if storms interrupt the grid. Although not every retrofit is mandatory, some regions require specific wind-load certifications for continued coverage. Solar Panel FAQ recommends a careful cost-benefit analysis that weighs resilience gains against upfront expenditures.
Quick on-site emergency precautions after a hurricane
After a storm, do not re-energize the system until a qualified technician inspects for damaged wiring, moisture intrusion, or structural movement. Create a safety-first protocol: check for downed lines, avoid standing water near inverters, and record any visible damage with photos for insurance claims. If you must move around, wear appropriate PPE and avoid perched panels that may shift with wind gusts. In many cases, temporary power solutions or generators can bridge the gap while repairs are underway. Solar Panel FAQ notes that disciplined post-storm action minimizes risk and accelerates recovery.
Tools & Materials
- Roof evaluation report or professional assessment(Obtain before making modifications)
- Wind-rated mounting hardware(Ensure compatibility with your racking system and roof type)
- Ballast or reinforced mounting options(For tile roofs or metal roofs, adapt accordingly)
- Sealant and corrosion-resistant fasteners(Use roof-appropriate sealant to prevent leaks)
- Torque wrench and basic hand tools(For secure fasteners)
- Weatherproof surge protector and proper wiring tools(Protect inverters and wiring enclosures)
- Safety gear (gloves, harness, fall protection)(Always follow safety protocols)
Steps
Estimated time: 3-6 hours
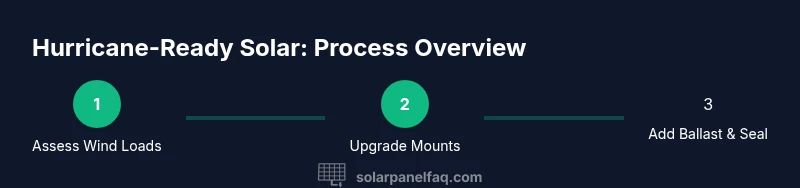
- 1
Assess wind-load requirements
Review local codes and your system’s wind rating. Compare current mounting to the required wind load for your hurricane zone and plan upgrades if ratings are not aligned. Document any gaps so you have a clear retrofit path.
Tip: Have your installer provide a stamped wind-load analysis for permits. - 2
Secure or upgrade mounting hardware
Reinforce the mounting with wind-rated rails and appropriate fasteners. If retrofitting, distribute loads evenly and verify roof attachment points anchor the racking to structural members.
Tip: Avoid over-tightening; use a torque spec per manufacturer guidance. - 3
Add ballast and protect edge panels
Install ballast where required to prevent lift. Use debris shields or edge protection to reduce damage from wind-borne projectiles.
Tip: Check ballast alignment with panel footprint to maintain balance. - 4
Secure electrical components
Ensure conduits, inverters, and junction boxes are weatherproof and sealed. Implement a clear shut-off procedure accessible to authorized persons.
Tip: Label shut-off points clearly for quick action during emergencies. - 5
Create a pre-storm readiness plan
Develop a simple checklist that includes debris removal, tool availability, and emergency contacts. Schedule a pre-season inspection with a licensed installer.
Tip: Keep a storm kit with PPE and a flashlight near the electrical area. - 6
Post-storm inspection and reset
After a hurricane, perform a visual check for loose hardware and moisture. Do not re-energize until a professional confirms system integrity.
Tip: Take photos for insurance and use a checklist to stay organized.
Frequently Asked Questions
What makes a solar panel hurricane-ready?
A hurricane-ready solar panel system uses wind-rated mounts, proper ballast, secure cabling, and a planned shut-off. This combination reduces lift risk and allows safe post-storm inspections. Local codes and professional retrofits are key.
A hurricane-ready system uses wind-rated mounts, ballast, secure wiring, and a planned shut-off for safety and faster post-storm checks.
Do all roofs require retrofits for storms?
Not always, but many roofs in high-wind areas benefit from upgraded mounting, better flashing, and ballast. A professional assessment will determine if retrofits are necessary to meet code and insurance requirements.
A professional assessment will tell you if retrofits are needed to meet code and insurance requirements.
Should I retrofit or replace components for hurricane resilience?
Retrofits can improve resilience without replacing your entire system, especially if existing components are compatible with wind-rated upgrades. In some cases, full replacement may be warranted for extreme wind zones.
Retrofits can improve resilience; in some cases full replacement is needed for extreme wind zones.
How does insurance treat hurricane-related solar damage?
Insurance policies vary; review coverage for wind, debris, and water intrusion. Upgraded, code-compliant installations may influence premium adjustments and claims eligibility.
Policies vary; check coverage for wind, debris, and water intrusion, and consider how upgrades affect claims.
How long does a hurricane retrofit typically take?
Time depends on roof type, system size, and permitting. A typical retrofit might span a few days to a couple of weeks when coordinating with a licensed installer.
Time varies, but expect a few days to a couple of weeks with scheduling and permits.
Is it safe to perform any prep work myself?
Basic inspections and housekeeping are safer DIY tasks, but electrical work and structural retrofits should be handled by licensed professionals to prevent injury or code violations.
Basic checks are fine, but electrical and structural work should be done by pros.
Watch Video
Top Takeaways
- Secure mounts are the first line of defense
- Plan retrofits with local codes and wind loads
- Maintenance before storms minimizes damage
- Document and insure your hurricane-ready setup