Solar Panel Guards: A Practical How-To Guide for Homeowners
Learn how solar panel guards protect panels from damage and tampering, extend life, and simplify maintenance. This guide covers materials, installation steps, safety tips, and warranty considerations for homeowners.

Solar panel guards are protective accessories installed around solar modules to deter physical damage and tampering, while shielding wiring and edges from impact. They help weatherproof the array and can extend its life in hail-prone or windy climates. According to Solar Panel FAQ, choosing guards that fit your roof and climate reduces maintenance and protects your investment over time.
What are solar panel guards and how they work
Solar panel guards are protective accessories installed around solar modules to deter physical damage and tampering, while shielding wiring and edges from impact. They come in various configurations, including edge guards that hug the frame, mounting rails that extend along the module, and mesh cages that surround the array. Most guards are made from aluminum or stainless steel, with powder-coated finishes to resist corrosion. When designed for your racking system and roof type, guards maintain clearance for airflow and cleaning access. Solar Panel FAQ analysis shows that guards should not block shading devices or venting; otherwise, energy yield could be affected. However, properly selected and installed guards can reduce maintenance needs and protect the system during hailstorms and heavy winds. The key is to choose a guard that fits your system rather than trying to shoehorn a one-size-fits-all solution. This section will help you understand the options and how they influence performance, warranty, and long-term durability. It also covers common misperceptions about guards and explains how to evaluate guard products based on climate, roof type, and local codes.
Benefits, trade-offs, and when guards make sense
Guard installations add physical protection, deter theft, and shield vulnerable cabling from hail, debris, and wind-driven branches. The trade-offs include potential costs, weight increases, and the need to verify compatibility with your existing racking and tilt angle. Homeowners in hail-prone regions or gusty coastal climates often see a clear benefit, while in milder inland areas the decision may hinge on aesthetics and maintenance planning. If your system sits under trees or near high-traffic areas, guards can reduce cleaning frequency by limiting debris accumulation on module surfaces. Always check local codes and warranty terms, because some manufacturers require certain guard configurations to keep warranty claims valid. The goal is to match guard level to risk: light edge protection for cool climates, reinforced frames or cages for high-wind sites, and tamper-resistant options for near-ground installations or multi-tenant properties.
Material options and design considerations
Aluminum guards are common due to their light weight and corrosion resistance, with stainless steel offering greater impact tolerance where hail or flying debris is a concern. Some guards use hinged panels or modular rails for easy access during maintenance, while others employ dense mesh for security without blocking airflow. Coatings and finishes matter: powder coatings in dark tones reduce glare and blend with most rooftops, while bright colors can help visibility in busy environments. Design should preserve sufficient airflow beneath modules to prevent heat buildup, maintain cleaning access, and avoid shading sensors. Compatibility with existing mounting rails, tilt systems, and inverter clearances is essential. If you plan retrofits, verify that new guards do not invalidate wiring or vent pathways, and consult with the panel manufacturer if needed. Finally, consider installation weight on the roof structure; heavier guards may require structural assessment in older homes or on metal roofs.
Planning and measurement for guard installation
Effective guard installation starts with precise planning. Measure the panel footprint, including the distance from the edge to the nearest mounting rail, and note any protrusions that could interfere with fasteners. Sketch the guard layout, accounting for access paths for cleaning and service. Decide whether you want a full-coverage guard or partial protection at edges and corners. Gather the required fasteners that match your racking system, and determine whether you need sealants or gaskets to weatherproof anchor points. Before drilling, verify roof materials and check for electrical conduit runs to avoid interference. A dry run on a bench or spare panel can help you visualize how guards will sit, where supports will land, and how to maintain clearance for adapters and connectors.
Installation best practices and safety tips
Begin with safe conditions: wear PPE, secure ladders, and have a second person assist. Align guards with mounting rails and secure at designated points using manufacturer-supplied hardware. Do not overtighten fasteners, which can distort rails or damage panels; use the torque values recommended by the guard and racking manufacturers. Check for consistent gaps around edges to prevent pinch points and ensure cable management remains unobstructed. After installation, inspect all joints for looseness and test the system by gently wiggling guards at anchor points. Schedule a follow-up inspection after a heavy storm or high-wind event to catch any loosening or corrosion early. If you are unsure about roof integrity, pause the project and consult a solar installer or structural engineer.
Tools & Materials
- Guard kit compatible with your racking system(Includes edge guards, mounting rails or mesh panels)
- Measuring tape(Minimum 5 meters for accurate layout)
- Cordless drill/driver(With appropriate bit sizes for guard hardware)
- Torque wrench or driver with torque settings(Follow manufacturer torque specs)
- Level(Ensure rails are straight across multiple strings)
- Safety gear(Gloves, goggles, fall protection as needed)
- Ladders or scaffolding(Stable setup for roof access)
- Sealant/gasket material(Weatherproof anchor points if needed)
- Replacement fasteners(Spare screws/bolts compatible with kit)
Steps
Estimated time: 2-6 hours
- 1
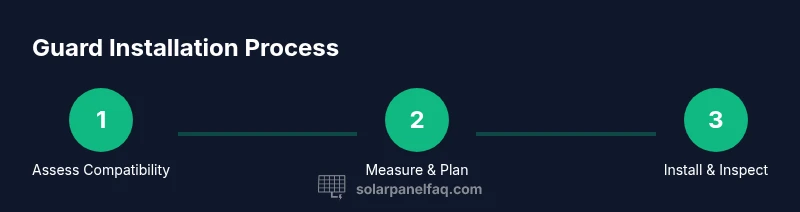
Assess system compatibility
Review your existing mounting rails, module dimensions, tilt angle, and warranty requirements to ensure the guard system you choose will fit without obstructing airflow or shading sensors.
Tip: Consult the guard and racking manufacturers for exact compatibility notes. - 2
Measure and map guard layout
Take precise measurements of panel width, edge clearance, and anchor points. Draft a layout that preserves cleaning access and cable management.
Tip: Use a laser measure for accuracy and mark anchor positions on a portable template. - 3
Gather tools and materials
Assemble all required tools and verify hardware counts against your guard kit specifications before you start.
Tip: Double-check that all fasteners are corrosion-resistant for outdoor use. - 4
Prepare mounting surfaces
Inspect rails and roof anchors; clean surfaces and apply any needed sealants or gaskets to prevent water intrusion.
Tip: Ensure no debris will interfere with guard alignment. - 5
Install guards
Attach edge guards or rails to the mounting system according to the kit instructions. Check alignment frequently and avoid over-tightening.
Tip: Keep a second pair of hands nearby to hold pieces in place during fastening. - 6
Inspect and test
Tighten all fasteners to spec, verify even gaps, and gently test movement of guards. Plan a post-storm inspection.
Tip: Document the installation with photos for warranty records.
Frequently Asked Questions
Do solar panel guards affect warranty or panel performance?
Guard decisions can affect warranty if the guard is not approved by the panel or racking manufacturer. Use guards that are designed for your system and follow installation instructions to minimize performance impact and warranty risk.
Guard choices can impact warranty if not approved by the manufacturer; use compatible guards and follow instructions to protect performance.
What materials work best in coastal or dusty environments?
Aluminum with corrosion-resistant coatings and stainless steel options perform well in coastal and dusty environments. Choose guards with protective finishes and avoid components prone to salt or dust buildup.
Aluminum with protective coatings or stainless steel is typically best for coastal or dusty areas.
Are guards required by code?
Code requirements vary by location. Guards are not universally required, but some jurisdictions or homeowner associations may have rules about protecting arrays. Check local codes before purchasing.
Codes vary; check local rules to know if guards are required in your area.
Will guards reduce energy yield?
If guards are properly sized and installed to avoid shading and airflow obstruction, energy yield is typically unaffected. Poor fit can reduce performance, so choose options designed for your module layout.
Guard systems designed for your layout usually have negligible impact on energy yield.
How do I maintain guards over time?
Inspect guards at least annually for corrosion or loosened fasteners, clean surfaces with mild soap, and re-tighten hardware after heavy storms. Document any changes for warranty.
Inspect annually, clean, and re-tighten hardware after storms.
What costs should I expect for guards?
Guard costs vary by design and size; budget for the kit, hardware, and potential professional installation if required by complexity or warranty terms.
Costs depend on type and size; include hardware and possible installation fees in your budget.
Watch Video
Top Takeaways
- Assess your roof and racking before choosing guards
- Choose guard designs that balance protection with airflow
- Measure carefully and follow torque specs
- Prioritize safety and document installation
- Check warranty terms before purchasing