Solar Panel for Project: A Step-by-Step Guide for Homeowners
Learn how to plan, size, and install a solar panel for your project with practical steps, safety tips, and financing guidance tailored for homeowners and aspiring solar buyers.

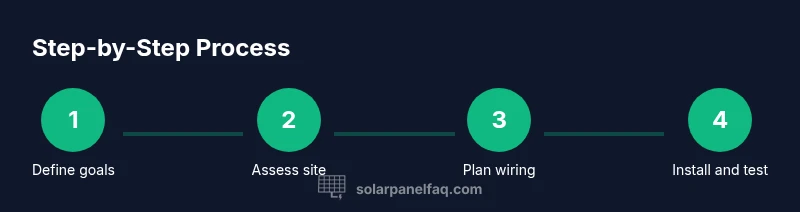
Plan a solar panel for project by clearly defining goals, site constraints, and future needs. Start with a rough energy target, evaluate roof and shade, and choose scalable components. This approach reduces oversizing, accelerates permits, and sets a realistic budget while leaving room to grow. See the full guide for step-by-step actions.
What a solar panel for project means
A solar panel for project describes a focused, goal-driven installation tailored to a specific objective—whether offsetting a portion of your home’s energy, powering a workshop, or testing a small-scale microgrid concept. This approach emphasizes modularity, safety, and scalability so you can grow later. According to Solar Panel FAQ, starting with a clear objective helps you select the right panel type, inverter, and mounting method, avoiding over- or under-sizing from the start. The Solar Panel FAQ team notes that early scoping also improves budgeting and helps you identify relevant incentives or permits before you buy a single panel. Throughout this article we’ll use practical checks and non-technical explanations to empower you to make informed decisions about a solar panel for project that fits your home and timeline.
Define goals and constraints
Before you buy a panel or book an installation, define what you want this project to achieve. Decide the portion of your energy bill you want to offset, whether you need a temporary demonstration, or if you plan a longer-term, expandable system. Consider roof space, orientation, and potential shading. Establish a realistic budget and a timeline that accommodates permitting and installation. Talking through these constraints early helps you select efficient components and avoid costly retrofits later.
- Goal: offset a percentage of energy use or run a dedicated load (workshop, shed, or appliance).
- Constraints: available roof area, climate, and local rules.
- Budget: plan for equipment, permitting, and professional labor if needed.
- Timeline: schedule approvals, procurement, and installation with buffer for weather.
As you work through these questions, keep alignment with your overall home-energy strategy and potential future expansions.
Site conditions and orientation
Site conditions largely determine system efficiency and safety. Start with a rooftop assessment or ground-mounted space check to confirm load-bearing capacity. Evaluate sun exposure across seasons, aiming for maximum exposure during peak sun hours. If you have trees or tall structures nearby, note potential shading patterns and plan to offset them with panel placement or microinverters. Tilt and azimuth angles affect performance; for many climates, a slight adjustment toward the equator improves daily output. If your roof orientation isn’t ideal, consider optimizing with mounting angles or adding a secondary, shaded installation area such as a ground-mount. Understanding site conditions now reduces surprises during final system design and helps you achieve a reliable solar panel for project.
Estimating energy needs and load profiling
A practical approach to estimating energy needs starts with listing major loads and estimating their daily use in hours. Convert device power into energy by using the formula: daily energy (kWh) = wattage × hours of use ÷ 1000. Sum across all devices and add a buffer for storage, charging, or future additions. If you’re unsure about exact consumption, use a simple, staged method: start with essential loads, then add discretionary loads in steps. This helps you determine a target system size and ensures you don’t overspend on capacity you won’t use. Remember, the goal is to create a scalable plan that aligns with your project’s growth and budget.
Panel technology options: mono vs poly, efficiency, and cost
Solar panels come in several technology classes, with mono- and polycrystalline modules being the most common for residential projects. Monocrystalline panels typically offer higher efficiency in a smaller footprint, which can be important for tight roof spaces. Polycrystalline panels are often more affordable but may require more roof area for the same output. Other considerations include module temperature coefficient, degradation rate, and warranty terms. For a project, balance upfront cost with long-term performance and reliability. In many cases, a mix of panel types from reputable manufacturers can optimize cost and space while meeting your performance targets. Always verify manufacturer warranties and after-sales support when selecting panels.
Inverter, mounting, and electrical considerations
The inverter is the heart of converting DC from panels into usable AC power. Choose between string inverters, microinverters, or power optimizers based on shading, system size, and future expansion. String inverters are cost-effective for uniform arrays; microinverters perform better in partial shade but can be more expensive. Mounting choices include roof-mounted rails or a ground mount, depending on space and safety. Proper wiring gauge, conduit routing, and grounding practices are essential for safety and code compliance. Plan for a clear separation of AC and DC wiring, a dedicated disconnect, and a robust monitoring solution to track performance.
Permits, codes, and incentives
Before installation, research local permits and electrical codes. Many jurisdictions require inspections, noting safe clearances and proper wire sizing. Incentives, rebates, and tax credits exist but vary by region; check federal, state, and local programs for eligibility. A well-documented project plan speeds up approvals and helps you qualify for incentives. Warranties may depend on installation quality, so following best practices and using licensed professionals in critical steps can protect your investment and provide long-term peace of mind.
Budgeting, procurement strategy, and timeline
Create a detailed budget that includes equipment, hardware, permitting, and labor. Compare quotes from multiple suppliers and consider phased procurement to align with cash flow. Include contingencies for unexpected issues like roof repairs or structural adjustments. Develop a realistic timeline that accounts for lead times on panels, inverters, and mounting hardware, along with scheduling for inspections. By planning financially and logistically, you reduce the risk of delays and ensure your project stays on track.
Installation workflow and commissioning
A successful installation follows a disciplined workflow: finalize design, verify site conditions, mount rails, install panels, connect the inverter, and perform safety tests. Commissioning includes measuring open-circuit voltage, short-circuit current, and verifying grid connection with the utility. Document system parameters and set up monitoring alarms. If you’re not confident with electrical work, hire a licensed electrician or solar installer to complete or supervise critical steps. A careful approach ensures a safe, reliable solar panel for project that performs as intended.
Maintenance, monitoring, and expansion planning
After installation, establish a routine maintenance plan: clean panels as needed, inspect for debris or damage, and monitor system output regularly. A monitoring system helps detect anomalies early, keeping performance close to expectations. Plan for future expansion by reserving space, conducting a mid-life assessment of components, and staying informed about upgrades in module technology or inverters. Regular maintenance preserves efficiency and extends the life of your solar panel for project.
Tools & Materials
- Measuring tape(at least 5m)
- Safety harness and roof anchors(for any elevated work)
- Level and chalk line(ensure rails align flat)
- Cordless drill with assorted bits(for mounting brackets)
- Roof protection equipment (gloves, safety glasses)(personal protective gear)
- Voltage tester and multimeter(verify circuit status)
- Panel specs sheet or datasheets(reference for wiring and mounting)
- Mounting rails/brackets and fasteners(sized for roof type)
- Inverter (string or microinverters)(dependent on layout)
- Appropriate electrical conduit and gauges(for safe wiring)
- Safety ladder and fall-arrest gear(optional but recommended)
Steps
Estimated time: Estimated total time: 6-10 hours
- 1
Define goals
Clarify what you want to achieve with the project: energy offset, cost reduction, or demonstration power. Document constraints such as space, budget, and timeline to guide equipment choices.
Tip: Involve a licensed electrician early if you’re unsure about electrical requirements. - 2
Estimate load and size
List major loads and estimate daily energy use using the basic formula: daily energy = wattage × hours ÷ 1000. Add a buffer for growth and inefficiencies to set a target system size.
Tip: Use a simple phased approach: start with essential loads and expand later. - 3
Assess site conditions
Check roof orientation, shading, and available mounting space. Verify roof strength and determine if a ground mount would be more suitable for access and maintenance.
Tip: Create a shading map for different times of day and seasons. - 4
Choose components
Select panels (mono vs poly), an inverter type, and mounting hardware that fit your site and budget. Review warranties and supplier support.
Tip: Prioritize reputable brands and documented performance data. - 5
Plan wiring and safety
Map conduit routes, DC/AC disconnects, and grounding. Ensure cable sizing matches expected currents and complies with local codes.
Tip: Label every connection and keep DC wiring isolated from living spaces. - 6
Address permits and incentives
Identify required permits and any regional incentives. Prepare drawings and calculations for the approval process and to justify your investment.
Tip: Check utility interconnection requirements early to avoid delays. - 7
Schedule procurement
Order panels, inverter, and mounting hardware with lead times. Consider phased procurement to align with cash flow and timeline.
Tip: Lock in installation dates to reduce weather-related risk. - 8
Install and connect
Mount rails, install panels, connect to inverter, and perform initial safety checks. If wiring feels uncertain, stop and consult a pro.
Tip: Document all connections and test continuity before energizing. - 9
Test and commission
Measure open-circuit voltage and current, verify grid connection, and set monitoring thresholds. Ensure all safety devices function correctly.
Tip: Keep a log of test results for future maintenance.
Frequently Asked Questions
Do I need a professional to install solar panels for a home project?
For safety, code compliance, and ongoing warranties, professional installation is strongly advised. A licensed installer ensures proper interconnection with the grid and correct wiring.
Yes. Hiring a licensed installer helps with safety and code compliance and ensures your system works reliably.
What is the first step to plan a solar panel project?
Begin by defining goals, site constraints, and a budget. Then estimate energy needs and assess roof or ground mounting options before selecting components.
Start with goals, site assessment, and a budget, then move to sizing and component selection.
Can I install solar panels myself?
DIY installation is possible for simple systems with safety training and knowledge of electrical standards. Complex layouts or dangerous roof work should be done by a professional.
DIY is possible for simple setups, but for complex roofs or grid connections, hire a pro.
What if I have limited space or shading?
Limited space or shade requires optimizing placement, considering microinverters or power optimizers, and possibly a ground-mounted option to maximize output.
Shade and space can be mitigated with special mounting or array design choices.
Are rebates and incentives worth pursuing?
Incentives vary by region, but they can significantly reduce the payback period. Check federal, state, and local programs and factor them into your budget.
Yes, incentives can substantially reduce costs; check what applies locally.
How do I choose between an inverter types?
Choose based on shading, array type, and expansion plans. Microinverters are better for partial shade; string inverters are cost-effective for uniform layouts.
Inverter choice depends on shade and layout; consider future expansion.
Watch Video
Top Takeaways
- Define goals before buying components
- Assess site and shading early
- Size the system using a clear load method
- Plan permits, warranties, and safety first