How to Plan and Execute a Solar Panel Project at Home
A comprehensive, educational guide for homeowners planning a solar panel project, covering goals, sizing, components, installation basics, safety, costs, and maintenance.

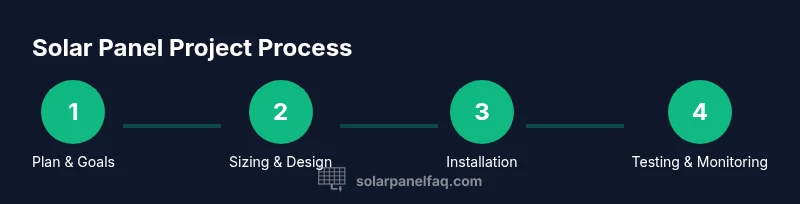
You will plan and execute a home solar panel project, from goal setting to safe installation. This guide covers system sizing, component selection, mounting, wiring basics, permitting, and maintenance. You’ll learn a practical framework you can follow step by step, with safety considerations and cost guidance. According to Solar Panel FAQ, start by defining your energy goals and site constraints.
Define your goals, constraints, and site realities
For a project on solar panel planning, the starting point is to articulate what you want to achieve beyond simply “more power.” Think about how much electricity you want to offset, potential roof or ground space, budget, and any constraints from your utility or local jurisdiction. According to Solar Panel FAQ, begin by outlining your energy goals, preferred timelines, and any site limitations (shading, roof condition, and orientation). This upfront clarity helps you avoid scope creep and makes every subsequent decision easier. Consider seasonal usage patterns, future changes in energy needs, and whether you want to expand later with battery storage or smart monitoring. A well-scoped project reduces surprises during permitting and installation, and it frames your cost-benefit analysis in practical terms. In the next sections, you’ll translate these goals into a sizing plan, a materials list, and a phased work plan that fits your calendar and safety requirements.
How to size your solar panel project
Sizing is the backbone of a successful solar project. Start by listing your average daily energy consumption in kilowatt-hours (kWh) from your utility bills. Combine this with local sun hours to estimate how many watts of solar you’ll need. A common approach is to target a system size that can offset 60–100% of daytime usage, depending on your budget and grid setup. Use a simple formula: daily kWh ÷ sun hours = required kW, then multiply by 1.1 to account for system losses. If you live in a higher-latitude region with fewer sun hours, you may opt for a larger system to reach the same daily output. This sizing step informs your panel count, inverter size, and wiring plan, and it helps you compare options from different vendors. Solar Panel FAQ notes that precise, local conditions matter, so use local irradiance data when available.
Selecting components and suppliers
Selecting components means balancing performance, longevity, and cost. The three core components are solar panels, an inverter, and mounting hardware. Choose panels based on efficiency, temperature coefficient, and warranty length. For inverters, decide between string inverters, microinverters, or power optimizers, considering shading and module matching. Mounting hardware should suit your roof type (rack systems for pitched roofs or ground mounts for flat terrain). Source reputable brands from trusted distributors, and compare warranties and service options. When shopping, request performance data sheets, check for certifications (UL, IEC), and verify compatibility with your existing electrical panel. A well-documented bill of materials helps the installation go smoother and reduces back-and-forth with installers or inspectors.
Site assessment and mounting considerations
Before a single drill bit is used, walk the site and note shading, roof orientation, and theajja angle that optimizes solar exposure. Shade from trees, chimneys, or nearby buildings can dramatically reduce output; plan pruning or trimming or choose microinverters to mitigate shade losses. For mounting, ensure the roof structure can support the added weight and confirm that fasteners and flashing are appropriate for your roofing material. Consider access for maintenance and an orderly routing path for cables. If roof work is needed, factor in weather windows and professional help, since improper mounting can cause leaks and safety hazards. Document the site with diagrams and photos to support permits and future maintenance.
Wiring, safety, and code compliance
Electrical work requires careful planning. Create a wiring diagram that shows how panels connect to the inverter, to the DC disconnect, and to the service panel. Use appropriately sized conductors, proper conduit, and weatherproof junction boxes. Always isolate the system from the grid during work and test with a multimeter before energizing. Check local code requirements and permit processes; many jurisdictions require a licensed electrician for the final interconnection. During wiring, label all circuits clearly and keep a copy of the system diagram for future maintenance or upgrades. Safety first means using fall protection, PPE, and lockout/tagout procedures when you work at height or with live components.
Maintenance, monitoring, and long-term costs
A solar project isn’t a one-and-done task. Regular maintenance—cleaning panels, inspecting mounting hardware, and monitoring performance—helps sustain output over time. Invest in a monitoring system or a simple performance dashboard to detect drops in production, which could indicate shading, dirt buildup, or equipment aging. Budget for periodic inverter service, potential module replacement, and occasional cleaning. Maintain records of warranties, installation dates, and service visits. A disciplined maintenance routine extends system life and keeps performance predictable.
Cost ranges, ROI, and practical planning
Understanding costs helps set expectations and secure financing if needed. Expect costs to include panels, inverters, mounting hardware, wiring, permits, and labor if you hire help. A typical DIY approach can lower upfront labor costs, but some jurisdictions require licensed installation for interconnection, which carries its own costs. While exact prices depend on system size and local labor, consider a broad range and evaluate payback based on your utility’s net-metering policy and any available incentives. Solar Panel FAQ analysis shows that long-term savings accumulate when the system is properly sized and well maintained. By treating this project as an investment with a documented plan, you’re more likely to achieve predictable energy cost reductions and improved home value.
Authoritative sources
- https://www.energy.gov/eere/solar
- https://www.nrel.gov/solar/
- https://www.epa.gov/greenpower/solar-power
Planning for future expansion and upgrades
The best solar projects anticipate growth. Plan for future capacity by leaving space for additional panels or for a future battery storage system. Consider upgrading wiring and inverters to accommodate higher DC input or AC output if you anticipate a bigger home energy footprint. Build flexibility into your permit and procurement strategy so you can scale without major redesigns. Document lessons learned and keep supplier contacts handy for quick reorders.
Tools & Materials
- Safety gear (helmet, gloves, safety glasses)(Protect during height work and electrical tasks)
- Measuring tools (measuring tape, string line)(Accurate layout and alignment)
- Cordless drill/driver(For mounting hardware and equipment fastening)
- Roof mounting rails or ground-mount hardware(Select system compatible with roof type and incline)
- Solar panels (qty based on design)(Check wattage and warranty details)
- Inverter (string or microinverters)(Converts DC to AC; choose based on shading and layout)
- DC disconnect and AC breaker(Safety interlock and service disconnects)
- Conduit, cable, MC4 connectors(Weatherproof wiring between components)
- Junction boxes and weatherproof sealant(Seals terminations against the elements)
- Multimeter and voltage tester(Verify electrical values before energizing)
- Roofing sealant and flashing(Prevent leaks at mounting points)
- Documentation and permits package(Keep records for inspections and warranties)
Steps
Estimated time: Total time: 2-5 days
- 1
Define goals and constraints
Document energy goals, budget, timeline, and site realities. Note roof orientation, shading, and any regulatory constraints. This step frames every subsequent decision and guides sizing and permitting.
Tip: Create a one-page plan and a backup scenario for expansion. - 2
Estimate energy needs and size the system
Review past utility bills to determine daily kWh usage. Use local sun hours data to estimate required system size in watts, accounting for losses and future changes in demand.
Tip: Add 10-15% headroom for system losses and weather variability. - 3
Select components and suppliers
Choose panels with good efficiency and warranties, decide on an inverter type, and pick mounting hardware compatible with your roof. Gather at least three supplier quotes to compare warranties and service.
Tip: Ask for performance data sheets and warranty terms in writing. - 4
Assess site and plan mounting layout
Map out panel rows, measure shading windows, and verify structural integrity of the mounting surface. Prepare a detailed layout drawing for permits and installers.
Tip: Consider future roof access and panel cleanability when aligning layouts. - 5
Prepare electrical plan and obtain permits
Create wiring diagrams and determine conductor sizes, protection devices, and interconnection strategy. Submit permit applications and coordinate inspections if required by local code.
Tip: Engage a licensed electrician for the final interconnection if required. - 6
Install mounting, run wiring, and connect panels
Attach mounting hardware, secure panels, route cables, and make connections to the inverter and service panel according to the plan. Use proper wiring practices and verify all connections before energizing.
Tip: Double-check weatherproof seals and labeling of circuits. - 7
Test, commission, and monitor
Power up the system, measure output, and verify safe operation. Set up monitoring to track performance and schedule routine maintenance. Document the commissioning and keep a maintenance log.
Tip: Record baseline production to detect future performance changes quickly.
Frequently Asked Questions
Do I need permits to start a solar panel project at home?
Permit requirements vary by location. Most jurisdictions require some form of approval before installation and interconnection. Check with your local building department early in planning to avoid delays and fines.
Permit requirements vary by location; check with your local building department early in planning to avoid delays.
Is DIY solar installation safe for homeowners?
DIY work can be feasible for simple, non-interconnected systems, but high-voltage DC wiring and grid interconnection pose safety risks. Consider professional help for electrical connections and grid tie-ins.
DIY can be feasible for simple setups, but electrical work carries significant risk; consider professional help for grid connections.
Can I connect a home solar panel system to the grid?
Yes, many homeowners connect to the grid using a net-metering setup. This typically requires permits, an inspection, and a grid-tied inverter. Follow local codes and utility requirements.
Grid connection is possible with permits and inspection; use a grid-tied inverter and follow local rules.
What tools do I need to mount solar panels on a roof?
Essential tools include a drill, wrenches, screwdrivers, a ladder, safety gear, and a conduit cutter. Having a helper and a plan for cable routing helps prevent mistakes.
You’ll need basic construction and electrical tools plus safety gear; plan cable routing in advance.
How long does a typical solar project take?
A small, straightforward DIY setup can take a few days; larger installations may span a week or more due to permits, inspection, and weather. Build a realistic schedule with buffers.
Most projects take a few days to a week or more depending on permits and weather.
What maintenance is required for solar panels?
Occasional cleaning and inspections are usually sufficient. Monitor performance and address any shading, corrosion, or loose components promptly to preserve output.
Keep panels clean and inspect for shading or loose parts; monitor performance regularly.
Watch Video
Top Takeaways
- Define clear goals and constraints before buying anything
- Size the system based on verified energy needs and sun exposure
- Choose verified components with reliable warranties
- Follow safety protocols and obtain required permits
- Plan for maintenance and future expansion
- Keep thorough documentation for performance tracking