Power Your Home with Solar Panels: A Practical Guide
Learn how to power your home with solar panels—from sizing and components to installation and ROI. A clear, practical guide for homeowners exploring solar panel for power.

You can power your home with solar panels by sizing a system to match your energy needs and choosing a suitable configuration. Start with a load analysis, pick an efficient inverter and durable mounting, and decide between grid-tied, off-grid, or hybrid options. Check local incentives and permitting requirements early to avoid delays.
Why a reliable solar panel for power matters
According to Solar Panel FAQ, homeowners who plan carefully for a solar panel for power project tend to achieve more consistent results and fewer setbacks. The goal is to align system capacity with actual energy use, roof orientation, shading, and climate. This planning reduces the risk of underproducing on sunny days or overspending on equipment you don’t need. Throughout this guide, you’ll see practical strategies to design, configure, and maintain a system that delivers meaningful benefits over many years. By understanding the basics, you’ll be better prepared to engage installers, compare equipment, and navigate incentives. The Solar Panel FAQ team emphasizes that a thoughtful approach saves time, money, and headaches later on.
Key concepts include load matching, choosing the right inverter, and planning for how your home will be connected to the grid or to a storage option. In addition, you’ll learn how to interpret performance expectations and what to monitor once the system is live. The aim is steady power supply, reduced electricity costs, and greater energy independence where feasible.
How solar panels convert sunlight to electricity
Solar panels are composed of photovoltaic (PV) cells that absorb photons from sunlight and release electrons. This movement generates direct current (DC) electricity, which is then converted to alternating current (AC) by an inverter for home use. The efficiency of the cells, the wiring and connections, and the overall system design determine how much energy you get from a given amount of sun. Since no two rooftops are exactly alike, the layout—how many panels, their tilt, and their orientation—has a direct impact on performance. Real-world gains depend on shading, temperature, and the cleanliness of the modules. This section explains the journey from sun to usable power and highlights common factors that influence output.
Analyzing your home's energy needs
To size a system effectively, you need a clear picture of how much energy your home consumes and when you use it most. Start with a recent utility bill to identify average daily kWh, then consider seasonal changes and appliance usage. A rough method is to categorize loads into essentials (refrigeration, lighting) and discretionary use (pool pumps, space heaters). Remember that solar output varies with the sun and weather, so you want a cushion for cloudy days and peak demand. Tools like online calculators and energy monitors can help you estimate a realistic target that your system should meet on an average day. This planning step reduces the risk of under or over-sizing your installation and supports smarter financing.
System sizing and configuration options
There are several ways to configure a solar system, each with different implications for reliability and cost. Grid-tied systems connect to the utility and can use net metering to credit excess daytime production. Off-grid systems require batteries and additional gear to supply power during the night or cloudy periods, which increases complexity and cost. Hybrid systems blend both approaches, offering storage plus grid access for reliability. The decision depends on your goals, local regulations, and whether you want energy resilience, lower energy bills, or both. This section explains how to choose among these configurations and how they affect system components and permitting.
Choosing panels and inverters
Your choice of PV modules and inverters determines long-term performance and maintenance needs. Monocrystalline panels typically offer higher efficiency and space efficiency, while polycrystalline options can be more affordable. Inverters convert DC to AC and come in several formats: central/string inverters, microinverters, and power optimizers. String inverters are cost-effective for larger arrays but can be susceptible to shading losses; microinverters perform better in partial shade and on complex roof layouts. When selecting components, consider your roof area, climate, warranty lengths, and compatibility with future storage or add-ons. This section helps you weigh trade-offs and pick reliable configurations.
Mounting, wiring, and safety basics
Roof mounts or ground mounts secure the panels and must withstand local wind loads and snow conditions. Racks, rails, and mounting hardware should be rated for outdoor use and properly fastened to structural members. Wiring should use weatherproof connectors and appropriately sized conductors to minimize voltage drop. A dedicated DC disconnect and an AC safety switch are essential for safe maintenance. This section covers site assessment, choosing mounting options, and grounding practices to ensure a safe, durable installation. Local codes and electrical permits are part of this calculation, so plan accordingly.
Permitting, incentives, and interconnection
Most solar projects require permits from your city or county and, in many places, a utility interconnection agreement. Incentives vary widely by region and can include tax credits, rebates, or performance-based incentives. It’s important to understand interconnection requirements, metering options, and any grid-connection standards before purchasing equipment. This section guides you through common permitting steps, how to prepare documentation, and how to coordinate with your utility to ensure a smooth connection and accurate billing.
Maintenance, monitoring, and performance optimization
A solar system requires relatively low maintenance, but regular checks help preserve performance. Keep panels clean and free of debris, inspect connections for corrosion, and monitor inverter and meter data for anomalies. Many systems offer remote monitoring that shows real-time generation compared to expected output, making it easier to spot shading, soiling, or equipment issues. This section also covers routine cleaning schedules, seasonal adjustments, and when to call a professional for service.
Cost considerations and ROI principles
Costs for solar installations vary by system size, location, and components, and incentives can significantly affect overall affordability. While exact prices depend on several factors, you can expect different cost ranges for panels, inverters, mounting, and permitting. ROI depends on energy use, local electricity rates, and available incentives, so projects with higher usage or favorable incentives typically yield faster payback. This section offers a framework for evaluating total cost of ownership and long-term savings without promising fixed numbers.
Quick-start checklist and next steps
Before you commit, verify your goals, property suitability, and financing options. Gather a few quotes from reputable installers, review warranties, and confirm permitting timelines. Compare system configurations (grid-tied, off-grid, or hybrid), and consider whether storage is right for you. Finally, plan for monitoring and maintenance to protect your investment over time. This concluding block provides a practical bridge from planning to action.
Tools & Materials
- Solar panels (PV modules)(Match wattage to load and space; consider efficiency and warranty)
- Inverter (string or microinverters)(Choose based on system type; compatibility with future storage matters)
- Racking/mounting hardware(Weatherproof, roof- or ground-mounted; rated for local wind/snow loads)
- DC disconnect and AC safety switch(Essential for safe maintenance and code compliance)
- Conduit, wiring, and connectors(Use appropriately gauged, outdoor-rated components)
- Electrical junction boxes(Weatherproof and properly rated for outdoor use)
- Monitoring system (optional but recommended)(Helps track performance and diagnose issues)
- Battery storage (optional for storage-based systems)(Consider if you want nighttime power; increases cost and complexity)
- Personal protective equipment(Gloves, goggles, and fall protection as needed)
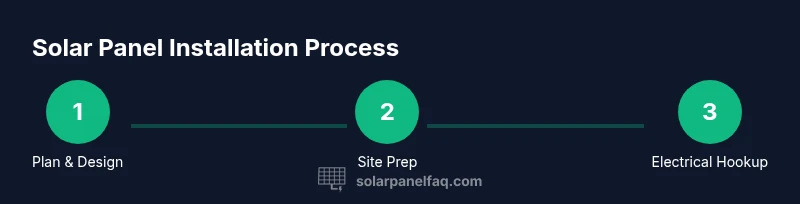
Steps
Estimated time: 6-12 hours (plus permitting and inspections as required)
- 1
Define goals
Identify your energy goals, whether reducing bills, increasing resilience, or both. This helps determine system size and configuration.
Tip: Write down target outcomes and helpful constraints (budget, aesthetics, storage plans). - 2
Conduct site survey
Assess roof orientation, tilt, shading, and available space. Note obstruction from trees or vents that could affect performance.
Tip: Take solar path measurements at different times of day to gauge sun exposure. - 3
Estimate loads
Review utility bills and typical daily usage. Break loads into essential and discretionary categories to guide sizing.
Tip: Use a home energy monitor for ongoing visibility after install. - 4
Choose system type
Decide between grid-tied, off-grid, or hybrid based on goals, budget, and local grid reliability.
Tip: Consider future storage needs and how they affect overall cost. - 5
Select components
Pick panels, inverter, and mounting hardware that fit your site and configuration. Check warranties and certifications.
Tip: Prioritize reputable brands with robust service networks. - 6
Plan wiring and safety
Draft wiring routes, conduit sizes, and safety disconnect locations. Ensure compliance with local codes.
Tip: Label all conductors clearly and maintain clean, organized junction boxes. - 7
Secure permits and interconnection
Apply for permits, arrange inspections, and submit interconnection paperwork with your utility.
Tip: Ask the installer to provide a permit-ready package to speed approvals. - 8
Prepare installation
Gather tools, assemble mounting hardware, and pre-wire components as needed. Safety checks precede any climbing.
Tip: Have a second person assist for handling panels and heavy components. - 9
Commission and test
Connect the system, perform initial energization, and verify monitoring data. Schedule a post-installation inspection if required.
Tip: Document all readings and warranties for future reference.
Frequently Asked Questions
What is the most important factor when sizing a solar system?
The most important factor is matching system capacity to your actual energy use and sun exposure. Accurate load analysis and roof assessment help prevent under- or over-sizing, which saves money and improves reliability.
The key is matching capacity to your usage and sun; do a thorough load analysis to size correctly.
Do I need storage for a solar system?
Storage is optional and depends on goals. Batteries increase cost and maintenance but can provide power during outages and after dark.
Storage is optional and depends on your goals and budget.
What maintenance does a solar system require?
Solar systems require minimal upkeep, mainly cleaning panels and checking connections periodically. Use monitoring data to spot performance changes early.
Maintenance is mainly cleaning and checking connections, with monitoring helping spot issues.
What incentives might be available?
Incentives vary by region and can include tax credits, rebates, and performance-based incentives. Check with local authorities and your utility for current options.
Incentives differ by region, so check locally for the latest options.
Can I install solar panels myself?
DIY installation is possible in some jurisdictions but often requires permits and professional electrical work. Evaluate safety and code compliance before proceeding.
DIY is possible in some places, but safety and codes matter; consider professional help.
How long does a solar system last?
Most solar panels and inverters come with long warranties, but performance naturally degrades slowly over time. Regular checks help maintain efficiency.
Panels last many years with gradual performance decline; monitor regularly.
Top Takeaways
- Size the system to match typical energy use
- Choose configuration based on reliability goals
- Plan permits, interconnection, and warranties upfront
- Monitor performance after installation