How to Get Solar Panels for Home: A Practical Guide
A practical, step-by-step guide to getting solar panels for your home—from roof readiness to financing, installers, permits, and after-install support—so you can make an informed purchase.

You will learn how to get solar panels for your home by evaluating roof suitability, budgeting options, and selecting installers. This guide covers planning, quotes, permits, incentives, and post-install support. According to Solar Panel FAQ, a careful approach reduces risk and helps maximize long-term savings. Prepare for a smooth process with a clear checklist and realistic timelines.
Assess Your Roof and Energy Goals\n\nBefore committing to solar, map how much energy your home uses and how much sun your roof receives. Start by reviewing your past electricity bills to identify typical daily and seasonal usage. If you can access historical data, estimate your annual energy needs, but keep it simple: average daily consumption and the sun hours your site receives. Then evaluate your roof's suitability: is it mostly south-facing, does it have minimal shading, and is the roof in good condition for a long-term solar installation? Age, material, and slope influence mounting options. If you’re planning renovations or roof work soon, coordinate those plans with solar installation so you don’t waste time or money. Finally, clarify energy goals: do you want to cover most of your usage with clean energy, or offset a portion? Defining goals early helps sizing and financing decisions later.
Assess Sun Exposure and Shading\n\nSun exposure drives system performance more than any other factor. Check for shading from trees, chimneys, or neighboring buildings at peak sun hours. Use simple tools like a sun-path chart or a smartphone app to quantify potential shading across seasons. If shading is significant, you may need microinverters or optimizers to maximize output and minimize losses. Document observed shading patterns and note any planned tree trimming or roof renovations. A site visit by an installer can validate your assessment and suggest mitigation strategies such as trimming branches or repositioning panels for optimal orientation.
Financing and Incentives: Options Without Numbers\n\nFinancing is a major factor in solar adoption. Explore ownership (cash or loan) versus third-party arrangements like leases or power purchase agreements (PPAs). Each option has trade-offs in upfront cost, long-term ownership, incentives, and maintenance responsibility. Incentives vary by location and can influence your payback period, so consult local programs and a tax professional to understand eligibility and timing. When evaluating offers, focus on total cost of ownership, warranty terms, and service commitments rather than monthly payments alone. Remember that some incentives cap or phase out, so plan with future needs in mind.
Sizing and System Design Basics\n\nSystem size should align with your energy usage, roof capacity, and budget. A larger system can cover more consumption but may require a bigger upfront investment. Compare inverter types (string vs microinverters) and module specifications (efficiency, warranty terms, and degradation rates). Net metering or export credit policies influence how much energy you can sell back to the grid, so understand local rules. Your installer should help you estimate annual generation based on your location, roof orientation, and shading, then translate that into a realistic panel count and spacing plan. Use this baseline to challenge speculative claims and ensure you only pay for the capacity you need.
Getting Quotes: How to Compare Proposals\n\nSolicit at least three detailed quotes from reputable installers. Ensure each quote specifies the model of panels and inverters, mounting hardware, wiring, labor, and any required electrical work. Compare warranties on panels, inverters, and the system as a whole, plus the service agreements for maintenance. Check installer credentials, local references, and response times. Ask for a site assessment report and a proposed layout showing panel count, orientation, and shading mitigation. A thorough comparison helps you avoid overpaying or ending up with underperforming equipment.
Permits, Warranties, and Insurance\n\nUnderstand the permitting process in your area and who handles it. Most installations require permits, inspections, and utility interconnection approvals. Warranties protect your investment: panel warranties, inverter warranties, and workmanship guarantees should be clearly documented. Verify that the installer carries liability and workers’ compensation insurance. Keep a digital file of all documentation, including permit approvals, warranty cards, and maintenance schedules. This record helps with future selling or refinancing and simplifies troubleshooting if issues arise.
Installation Day: What Happens and How to Prepare\n\nOn installation day, the crew will mount racking, connect panels, and install inverters and electrical wiring. Expect brief interruptions to your electrical service while wiring is completed, and ensure pets and children stay clear of the work area. A final inspection by a licensed electrician will verify safety and performance. After installation, test the system and demonstrate monitoring tools. Ask about system start-up time, commissioning, and how to track performance in real time.
Monitoring, Maintenance, and Warranties\n\nMost modern solar systems come with monitoring software or apps to track production and performance in real time. Regular maintenance is light: keep panels clean, inspect for loose hardware after storms, and address shading or debris that could reduce output. Review warranty coverage and know how to trigger service visits. Consider setting calendar reminders for annual inspections and performance checks to ensure continued reliability and optimal return on investment.
Choosing a Solar Installer: Red Flags and Smart Questions\n\nChoose installers with solid local presence, transparent pricing, and a track record of successful projects. Red flags include pressure selling, vague quotes, or promises of guaranteed output regardless of site conditions. Ask for: a site assessment report, a detailed proposal, peer references, and a clear payment schedule. Inquire about the installation timeline, post-install monitoring, and who handles future maintenance. A thoughtful selection process reduces risk and supports long-term satisfaction.
Common Pitfalls and How to Avoid Them\n\nAvoid common missteps such as choosing a system that’s too large for your needs, ignoring roof aging, or failing to verify interconnection approval. Don’t underestimate shading, as it can significantly reduce returns. Ensure the system’s design aligns with your real usage patterns and climate. Finally, beware of aggressive financing terms that look attractive upfront but lock you into unfavorable conditions over time. A careful, questions-first approach protects your investment.
Final Checklist Before Sign-Off\n\nBefore signing a contract, confirm each quote includes a complete bill of materials, labor costs, permits, interconnection with the utility, and a clear warranty package. Verify that the plan matches your energy goals and budget. Confirm the installation date, required access, and contingency plans for weather-related delays. Keep a copy of all communications and ensure you have a point of contact for post-install questions and support.
Tools & Materials
- Measuring tape(At least 5 meters long for roof assessment)
- Slide rule or calculator(For quick energy usage estimates)
- Notebook or app for energy data(Track monthly kWh and peak demand)
- Safety gear (gloves, harness, non-slip shoes)(Roof work requires proper protection)
- Ladder and fall protection(Stable setup with secure anchor points)
- Tools for electrical work (pliers, insulated screwdriver)(Used by licensed professionals during install)
- Copies of recent utility bills(Shows historical consumption patterns)
- Quotes from at least three installers(Essential for comparison)
- Permitting documents (if applicable)(Varies by location)
Steps
Estimated time: 4-8 weeks
- 1
Define energy goals and site readiness
Identify your current energy usage and long-term goals for solar. Assess whether your roof and site can support a solar installation, noting any shading, orientation, or structural concerns. This defines the baseline for system sizing and financing decisions.
Tip: Use past 12 months of utility bills to establish baseline consumption. - 2
Conduct roof and shading analysis
Review roof condition, material, and slope. Assess shading patterns across seasons and determine if any pruning or roof work is needed before installation. A site visit from an installer can provide precise guidance.
Tip: Document shading with photos at different times of day. - 3
Explore financing options
Compare ownership, leases, and PPAs. Consider how incentives, warranties, and maintenance responsibilities affect total cost of ownership. Gather initial quotes to use as a baseline for negotiations.
Tip: Ask installers to show total cost of ownership over the system lifetime. - 4
Request and compare quotes
Ask for a detailed proposal including system design, panel/inverter models, mounting hardware, wiring, and warranties. Verify interconnection requirements and service commitments.
Tip: Require a site assessment report and a map layout of panel placement. - 5
Handle permits and interconnection
Prepare for local permit applications and utility interconnection approvals. Ensure all required documents are submitted and track the approval timeline.
Tip: Confirm who is responsible for permit fees and inspections. - 6
Prepare for installation day
Coordinate access, protect valuables, and plan for potential electrical shutoffs during wiring. Confirm installation window and weather contingencies with the installer.
Tip: Clear access routes and confirm electrical shutoff timing with the utility. - 7
Complete contract and schedule install
Review the final contract, confirm warranty coverage, and schedule the installation. Ensure a post-installation commissioning and performance check is included.
Tip: Keep digital copies of all documents and a primary contact for follow-up questions.
Frequently Asked Questions
How long does solar panel installation typically take?
Most residential solar projects require a few days for the physical install, plus time for permitting and interconnection. A detailed plan from your installer will outline milestones and expected dates.
Most homes complete the physical install in a few days, with permitting and interconnection adding additional time. Your installer will provide a timeline.
Do I need permits to install solar panels?
Yes. Permits are usually required to ensure safety and code compliance. Your installer typically handles the permit process, but you should verify what is required locally and who pays for fees.
Yes, permits are usually required, and your installer will often handle them. Check local rules for timing and fees.
Can I install solar panels myself?
Installing solar panels yourself is typically not recommended due to safety, electrical codes, and warranty considerations. Most homeowners hire licensed professionals to install and commission the system.
DIY is not usually advised. Work with licensed installers to ensure safety and warranty protection.
What is net metering and how does it affect me?
Net metering allows you to credit excess solar energy you generate back to the grid. The specifics vary by utility and location, so confirm how credits are calculated and applied to future bills.
Net metering lets you earn credits for excess energy, but rules vary by location, so check with your utility.
Will solar panels increase my home value?
Solar installations can increase property appeal and value, especially with clear ownership and reliable performance. Local market conditions influence the overall impact.
Solar can boost home value, particularly when ownership is clear and performance is strong.
What warranties should I expect?
Expect warranties for panels, inverters, and workmanship. Read the terms carefully to understand coverage duration and what qualifies for replacement or service.
Look for panel, inverter, and workmanship warranties with clear terms.
Watch Video
Top Takeaways
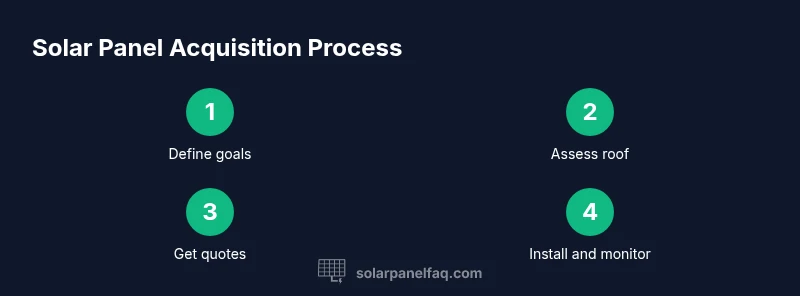
- Assess roof and goals before shopping.
- Get multiple quotes and compare total ownership.
- Understand permits, warranties, and interconnection.
- Monitor performance post-install for warranty ROI.
- Choose an installer with clear communication and references.