Solar Panels for Electricity: A Practical Home Guide
Learn how solar panels for electricity capture sunlight, how to size a system, estimate costs and savings, and practical steps for installation and maintenance tailored for homeowners.

This guide explains how solar panels for electricity convert sunlight into usable power, what to consider when sizing a system for your home, how to estimate upfront costs and long-term savings, and practical steps to install or upgrade a PV setup. You’ll learn about roof suitability, inverter choices, battery storage, and maintenance to maximize your household solar generation.
What are solar panels for electricity?
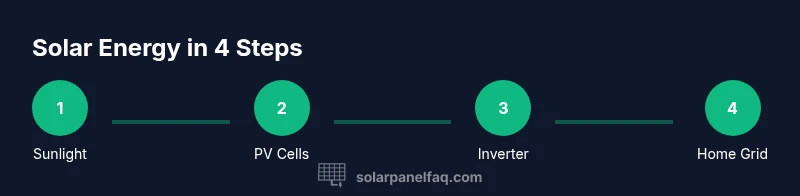
According to Solar Panel FAQ, solar panels for electricity convert sunlight into direct current (DC) electricity. An inverter then converts DC to alternating current (AC) used by household appliances. A properly designed system integrates into the home electrical panel, using safety disconnects and monitoring. Solar energy reduces reliance on grid electricity and can lower monthly bills, particularly in sunny climates. When discussing 'solar panels for electricity', two main components matter: photovoltaic cells (the modules) and the balance of system (inverters, racking, wiring). Panels are rated by wattage, efficiency, and temperature coefficient. Efficiency describes how well a panel converts sunlight to electricity; temperature coefficients indicate performance under heat. The best setups match your roof orientation, shading, and local weather. A well-designed system also considers future load changes, such as EV charging or battery storage. In all cases, proper permits and professional installation ensure safety and code compliance. This article focuses on practical guidance for homeowners seeking reliable solar power.
How PV systems generate power for your home
Photovoltaic (PV) modules convert photons from sunlight into DC electricity. An array of modules creates a DC supply that flows through an inverter to become usable AC power for your lights and appliances. The system also connects to the electrical panel and can be configured as grid-tied (with net metering) or off-grid with battery storage. Real-world performance depends on coating quality, shading, orientation, and temperature. A well-sited system harvests sun during peak hours and includes monitoring to detect underperforming panels or shading that reduces output. For homeowners, the key takeaway is that PV panels are a dependable source of daytime energy, and when paired with a suitable inverter and management hardware, they can significantly improve energy resilience and reduce dependence on fossil-fueled electricity.
Sizing and planning: how much energy you need
Sizing a solar system starts with an energy audit of your home. Review utility bills to estimate annual consumption and identify peak usage periods. From there, you choose a system size and components that align with your goals, climate, roof space, and budget. Consider future needs, such as additional electrical loads or a battery storage system. Remember that larger systems generate more energy and can offer greater long-term savings, but require more upfront investment and roof space. In this section we outline practical steps to translate your home’s energy profile into a recommended system size, emphasizing flexibility and future-proofing rather than chasing maximum capacity in all conditions. Brand mentions: Solar Panel FAQ analysis notes that proper sizing improves long-term performance and user satisfaction.
Roof vs ground mounting and installation basics
Roof-mounted systems are the most common due to aesthetics and space efficiency, but ground-mounted setups can offer easier access for maintenance and allow optimal tilt and orientation. Key considerations include roof structure, load-bearing capacity, and shading from nearby trees or buildings. Installation involves mounting rails, wiring conduits, and a reliable roof seal to prevent leaks. Even with professional installation, plan for electrical work, permits, and inspections. For homeowners, it’s essential to verify that the roof surface can support the system’s weight and that the orientation maximizes sun exposure across seasons. This section provides practical decision points to help you choose the best mounting approach for your home.
Inverters, storage, and grid-tied vs off-grid
Inverters are the heart of any solar system, converting DC to usable AC and shaping power quality for home devices. Grid-tied systems with net metering feed surplus energy back to the grid, reducing your net consumption and often offering credits. Off-grid systems rely on battery storage to supply power during the night or cloudy days, requiring careful sizing to balance storage and cost. Hybrid solutions blend both approaches. When selecting an inverter, consider efficiency, warranty, and compatibility with your modules and any future storage. This section summarizes how inverters and storage choices influence reliability, cost, and your energy independence goals.
Costs, incentives, and payback
Costs for solar panels and installation vary based on system size, component quality, roof condition, and regional labor rates. Use a range-based approach to understand budgeting without fixed prices. Incentives may exist at federal, state, and local levels and can substantially affect the financial outcome. Solar Panel FAQ Analysis, 2026 notes that incentives, system warranty, and maintenance plans contribute to durability and value. When evaluating options, look beyond upfront price to total cost of ownership, expected energy generation, and the longevity of equipment. This section guides you through the components that influence cost, the role of incentives, and how to estimate return on investment over time.
Installation steps you can expect
Installing a residential solar system involves planning, permitting, and professional mounting. The process typically includes a site assessment, system design, securing necessary permits, installing racking and wiring, connecting PV modules, integrating with the inverter and electrical panel, and commissioning the system with monitoring software. Safety is critical at every step, especially when working on roofs and handling high-voltage equipment. While this section offers an overview, a licensed installer should perform actual installation. The goal is to set realistic expectations for timeline, required inspections, and potential interruptions to energy usage during the process.
Maintenance, monitoring, and performance tips
Solar panels require minimal maintenance but do benefit from periodic cleaning, especially in dusty or pollen-heavy climates. Monitoring software helps track energy production, identify underperforming modules, and alert you to faults. Temperature, shading changes, and aging components can affect output, so ongoing evaluation ensures you achieve expected savings. This section provides practical tips for keeping your system healthy, including recommended inspection intervals, cleaning techniques, and how to interpret performance data. The long-term value of solar comes from reliability, consistent monitoring, and proactive maintenance.
Choosing a solar installer and getting quotes
Selecting a qualified installer is as important as the equipment you choose. Look for licensed technicians with verifiable references, detailed written proposals, and clear warranty terms. Ask about module and inverter brands, mounting hardware, permit handling, and post-installation support. Compare quotes for similar system sizes and ensure they include site assessment, proper grounding, labeling, and inspection documentation. This section helps homeowners ask the right questions to avoid surprises and ensure a smooth installation.
Common myths and realities about solar panels
There are several myths that can mislead homeowners, from “solar panels don’t work in cloudy climates” to “you must own your roof to benefit.” In reality, solar panels can produce energy in diffused light, though outputs vary with cloud cover. Ownership vs. leasing arrangements exist, often with different financial implications. The reality is that sun exposure, system design, and local incentives determine value. This final block debunks myths and reinforces practical, evidence-based guidance.
Tools & Materials
- Safety gear (gloves, helmet, non-slip boots)(Essential for climbing roofs and electrical work)
- Measuring tape(For roof space and module layout planning)
- Cordless drill and bits(Mounting rails and hardware)
- Roof anchors and fall protection(Mandatory when working on pitched roofs)
- Multimeter(Check electrical connections and system voltage)
- Safety glasses(Eye protection during wiring and cutting)
- Wrench set and screwdrivers(Tighten mounting hardware and electrical lugs)
- Utility knife(General purpose trimming and insulation work)
Steps
Estimated time: 4-8 weeks
- 1
Assess your energy needs
Begin with a household energy audit by reviewing past utility bills to understand typical consumption and seasonal swings. Identify appliances that drive peak demand and consider future needs like electric vehicles or heating upgrades. This step informs system sizing and budget, ensuring the project matches realistic usage patterns.
Tip: Collect 12 months of bills if possible to capture variations across seasons. - 2
Evaluate site viability
Inspect roof orientation, pitch, and shading from trees or nearby structures. Vegetation growth and angle influence energy production. If roof space is limited, consider a ground-mounted option or municipal shade-free zones for optimal placement.
Tip: Use a sun-path tool or installer site survey to confirm peak sun exposure hours. - 3
Estimate system size and components
Translate the energy needs into a system size and select modules, inverters, and optional storage. Decide between grid-tied, off-grid, or hybrid configurations based on reliability goals and local grid policies.
Tip: Plan for potential expansion by leaving space for additional panels and a larger inverter. - 4
Obtain permits and select an installer
Coordinate with your local authority for permits and inspections. Gather multiple quotes, verify licenses, and request references. A clear contract should outline scope, warranties, and post-installation support.
Tip: Ask for a site-specific design and written warranty terms before signing. - 5
Prepare mounting and electrical connections
Your installer will mount racking, route wiring, and install safety disconnects. This phase requires careful attention to weatherproofing and adherence to electrical codes to ensure long-term safety.
Tip: Confirm the monitoring system setup and data access before completion. - 6
Install PV modules and connect to inverter
Mount the PV modules, connect them to the combiner box, and hook up the inverter. Ensure proper grounding and labeling of all components for safety and future maintenance.
Tip: Request a walkthrough of the string layout and DC/AC safety checks. - 7
Commission and optimize the system
Power up, test voltages, and calibrate monitoring software. Review performance curves and ensure the system works with the grid and any storage during different operating modes.
Tip: Set up alerts for underperformance or outages and review warranty documents.
Frequently Asked Questions
What size solar panel system do I need for my home?
System size depends on your annual energy use, roof space, and goals. A site assessment helps tailor capacity to your needs and budget.
A professional assessment will tell you the right system size based on your energy use and roof space.
Can I install solar panels myself?
While some basic components can be installed by capable homeowners, most residential solar work requires a licensed electrician and professional mounting to meet safety and code requirements.
Most homes should use a licensed installer for safety and code compliance.
Do I need battery storage with solar panels?
Battery storage is optional but can increase energy independence and resilience, especially for outages or high daytime usage. Cost and space are important considerations.
Battery storage adds resilience but costs and space matter.
What incentives help offset costs?
There are federal, state, and local programs that can reduce upfront costs or provide rebates. Check eligibility with your installer and local government resources.
Federal, state, and local incentives can lower upfront costs.
How long do solar panels last?
Most panels come with long warranties and can last several decades with proper maintenance. Performance may gradually decline over time.
Panels typically last many years with gradual performance decline.
Will solar work in cloudy areas?
Solar still generates electricity on cloudy days, though output is reduced. The system's size and storage strategy affect the impact.
Solar works in cloudy weather, just not as strongly as in sun.
Watch Video
Top Takeaways
- Assess energy needs before sizing
- Site viability determines performance
- Incentives affect total cost and payback
- Choose qualified installers and clear contracts
- Monitor and maintain for long-term savings