Solar Panel Build: A Practical DIY Guide for Homeowners
A beginner-friendly guide to a safe solar panel build for homeowners, covering planning, tools, steps, safety, testing, and maintenance for small DIY projects.

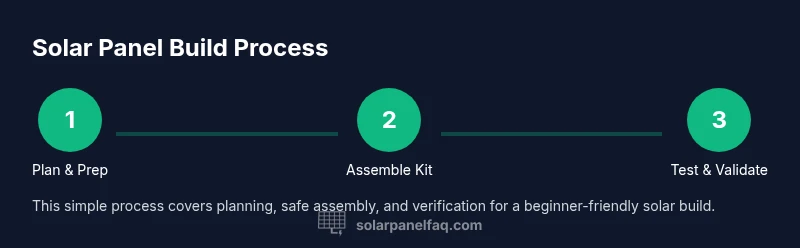
Goal: complete a safe, beginner-friendly solar panel build for a small project (lamp, battery charger, or test rig). You'll plan, assemble a kit, wire basics, and test output. This guide starts with a realistic goal, safety, and a simple kit approach recommended by Solar Panel FAQ. You’ll learn planning, materials, and step-by-step execution to avoid common mistakes.
Understanding the Why and What: Solar Panel Build for Homeowners
A solar panel build begins with clear goals. For many homeowners, a small, kit-based project offers hands-on understanding without the complexities of a full rooftop installation. The key is to translate your goal into a safe, repeatable process: define the output you want, pick a suitable kit, and plan for testing. When you approach this project as a learning exercise, you’ll gain practical insight into how solar energy devices convert sunlight into usable electricity. The phrase solar panel build captures both the science and the craft, and it is deliberately approachable for beginners. Solar energy remains a practical home technology with broad applicability—from charging a battery pack to powering a low-watt device during a camping trip. In this guide, we’ll emphasize learning outcomes, not perfection, and we’ll keep you focused on safe, incremental steps. You’ll see how design choices affect voltage, current, and energy storage, and you’ll learn to read a data sheet with curiosity rather than intimidation.
Planning Your DIY Solar Build: Scope, Goals, and Constraints
Effective planning starts with a realistic scope. For a first project, aim for a single-panel build that can charge a small battery or run a low-watt device under daylight conditions. Define your target voltage and current, then choose a kit that meets those specs. Consider environment: will you test indoors near a window or outdoors in full sun? Document your constraints—budget, space, and time—to keep the project manageable. This planning phase reduces waste and helps you evaluate success criteria before you connect anything live. Remember, a well-scoped project is already half done. As Solar Panel FAQ notes, start with a modest goal and build confidence before expanding to larger configurations.
Kit-Based Approaches: Safe, Manageable Options
For beginners, a kit-based solar build is the safest, most approachable path. Kits typically include a single panel, wiring, a blocking diode, and a basic controller or load. The advantage is that everything is matched for compatibility, and the accompanying documentation guides you through the setup. Avoid DIY trials that require unusual components or professional-grade inverters at this stage. Kit builds teach you core concepts: polarity, series vs. parallel configurations, and how output scales with sunlight. As you gain experience, you can explore adding more panels or upgrading to a more robust power management system.
Tools, Materials, and Safety Essentials
A safe, productive workspace is the foundation of a successful solar panel build. Gather a dedicated non-conductive mat or bench, safety glasses, insulated tools, and a multimeter for testing. Use wire cutters and strippers to prepare leads, and keep insulating tape or heat-shrink tubing handy to secure joints. If your kit includes a charge controller, diode, or mounting hardware, verify each component before starting, and check that wiring is color-coded to avoid misconnection. Always work in a dry environment, away from liquids, and avoid touching live conductors. Label everything and store components neatly when not in use.
From Modules to Output: Stepwise Assembly Concepts
The core idea of a solar panel build is to translate sunlight into usable electrical energy with safe, repeatable steps. Start by inspecting the panel and your kit contents, then connect the panel to a small load or battery using safe, temporary connections. If available, insert a blocking diode to prevent backflow and connect to a simple charge controller to regulate charging. Use a multimeter to measure open-circuit voltage and short-circuit current under daylight. If results diverge from expected values, recheck polarity and the configuration (series vs parallel). This incremental approach minimizes risk while teaching you essential electronics concepts.
Testing, Troubleshooting, and Safety
Testing validates that your build produces expected outputs and helps you identify issues early. Record voltage and current readings under different light levels, and compare with the kit’s specifications. If readings are low or erratic, inspect for loose connections, damaged cables, or cracked panels. Wipe dust or debris from panel surfaces to maintain efficiency. Practice safe shutdown procedures before making any changes, and never test while wet or with exposed conductors. Troubleshooting is a learning process; use a methodical approach and document each step.
Long-Term Considerations and Maintenance
Once you’ve completed a basic build, think about maintenance and future expansion. Regularly inspect wiring insulation, connector integrity, and panel cleanliness. If you plan to scale, consider adding more panels in series for higher voltage or in parallel for greater current, and ensure your circuit protection and storage capacity keep pace. Keep a maintenance log and set reminders for component checks. The knowledge you gain from a small solar panel build lays a solid foundation for responsible, scalable solar projects.
Tools & Materials
- Beginner solar kit (panel, diode, cables, optional charge controller)(Choose a kit designed for learners; includes basic components for a single panel.)
- Multimeter(For measuring voltage, current, and continuity across the circuit.)
- Wire cutters and strippers(Use appropriate insulation and cut lengths.)
- Insulating tape or heat-shrink tubing(For safe, durable wire insulation.)
- Alligator clip leads(For temporary, flexible connections during testing.)
- Safety glasses(Protect eyes from sparks or cracked modules.)
- Non-conductive workspace mat(Keeps components isolated and protected.)
- Small storage containers or bins(Sort components to avoid mix-ups.)
- Battery for storage testing (optional)(Use only with kit-provided testing protocols.)
- Gloves (optional)(Protect hands when handling sharp edges.)
Steps
Estimated time: 2-6 hours
- 1
Gather materials and set up workspace
Begin by laying out all kit components on a non-conductive surface. Verify contents against the bill of materials. Establish a clean, dry testing area and ensure you have safe lighting. This creates a reliable baseline for the rest of the build.
Tip: Organize parts by color and function to avoid cross-connections. - 2
Inspect components and plan the circuit
Carefully inspect the solar panel for any cracks or discoloration. Review the kit’s data sheet to determine whether to connect panels in series or parallel for your target voltage and current. Plan safe, incremental steps before making any connections.
Tip: Do not force connections; align polarity and connectors before joining. - 3
Make initial connections with safety in mind
Using the included wires or test leads, connect the panel to a temporary load or a small battery. Maintain correct polarity and avoid touching exposed conductors. Keep the work area dry and wear safety glasses throughout.
Tip: Double-check polarity before power flow. - 4
Incorporate a blocking diode and controller (if included)
If your kit includes a blocking diode and/or a basic charge controller, mount them in the correct orientation and place them between the panel and load/battery. This prevents backflow and protects your components.
Tip: Follow the diode orientation markings; incorrect alignment reduces output or damages parts. - 5
Test output and adjust as needed
With a multimeter, measure open-circuit voltage and short-circuit current. Compare results to the kit specification. If needed, reconfigure connections from series to parallel or adjust load size to stay within safe limits.
Tip: Record test results to track performance changes. - 6
Document results and plan the next steps
Summarize what worked, what didn’t, and any lessons learned. Store wires and components neatly, and set a plan for scaling (e.g., adding panels) if your goals require it. This reflection helps prevent repeat mistakes.
Tip: Keep a simple log with date, components, and outcomes.
Frequently Asked Questions
Do I need permits for a small DIY solar panel build?
Permit requirements vary by location; for simple, off-grid demos there’s usually no permit, but always check local codes and homeowners associations. If you plan any grid-tied or professionally installed components, contact your local building department.
Permit rules vary by location; check local codes and homeowner associations.
What is the safest starting kit for a beginner?
Choose a beginner solar kit designed for learners that includes a single panel, basic wiring, and a diode or controller. It should be rated for low voltage and include clear safety instructions.
Choose a beginner kit with safety instructions and low-voltage components.
Can a DIY solar panel build power household appliances?
A small, kit-based build can run low-power devices under controlled conditions, but powering typical home appliances requires a much larger system, proper inverters, and professional installation.
Small devices are possible; home appliances need a larger, professionally installed system.
What safety checks should I perform before testing?
Inspect panels for cracks, ensure dry connections, use proper insulation, and wear safety glasses. Keep liquids away from electronics and never touch exposed conductors when live.
Inspect for damage, stay dry, wear eye protection, and avoid live conductors.
How does a DIY build differ from a licensed installation?
A DIY build is educational and typically off-grid; licensed installations involve grid-tied inverters, permits, and professional compliance. For safety and reliability, plan future upgrades with a professional.
DIY is learning-focused and off-grid; licensed installs meet code and require permits.
Watch Video
Top Takeaways
- Define a safe, scoped DIY solar panel build.
- Choose a kit-based approach to learn basics.
- Test outputs safely and document results.
- Plan scaling only after mastering core skills.