Solar Energy System for Home: Step-by-Step Guide to Solar Installation and Savings
Learn how to plan, size, install, and maintain a solar energy system for home. This comprehensive guide covers feasibility, permits, financing, warranties, and long-term performance for homeowners seeking sustainable energy.

Will you install a solar energy system for home? This guide explains the steps, required permits, and common equipment to expect. You’ll learn how to assess site suitability, choose a system size, and launch a safe installation that aligns with local codes and your energy goals. This is essential for efficiency, safety, and long-term savings.
Understanding the goal of a residential solar energy system
A solar energy system for home is designed to convert sunlight into usable electricity, reducing dependence on the grid and cutting energy bills. Beyond financial savings, it lowers greenhouse gas emissions and offers resilience during outages when paired with battery storage. When homeowners start planning, they should define clear objectives: how much of their annual electricity use they want to offset, whether they value independence from the utility, and how much roof space is available for panels. This early stage sets sizing, equipment choices, and financing expectations. The Solar Panel FAQ team emphasizes aligning system goals with local climate, energy prices, and future plans like adding battery storage or participating in demand response programs. Reading local code requirements and utility interconnection rules early helps prevent surprises later and keeps the project moving smoothly. In this article, we explore feasibility, design considerations, and practical steps to help you move from interest to an operating solar energy system for home. According to Solar Panel FAQ, setting clear goals improves project success and guides sensible, cost-effective decisions.
note):null
false
Tools & Materials
- Safety gear (helmet, gloves, non-slip boots)(Essential for roof and electrical work; ensure PPE fits and is rated for outdoor use)
- Ladder and fall protection equipment(Stable, roof-safe setup; use fall-arrest systems as needed)
- Roof mounting rails and racking hardware(Compatible with roof type; check wind load requirements)
- Solar panels (photovoltaic modules)(Quantity based on system size and available roof area)
- Inverter (string or microinverters)(Matches panel configuration and grid-interconnect plan)
- Junction boxes, conduit, and outdoor-rated wiring(Weatherproof and code-compliant wiring supplies)
- DC disconnect switch and safety labels(Required for system isolation during maintenance)
- Main service disconnect and interconnection equipment(Per local utility and building code requirements)
- Tools: torque wrench, wire strippers, crimping pliers(Essential for secure electrical connections)
Steps
Estimated time: 1-2 days
- 1
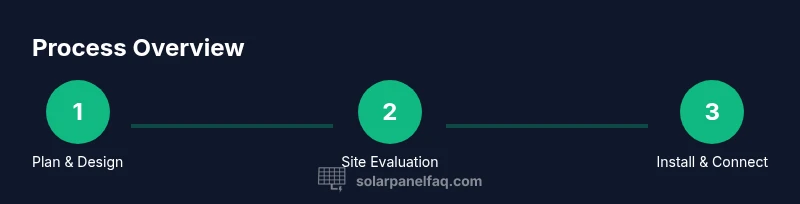
Plan and design your system
Define your objectives, assess roof space, and rough-scan available sun exposure. Map out where panels, inverters, and monitoring equipment will be placed. This planning phase reduces backtracking later and helps you communicate with installers or electrical professionals.
Tip: Create a simple sketch of roof layout and shading patterns to share with contractors. - 2
Assess site conditions and orientation
Evaluate roof orientation, tilt, and any shading from trees or nearby structures. Identify any potential obstructions to panel performance and plan wiring routes that minimize run length and heat exposure.
Tip: Take photos at different times of day to capture shading profiles. - 3
Obtain permits and schedule installation
Research local permitting requirements and interconnection rules. Begin the permitting process early to avoid delays and coordinate with utility approval for grid connection.
Tip: Ask about expected turnaround times and required documents before submitting. - 4
Prepare mounting structure
Install the mounting rails securely, ensuring a solid roof attachment and proper water runoff. Verify alignment and spacing before attaching panels.
Tip: Use a level and string line to keep rails perfectly straight. - 5
Install panels and wiring
Mount panels onto rails, connect series/strings, and route wiring through weatherproof enclosures. Keep cables organized and away from sharp edges.
Tip: Label all cables for easy maintenance and future expansion. - 6
Install inverter and safety disconnects
Place the inverter in a ventilated location and connect it to the DC strings and AC output, along with safety disconnects for serviceability.
Tip: Ensure clear access for future service and testing. - 7
Connect to the main panel and grid
Join the system to the home electrical panel and complete the grid interconnection per utility instructions. Verify grounding and anti-islanding protections are in place.
Tip: Coordinate timing with the utility so inspections align with local requirements. - 8
Commissioning and final inspection
Test the system, verify monitoring, and schedule inspections. Once approved, formally interconnect to begin feeding solar power to your home.
Tip: Document all approvals and keep a copy of the permit and system specs for future reference.
Frequently Asked Questions
Do I need a permit to install a residential solar energy system?
In most areas, a permit is required for rooftop solar installations and interconnection with the grid. The process varies by locality, so check with your city or county building department and your utility for documentation and inspections.
Yes, most places require a permit. Check with your local authority for the exact steps and inspections.
How much can I save by installing solar at home?
Savings depend on your energy usage, system size, local rates, and incentives. The guide explains how to estimate potential benefits and plan around peak solar production times.
Savings vary by location and system size; our guide helps you estimate potential benefits.
Is battery storage worth it for a home solar system?
Battery storage can increase resilience and allow energy use during outages or peak pricing. Consider your goals, budget, and space when deciding whether to add storage now or later.
Battery storage helps during outages and can optimize energy use; it’s worth evaluating with your goals.
Can I install solar panels myself or should I hire a pro?
Some aspects can be DIY, but many jurisdictions require licensed professionals for electrical connections and interconnection paperwork. The guide covers when to hire help and how to work with a contractor.
DIY is possible for planning, but electrical work and interconnection usually require a pro.
What maintenance does a home solar system require?
Solar systems require periodic cleaning, inspection of mounting hardware, and monitoring checks to ensure panels and wiring are functioning and safe.
Regular checks of panels and wiring keep performance steady; the guide outlines a simple maintenance routine.
How long does it take to install a home solar system?
Installation time varies, often depending on permits, roof work, and system size. The guide provides a step-by-step timeline and what to expect during each phase.
Install time depends on many factors, but you’ll find a clear timeline in the guide.
Watch Video
Top Takeaways
- Define goals and available space before sizing
- Obtain permits early to prevent delays
- Choose reliable components compatible with your roof
- Plan for maintenance and monitoring from day one