Complete Solar System for Home: A Practical Guide
Learn how to design, size, and install a complete solar system for home. This practical guide covers components, permits, financing, and maintenance for homeowners.

By the end, you will be able to design a complete solar system for home, including choosing panels, an inverter, storage, and safety-rated wiring. You'll learn how to size the system for your roof, estimate production, and plan a step-by-step path from assessment to commissioning. According to Solar Panel FAQ, a well-planned setup can maximize energy generation and long-term savings.
Understanding the complete solar system for home
The concept of a complete solar system for home goes beyond a single solar panel. It combines PV modules, an inverter, and optionally storage, with the wiring, mounting, and monitoring needed to operate safely and efficiently. The goal is to convert sunlight into usable electricity with minimal losses and predictable performance. A well-designed system considers roof orientation, shading, usage patterns, and future expansion. For homeowners, this means planning around daily energy use, peak sun hours, and any local incentives. By framing the project as a system, you can avoid common pitfalls such as over- or under- sizing, shading blind spots, and mismatched components. This article uses plain language to guide you through every step toward a robust, safe, and cost-effective installation.
Key components of a home solar system
A home solar system has several core parts: PV modules (solar panels) to harvest sunlight; an inverter to convert DC to AC; an electrical disconnect and combiner boxes; mounting hardware to secure panels on the roof or ground; wiring and conduit to route power safely; and a monitoring system to track performance. Optional storage helps balance supply and demand. Depending on your goals, you might opt for a grid-tied system, a hybrid with battery storage, or a fully off-grid setup. Each option changes the wiring, safety requirements, and maintenance needs. Understanding how these parts fit together helps you design a system that aligns with your home’s energy profile and budget.
Sizing and energy needs
Sizing a solar system begins with understanding energy consumption and available roof space. Start with your past electricity bills to estimate daily usage, then map this against the space you have for panels and the typical sun exposure in your region. The aim is to match production potential with consumption, ensuring enough generation during peak sun hours while leaving room for future growth. Tools like solar calculators and design software can aid this process, but you can also work with a local installer to verify shading, orientation, and potential output. Keep in mind that net metering rules and local incentives can affect project economics.
Roof/site assessment and orientation
Assessing roof condition, orientation, tilt, and shading is critical. Ideal sites face true south (in the northern hemisphere) with minimal shading from trees or chimneys. Roof angle, material, and age influence mounting choices and warranty coverage. If shading changes seasonally, you may need microinverters or optimizers to maximize output. For flat roofs, camber considerations and ballast weights impact installation cost and safety. A thorough site walk and drone photos can help you decide between roof mounts, ground mounts, or carport structures.
Choosing components
Panel quality matters for efficiency and longevity; look for reputable polycrystalline or monocrystalline cells with good warranty terms. Inverters come as string inverters, microinverters, or hybrid inverters; selection depends on shading and system size. Storage options range from simple battery packs to integrated energy storage systems; consider depth of discharge, round-trip efficiency, and warranty. Racking systems vary by roof type; ensure corrosion resistance and proper ballast. Finally, select a monitoring platform to track production, consumption, and alerts.
Permitting, interconnection, and warranties
Most residential solar projects require permits from your local authority and interconnection approval with the utility. Your installer can handle most paperwork, but you should understand inspection steps, wiring codes, and safety requirements. Warranties vary by panel, inverter, and installation method; keep copies and record serial numbers. When evaluating bids, compare equipment warranties, workmanship guarantees, and expected outage risk. A clear contract reduces surprises later.
Installation considerations and safety
Decide between do-it-yourself installation and professional installation. If you have electrical experience and are confident on roofs, you may handle simple mounts and wiring; otherwise hire licensed electricians and installers. Never work on a live electrical system, and use fall protection when working on rooftops. Ensure proper grounding, conduit routing, and weatherproof connections. The safest path is to schedule a professional installation that meets code requirements.
Monitoring, maintenance, and performance
After commissioning, set up monitoring to track real-time production, energy usage, and system health. Clean panels periodically to remove dust, pollen, or debris, and inspect mounting hardware for corrosion or looseness. Battery storage systems require management of charge levels and temperature conditions. Schedule annual inspections to verify wiring, connectors, and inverters. Staying proactive helps sustain performance and protect warranty coverage.
Costs, incentives, and environmental impact
Costs will vary by region, roof type, system size, and equipment quality. Financing options, tax credits, rebates, and net metering programs influence the economics of a home solar project. A well-designed system reduces greenhouse gas emissions and dependence on grid power, while increasing property value and energy independence. By weighing up front costs against long-term savings and environmental benefits, homeowners can justify the investment.
Tools & Materials
- PV modules (solar panels)(Qty depends on system size; plan for mechanical fit.)
- Inverter (grid-tied or hybrid)(Converts DC to AC; choose based on system type.)
- Battery storage (optional)(Adds resilience; evaluate depth of discharge & warranty.)
- Racking/mounting hardware(Roof- or ground-mounted; ensure roof compatibility.)
- DC/AC disconnects and combiner box(Safety and wiring organization.)
- Wiring, conduit, and junction boxes(Weatherproof routing; proper gauge.)
- Monitoring system(Track production and usage in real time.)
- Grounding equipment and safety gear(Gloves, goggles, harness; keep safe.)
- Tools (drill, screwdriver, multimeter, torque wrench, conduit bender)(Essential hand tools and safety devices.)
- Permits & paperwork (as needed)(Local approvals; installer can assist.)
Steps
Estimated time: 4-6 weeks (planning, permitting, installation, and commissioning)
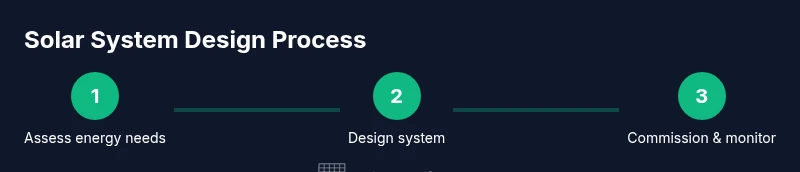
- 1
Assess energy needs and site
Gather past energy usage and inspect roof/site for panel placement; identify shading and structural constraints. Create a rough design sketch to visualize layout and wiring routes.
Tip: Start with a 12-month energy bill analysis to capture seasonal patterns. - 2
Design layout and component selection
Choose panel type and quantity, select inverter options, and decide on storage strategy if desired. Map electrical connections and consider future expansion.
Tip: Prototype multiple layouts to optimize shade-free exposure. - 3
Obtain permits and plan interconnection
Submit designs to authorities, arrange utility interconnection, and review warranties. Align with local codes to avoid delays during inspection.
Tip: Ask your installer about typical permit timelines in your area. - 4
Prepare roof and install racking
Inspect roof condition and install mounting rails or carport structures. Ensure correct spacing and mounting torque, then secure panels to rails.
Tip: Use fall protection and confirm ballast on flat roofs. - 5
Install electrical connections and inverter
Route conduit, install disconnects, and connect panels to the inverter or storage system. Verify polarity and grounding; test continuity safely.
Tip: Double-check wire gauges and safety clearances. - 6
Commission, test, and monitor
Perform functional tests, connect to the utility grid if required, and configure the monitoring dashboard. Monitor performance and verify warranties and documentation.
Tip: Document serial numbers and take baseline readings.
Frequently Asked Questions
Do I need a permit for a residential solar installation?
Most jurisdictions require permits and inspections. Your installer can guide you through the process.
Most places require permits and inspections; your installer can guide you.
Can I install solar panels myself?
DIY installation is possible for small systems with electrical experience, but most homeowners hire licensed professionals for safety and code compliance.
DIY is possible for small projects with experience, but safety and codes usually require a professional.
What is the difference between grid-tied and off-grid systems?
Grid-tied systems feed excess energy to the utility and rely on the grid; off-grid systems require storage and backup power.
Grid-tied uses the grid; off-grid relies on storage and backups.
How does battery storage affect cost and maintenance?
Storage adds upfront cost and complexity but improves reliability. Maintenance includes temperature control and periodic health checks.
Storage increases cost but improves reliability; you’ll need to maintain it.
How long do residential solar systems last?
Most components come with long warranties; many systems last decades with periodic replacements.
Most parts last many years, with warranties guiding replacements.
What maintenance does a home solar system require?
Routine cleaning, inverter checks, and annual inspections keep performance high.
Clean panels and check inverters yearly to stay efficient.
Watch Video
Top Takeaways
- Define energy needs before selecting equipment.
- Choose components that fit your roof and budget.
- Secure permits and interconnection early.
- Monitor performance and perform routine maintenance.