How to Replace a Solar Panel
Learn how to replace a damaged solar panel with a safe, structured approach. This guide covers signs, safety, tools, step-by-step replacement, testing, and maintenance for homeowners pursuing reliable solar energy.

Replacing a solar panel on a residential array is feasible with proper safety mindset and the right tools. You’ll learn when replacement is needed, essential safety steps, required equipment, the actionable process, and how to verify performance after installation to protect your investment. The guide also flags common mistakes and tells you when to call a pro.
When to Replace a Solar Panel
Solar panels are built for long life, but damage or degradation can necessitate replacement. You might notice visible cracks, delamination, hot spots, or a persistent drop in output that can’t be explained by shading or wiring issues. Before deciding, assess the panel’s physical condition and compare performance data from your inverter logs. According to Solar Panel FAQ, replacing a panel is often warranted when structural damage or irreversible performance decline occurs, and when remedies like cleaning or wiring fixes don’t restore output. Check the manufacturer warranty as well; some brands require professional service or specific claim procedures. If the array remains under warranty and a single module is faulty, replacement is usually more cost-effective when performed by a trained technician. If several panels exhibit issues or the roof has complex geometry, enlisting a pro becomes the safer choice. Have a documented diagnosis, match the replacement panel’s electrical rating, and plan for safe removal and disposal of the damaged unit. Weather considerations matter; avoid work during rain, high winds, or icy conditions.
This section lays the groundwork for why and when you should pursue a replacement, helping homeowners avoid premature or improper fixes.
Safety First: Is It Worth DIY or Hire a Pro?
PV systems involve both AC and DC circuits, and a faulty replacement can create shock or fire hazards. Working on a roof adds the risk of slips and falls, especially on steep pitches. The Solar Panel FAQ Team emphasizes that many repair scenarios require permits, code compliance, and adherence to manufacturer guidelines. If your roof is difficult to access, the panel is large, or the array is connected to a larger commercial system, professional installation may be the safer, more reliable option. For warranty purposes, professional replacement ensures documentation and compliance with manufacturer terms. If you choose a DIY approach, plan for a two-person workflow, strictly follow lockout/tagout procedures, and verify all connections with appropriate testing before re-energizing the system.
Safety language: power down, de-energize, wear PPE, and never bypass safety gear. This section outlines the risk landscape and helps you decide whether DIY is realistic for your situation.
Tools, Materials, and Prep
A successful replacement relies on having the right tools, the correct replacement panel, and a prepared workspace. In the Tools & Materials block below, you’ll find an organized list of essential and optional items, plus notes on sizing and compatibility. Before you start, verify the replacement panel’s electrical rating (voltage, current, and wattage) matches the rest of the array and that the mounting footprint aligns with existing rails. Prepare the area by cleaning debris, setting up fall-arrest equipment if on a roof, and ensuring a dry, stable surface. Gather a steel-toed boot option for footing, non-conductive tools, and a test meter to check for voltage and continuity after installation. The goal is a clean, repeatable process that minimizes risk and ensures a solid mechanical and electrical connection.
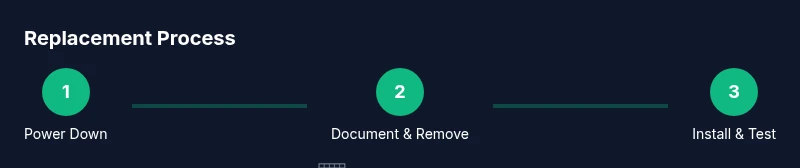
Step-By-Step Replacement Process Overview
This section provides an overview of the replacement workflow. The following step-by-step block contains the precise actions required to remove a damaged module and install a replacement, including wiring diagrams, bolt torque considerations, and inspection checkpoints. Always consult the manufacturer’s installation guide for the exact mounting pattern and electrical wiring scheme. Plan for a counter-check after installation to confirm the panel is producing in line with adjacent modules, and document any changes to system performance for future reference.
Post-Installation Verification and Testing
Verification is about confirming safe energization and expected performance. After installing the replacement panel and re-energizing the string, inspect all connectors for snugness, measure open-circuit voltage and short-circuit current (comparing to the string’s expected values), and check for any abnormal heat at the module or wiring. If a multimeter reads out-of-range values, stop and recheck connections, fusing, and diodes according to the panel’s schematic. Confirm there are no arcing sounds or visible signs of damage in the surrounding wiring or mounting hardware. Document readings and compare them against previous performance data to ensure the replacement achieved the target output.
Maintenance, Warranty, and Long-Term Considerations
After replacement, keep a close eye on system performance logs to detect early signs of degradation or shading effects. Record the replacement date, the panel’s serial number, and the warranty terms in your home solar log. Many manufacturers offer a limited warranty for the panel and a separate warranty for the mounting hardware; understand what the warranty covers and the required service process. If you’re near the end of a panel’s warranty period, ask about replacement terms and whether a pro replacement is necessary to preserve warranty coverage. Regular inspections—at least once a year—help catch micro-cracks, corrosion, or loose hardware before they escalate. A well-documented replacement can simplify future maintenance or panel swaps.
Common Pitfalls and Troubleshooting
Common mistakes include using the wrong replacement panel (mismatched voltage or frame size), skipping lockout-tagout steps, and neglecting to torque mounting bolts to specification. Another pitfall is failing to reseal the roof penetration or to reapply grounding correctly, which can expose the system to moisture ingress or electrical faults. If you notice persistent underperformance after replacement, re-check the wiring, insulation resistance, and string configuration. When in doubt, stop work and consult the manufacturer guidelines or a qualified solar technician. This section highlights practical checks to help you avoid costly missteps.
Tools & Materials
- Main DC disconnect switch(Accessible and clearly marked)
- Lockout/Tagout kit(Ensure two-person control and padlocks)
- Insulated gloves(Electrical-rated PPE)
- Fall protection kit (harness, lanyard, roof anchor)(Only for pitched roofs)
- Non-conductive tools (plastic-handled)(Avoid metal contact with live circuits)
- Multimeter with PV diode test capability(Verify voltage, current, and continuity)
- Replacement solar panel (same rating and dimensions)(Match module size and electrical specs)
- Torque wrench(Torque to manufacturer specs)
- Screwdrivers and wrenches (assorted sizes)(Phillips and flat-head as needed)
- Silicone sealant or mounting sealant (optional)(Weatherproof seal around penetrations)
- Electrical tape and heat shrink (insulation)(Pad and insulate exposed conductors)
- Wire cutters/strippers(Clean cuts on module wiring)
Steps
Estimated time: 2-6 hours
- 1
Power down and isolate the array
Shut off the solar inverter and the DC disconnects. Verify no voltage is present with a multimeter before touching any wiring. Apply lockout/tagout and confirm a secondary check with a colleague.
Tip: Always confirm de-energization with a second person before proceeding. - 2
Document wiring and remove damaged panel
Take clear photos and label wires according to the manufacturer diagram. Loosen and remove the mounting hardware for the damaged panel while supporting the module to prevent drops. Disconnect wiring tabs or connectors with appropriate tools.
Tip: Label cables as you disconnect to avoid mismatches during reassembly. - 3
Inspect rails and mounting hardware
Check rails for corrosion, bending, or wear. Replace any damaged rails or brackets to ensure a secure and level installation for the replacement panel.
Tip: Do a quick check of roof penetrations to ensure waterproofing integrity. - 4
Install the replacement panel and mount
Position the replacement panel on the rails, align mounting holes, and hand-tighten bolts before torquing to specification. Attach wiring pathways neatly to prevent damage during wind and thermal cycling.
Tip: Use a torque wrench to avoid over-tightening sensitive frame hardware. - 5
Reconnect wiring per diagram
Reconnect the panel wiring following the manufacturer’s diagram. Ensure connectors are fully seated and that polarity is correct to prevent reverse current issues.
Tip: Double-check connections with the multimeter before re-energizing. - 6
Re-energize and test
Remove lockout/tagout steps and re-energize the array. Verify string voltage and current, and confirm there are no unusual heats or smells after re-energizing.
Tip: Monitor the first few minutes of operation for signs of arcing or overheating. - 7
Inspect, label, and dispose
Perform a final visual inspection, label the replaced panel with its serial and date, and dispose of the damaged unit according to local regulations or return to the supplier.
Tip: Keep disposal receipts and warranty paperwork accessible for future claims.
Frequently Asked Questions
Do I need to hire a professional to replace a solar panel?
In many cases, replacement on a roof or large array benefits from professional installation to ensure safety, code compliance, and warranty protection. If the system is complex or involves warranty terms, a pro is often the best option.
For safety and warranty reasons, a professional is often the safer choice for roof work and complex systems.
Can I replace a solar panel myself?
DIY replacement is possible for simple, well-documented setups and if you have roofing access and electrical knowledge. However, it requires strict adherence to safety procedures and manufacturer instructions.
It’s possible for a confident homeowner with safety training, but follow manufacturer directions closely.
What safety steps are essential?
Shut down the system, lockout the disconnects, wear PPE, and avoid working in wet conditions or on steep roofs. Verify de-energization with a meter and have a second person assist.
Shut it down, lock it out, wear PPE, and verify with a meter.
Will replacing a panel affect my warranty?
Replacement can affect warranty if not performed by the manufacturer’s guidelines or an authorized technician. Check the terms and confirm what conditions preserve coverage.
Check the warranty terms and consult the manufacturer to keep coverage intact.
How can I tell if a panel needs replacement?
Look for visible damage like cracks, delamination, or hot spots, and note a persistent output drop after accounting for shading and wiring. Consult data logs and test results to confirm.
Cracks, delamination, hot spots, or unexplained output drops usually signal replacement.
How long does replacement usually take?
Replacement time varies with roof access and system size, typically ranging from a few hours to most of a day. Plan accordingly and allow for weather-related delays.
It usually takes a few hours to a full day depending on the setup.
Watch Video
Top Takeaways
- Identify when replacement is necessary by visual and performance cues.
- Prioritize safety and follow lockout/tagout practices.
- Use the correct replacement panel with matching ratings.
- Test thoroughly after re-energizing and document results.