When to Change Solar Panels: A Practical Guide
Learn how to tell when your solar panels should be replaced, how to compare repair vs replacement, and how to plan a safe, cost-effective upgrade for your home solar system.

Replacement should be considered when performance declines, safety concerns arise, or repairs no longer provide reliable returns. A licensed installer should assess current output, warranty terms, and system design to determine whether replacement offers better long‑term value than repair. In many cases, modern panels deliver significant efficiency or reliability gains that justify upgrading.
Why replacement matters for efficiency and safety
According to Solar Panel FAQ, solar panels gradually lose performance due to environmental stress, material aging, and microcracks. Over time, these declines can erode savings and create safety concerns around hot spots or damaged modules. For homeowners, replacing an aging or failing array can restore energy production, maintain warranty coverage, and reduce ongoing maintenance costs. The Solar Panel FAQ team highlights that a professional assessment is essential before any decision. In practice, a full replacement may become the most cost-effective option when multiple panels show degraded output or when new technology offers substantial gains in efficiency or reliability. This article explains why replacement matters, how to recognize when it’s warranted, and how to approach planning without compromising safety or grid compliance.
Signs you should replace rather than repair
There are concrete indicators that replacement may be the better path. Persistent energy production declines across multiple months, especially after a thorough cleaning and shading check, point to underlying issues beyond routine soiling. Visible damage such as cracks, delamination, or discoloration, as well as hot spots detected by an infrared scan, signal structural problems that are not easily repaired. Inverters reporting fault codes that recur after resets, or frequent microinverters going offline, can indicate panel-level faults rather than wiring alone. If the system is approaching the end of its warranty term and a professional assessment confirms widespread degradation, replacement often becomes the sensible option. Remember that some problems can be mitigated with targeted repairs, but broad panel aging or structural compromise rarely returns the original performance.
How to evaluate replacement vs repair
Evaluating replacement vs repair requires a structured approach. Start by confirming whether the observed issues are panel-level or system-level—an outage in one string may be a wiring or inverter problem rather than the panels themselves. Compare the cost of repairing or reconfiguring the array to the expected energy yield of a modern replacement and how long the improvement would last. Also consider warranty terms; if many panels are out of spec, replacing a portion of the array is not typically cost-effective. Examine long-term maintenance needs, compatibility with the existing mounting rails, and the potential for future upgrades such as optimizers or microinverters. A professional installer can run a production analysis and provide a clear recommendation based on site-specific data.
Costs, warranties, and value
Financial considerations play a central role. Warranties on panels and inverters define the baseline protection, and the terms may influence whether replacement is covered or cost-prohibitive. Since prices vary by region, installer, and panel type, homeowners should request written quotes that detail hardware, labor, permits, and any teardown costs. When evaluating quotes, check for performance guarantees and expected output under standard test conditions. It’s also wise to factor in potential energy savings from improved efficiency and the possibility of rebates or tax credits, where available. While numbers are site-specific, a well-planned upgrade often yields better long-term reliability and a smoother path to interconnection with the grid.
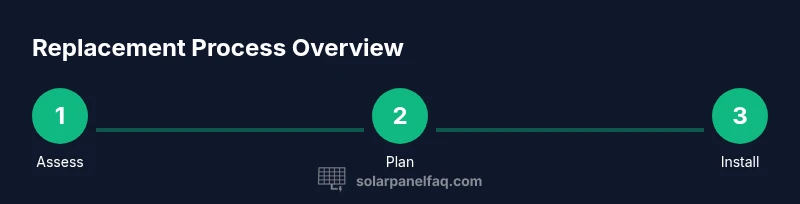
How to plan a replacement: a practical checklist
Planning begins with a site audit and a clear goal for the upgrade. Gather four key items: a current system map, warranty documents, a list of questions for the installer, and a timeline that minimizes downtime. Obtain multiple quotes from licensed installers and verify their certifications, such as NABCEP. Confirm compatibility with your roof layout, wiring, and the selected panels’ dimensions. Schedule permits, interconnection approvals, and any required electrical service upgrades well ahead of the installation window. Finally, decide whether to upgrade related components, such as the inverter or mounting rails, to maximize compatibility and future expandability.
Choosing replacement panels: specs that matter
Focus on a balance of efficiency, durability, and warranty length. Higher efficiency panels deliver more power from limited roof area, but may come at a premium; ensure the frames, connectors, and junction boxes fit your existing roof mounting. Check temperature coefficient, which affects performance in hot climates, and the panel’s tolerance and frame finish for longevity in your climate. Consider selecting panels that are compatible with your inverter and string design to avoid voltage mismatch and shade losses. If you plan future upgrades, select modular options that enable expansion without reworking the entire array.
Timing considerations: seasons, shading, and energy goals
Timing replacement to align with energy goals and seasonal production can reduce downtime and maximize savings. Scheduling during a period of lower consumption or during a calm weather window minimizes disruptions. Shade patterns change with trees and nearby structures; a shading analysis helps ensure the new panel array provides the expected output. If you rely on monthly credits or net-metering, coordinate timing to minimize interruptions to interconnection or meter changes. Finally, set measurable targets for post-install production to evaluate the upgrade’s success.
Installation expectations and safety
Even a seemingly straightforward replacement involves rigorous safety checks. Roof access requires fall protection, proper harness use, and weather considerations. A licensed installer should perform structural checks, disconnect and safely remove old equipment, connect new panels, and verify electrical continuity and grounding. Inspections by the local authority and the utility permit process should be completed before energizing the system. Throughout, maintain clear communication with your installer about access, ladder usage, and any changes to your electrical service.
Post-install maintenance and monitoring
After installation, monitor the system’s performance using the inverter display and online monitoring tools. Record baseline production and compare it to expected yield to confirm the upgrade meets goals. Schedule periodic inspections for corrosion, sealant integrity around mounting points, and clean surfaces to maintain performance. If you notice persistent dips, investigate shading or microcrack indicators and consult the installer promptly. Ongoing maintenance can extend system life and ensure consistent energy production.
Common mistakes to avoid
Avoid DIY replacements unless you are a trained technician; roof work and high-voltage systems pose serious safety risks. Do not skip a formal site assessment or ignore warranty terms when replacing components. Rushing the permit process or neglecting interconnection requirements can lead to delays or penalties. Inaccurate panel matching or improper mounting can cause structural damage and wind uplift. Finally, neglecting maintenance after installation undermines performance gains and reduces the value of the upgrade.
Real-world scenarios
Consider the case of a homeowner with a 10-year-old system who experiences a 20-30% drop in output in cloudy seasons due to aging. An engineer’s assessment reveals widespread microcrack patterns and degraded inverters as primary drivers. Replacing the entire array with higher-efficiency panels and a modern inverter results in restored energy production and a more stable interconnection. Another scenario involves severe hail damage in a rural area; the customer replaces affected panels and upgrades sealing to prevent water intrusion, maintaining safe operation and compliance.
Authority sources
See credible references for verification and further reading, including:
- https://www.energy.gov/eere/solar
- https://www.nrel.gov
- https://www.seia.org
Tools & Materials
- Safety helmet and fall-arrest gear(Protective gear for roof work)
- Non-conductive gloves(Handle modules safely)
- Torque wrench(For mounting hardware torque to spec)
- Roof anchors/harness(Fall protection while on roof)
- Multimeter(Test wiring and inverter connections)
- Replacement solar panels(Select panels with compatible voltage and frame sizing)
- MC4 connectors and wiring supplies(To connect panel strings properly)
- Sealant and sealant gun(Waterproofing around penetrations)
- Safety ladder and roof access equipment(Safe ascent/descent)
- Inverter and mounting hardware(Ensure matching inverter)
Steps
Estimated time: 2-4 weeks
- 1
Assess the current system and goals
Document current panel count, layout, inverter type, and warranty terms. Define what you want to achieve with replacement (higher output, better reliability, or future expandability). This upfront evaluation prevents scope creep and ensures installer alignment.
Tip: Ask for a written baseline production report from the current system to compare against post-install results. - 2
Define replacement plan and budget
Choose whether to replace all panels or only the degraded ones, and decide on panel type, efficiency, and warranty length. Obtain at least two quotes from licensed installers and compare hardware, labor, and permits. Ensure the plan matches your roof layout and electrical design.
Tip: Request a side-by-side comparison of old vs new equipment to understand incremental benefits. - 3
Verify permits and utility interconnection
Confirm required permits, utility interconnection approvals, and any grid service upgrades before work begins. Missing approvals can delay energizing the system and affect warranties.
Tip: Coordinate with your utility to schedule meter upgrades or net-metering changes if needed. - 4
Prepare site and safety checks
Secure the work area, set up fall protection, and protect landscaping or outdoor items around the work zone. Review safety procedures with the installation team and confirm weather windows to minimize delays.
Tip: Ensure all safety gear is in place and tested prior to any rooftop work. - 5
Remove old panels and install new ones
Carefully disconnect and remove panels, then mount the new frames and secure with correct torque. Connect strings, ensure proper grounding, and verify that the wiring matches the inverter specifications.
Tip: If reusing rails, verify they’re compatible with new panel dimensions. - 6
Test, document, and finalize
Run system tests, confirm inverter communication, and log post-install production. Complete documentation for warranty, permits, and interconnection. Schedule a follow-up check to verify long-term performance.
Tip: Keep a copy of the commissioning report for future maintenance.
Frequently Asked Questions
How do I know if my solar panels need replacement?
Look for persistent output losses across months, visible damage, hot spots, and recurring inverter faults. If multiple panels show degradation and the repair cost approaches replacement value, replacement is often warranted.
Look for ongoing drops in energy production, obvious damage, or recurring inverter faults—these suggest it’s time to replace rather than repair.
Can replacement be covered by solar warranties?
Warranties vary; some components may be covered for defects, while aging panels may fall outside coverage. Always check the terms and consult your installer for claimable conditions.
Warranties vary; check the terms with your installer to see what’s covered and for how long.
Is it cheaper to replace panels or repair them?
Repair may be cheaper short-term, but multiple degraded panels or aging components can make replacement more cost-effective over time due to efficiency gains and fewer ongoing repairs.
Repairs can help short-term, but replacements often save more money in the long run when many panels are aging.
How long does installation take?
A typical replacement project can take several days to a few weeks, depending on permitting, weather, and the size of the system. A licensed installer should provide a schedule and keep you updated.
Most replacements take a few days to a couple of weeks, depending on permits and weather.
Will replacement affect my solar warranty or interconnection?
Replacing panels may affect existing warranties and interconnection terms. Ensure the installer reviews warranty transferability and coordinates with the utility to avoid service interruptions.
Talk to your installer about warranty transfer and coordinating with the utility before replacing.
Watch Video
Top Takeaways
- Plan with a licensed installer to assess replacement needs
- Weigh warranty and long-term value alongside upfront costs
- Choose panels compatible with your inverter and roof layout
- Account for permits and interconnection in your timeline
- Document post-install performance to verify ROI