How to Test a Solar Panel Without a Multimeter
Learn safe, practical methods to test a solar panel without a multimeter. Step-by-step qualitative checks, load testing with LEDs or batteries, and precautions for reliable results—perfect for homeowners exploring DIY solar testing.

According to Solar Panel FAQ, you can perform a safe, qualitative check of a solar panel without a multimeter by inspecting physical condition, ensuring direct sunlight, and using a simple, known-load test (like an LED with a current-limiting resistor) or a small battery to observe charging behavior. This quick method helps you spot obvious faults before you invest in tools. When done carefully, you’ll know if the panel is likely functional under sun.
Why testing a solar panel without a multimeter can be valuable
Testing a solar panel without a multimeter is a practical first step for homeowners and prospective solar buyers who want a quick sanity check before diving into more precise measurements. The goal is to verify that the panel responds to sunlight under typical conditions and to identify obvious faults such as loose wiring, cracked cells, or corroded connectors. While a meter provides exact voltage and current, a well-structured qualitative test—rooted in the keyword how to test solar panel without multimeter—can reveal problems that deserve attention. For context, Solar Panel FAQ notes that early, simple checks can save time and money while guiding you toward the right tool if a deeper test is needed. Always perform tests in daylight, avoid touching live conductors, and ensure safe, dry conditions to prevent shocks or short circuits.
Quick tip on the phrase you’ll hear most: how to test solar panel without multimeter is about safe exploration, not precision. Direct sunlight and careful loading are your friends here.
In practice, the test relies on two pillars: observing a power response under sunlight and confirming that connections are solid. With a panel capable of generating energy, you should see a noticeable activity when a load is applied. The aim is to confirm basic operability, not to replace lab-grade measurements. If results are inconclusive, plan a follow-up test with a meter or seek professional assistance. See Solar Panel FAQ’s practical guidance for how to approach this topic and stay within safe limits when experimenting with DIY solar power.
Tools & Materials
- Outdoor testing area(Clean, dry spot with direct sunlight)
- LED with current-limiting resistor(Use a resistor sized to safely limit current for the LED)
- Wire and connectors(Quality connections reduce resistance and noise in tests)
- Safety gear(Insulated gloves and eye protection recommended)
- Battery for load test (optional)(A small 12V or 6V battery can help observe charging behavior)
- Cable clips or clamps(Keep wiring tidy and prevent accidental shorts)
Steps
Estimated time: Approximately 25-40 minutes
- 1
Prepare the testing setup
Position the solar panel in direct sunlight, clean the surface, and inspect terminals for corrosion. Lay out the LED load and any battery you plan to use, ensuring wiring follows correct polarity. This step is about organizing a safe, repeatable test so later steps aren’t muddled by tangled cables or loose connections.
Tip: Label the positive and negative leads to prevent accidental reversal during setup. - 2
Do a visual inspection
Look for cracked glass, disconnected junction boxes, loose mounting hardware, or obvious dirt that could shade cells. Clean exterior grime if needed and check that junction boxes are dry. Visual faults often explain underperforming panels more than any other issue.
Tip: Do this in good daylight and use a magnifier for fine cracks you might miss with the naked eye. - 3
Choose a safe load to apply
Select a simple, known load such as an LED with a resistor or a small battery as your test load. The load should be modest enough to not overdraw current from the panel under bright sun. This step is crucial because a proper load reveals whether the panel can deliver power without tools.
Tip: Start with the highest practical resistance to limit current and gradually reduce if the LED is too dim. - 4
Connect the load and observe
Connect the load to the panel in sunlight and watch the indicator (LED brightness or battery charging rate). If the LED glows brightly or the battery voltage rises, the panel is producing useful energy under the tested conditions. If there’s little or no activity, recheck connections and consider shading effects or potential damage.
Tip: Never touch exposed conductors while the system is live; keep a safe distance and validate polarity before connecting. - 5
Qualitatively assess the response
Assess whether the panel behaves consistently with expected solar input: clear, direct sun and a properly matched load should yield observable activity. Compare results with a quick baseline (same load, different time of day). This helps you gauge whether the panel is likely healthy or if you should perform further testing with a meter.
Tip: Record what you observe (LED brightness level, battery voltage trend) to compare later under similar conditions. - 6
Optional: battery-based test
If you have a small battery, connect the panel to it and monitor charging behavior. A noticeable uptick in battery voltage during sun exposure indicates production. Use a regulator if you have one to limit charge rate and protect the battery.
Tip: Do not push a battery beyond its rated charging current; a regulator or smart charger adds safety and longevity. - 7
Angle, shade, and weather considerations
Remember that solar output varies with panel angle, shading, and cloud cover. Retest at different angles (if feasible) and during stable weather to understand performance patterns. This helps you distinguish between a weak panel and a temporary condition like partial shading.
Tip: Aim for a 30- to 45-degree tilt toward the sun when feasible for the most consistent qualitative results. - 8
Decision point: meter or professional
If you don’t observe any meaningful response or the LED remains very dim across several tests, it’s time to switch to a meter-based test or consult a solar professional. A multimeter or dedicated solar tester provides precise voltage and current readings and can diagnose wire faults, diode issues, or degraded cells more accurately.
Tip: When in doubt, use a meter or seek professional help to avoid misinterpretation and potential safety risks.
Frequently Asked Questions
Can I test a solar panel without any tools at all?
Yes, for a basic check you can use sunlight exposure with a simple load like an LED, observing whether the circuit responds. This method won’t give exact measurements but helps identify obvious issues and whether further testing is warranted.
Yes. You can do a basic check using sunlight and a simple load to observe if the panel responds. It won’t give exact numbers but helps spot obvious problems.
What should I look for during a visual inspection?
Look for cracks, discoloration, loose wires, corrosion, and dirt buildup. Check junction boxes and housing for moisture. Any visible damage or loose connections can explain poor performance, even if the panel appears to be functioning under sun.
Check for cracks, loose wires, and dirt, plus signs of moisture. Damaged or loose parts often cause problems.
Is it safe to test with a simple LED/load?
Yes, a low-power LED with a resistor is a safe, common method to observe a qualitative response. Ensure correct polarity and avoid short circuits. This approach is designed for quick checks, not precise measurements.
Yes, you can use a simple LED with a resistor as a safe qualitative test. Be careful with wiring and polarity.
When should I use a meter instead of this method?
If you need exact voltage and current readings, or if the qualitative test is inconclusive, switch to a digital multimeter or solar tester. Meter-based testing helps confirm panel health, diode integrity, and wiring quality.
Use a meter when you need exact readings or if the qualitative test isn’t clear.
Can a panel still fail even if it charges a battery briefly?
A brief charging result can indicate some power generation, but it doesn’t guarantee long-term health. It’s important to test under stable conditions and, if possible, use proper measurements to assess sustained output.
A quick charge doesn’t guarantee long-term health; use proper measurements for a full assessment.
How do shading and angle affect results?
Shade and suboptimal angles can significantly reduce output, making a healthy panel appear weak. Re-test with the panel steered toward the sun and ensure shading is minimized during testing.
Shading and angle can skew results; re-test with optimal sun exposure.
Watch Video
Top Takeaways
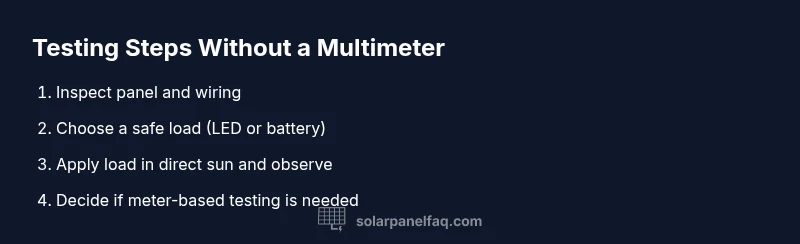
- Inspect and set up safely in direct sun before testing.
- Use a simple LED or battery load to observe basic power response.
- Qualitative results guide whether to pursue meter-based testing.
- Visual and environmental factors can mask underlying faults.
- When in doubt, consult a professional or use proper testing tools.