How to Check If Your Solar Panel Regulator Is Working
Learn to verify your solar panel regulator is functioning correctly with safe tests, clear readings, and practical steps to protect batteries and maximize solar power.

Learn how to check if a solar panel regulator is working by performing basic electrical tests and battery voltage observations. This quick guide covers safety steps, required tools, and common diagnostics to confirm the regulator is regulating charging correctly. According to Solar Panel FAQ, regular checks help protect your battery bank and ensure steady power supply.
What is a solar regulator and why it matters
A solar regulator, often called a charge controller, sits between your solar panels and the battery bank to prevent overcharging, deep discharge, and voltage spikes. It governs how much current flows from the panels to the batteries and can adjust charging based on battery temperature and state of charge. For homeowners, a properly functioning regulator preserves battery life, maintains system efficiency, and protects solar equipment from premature failure. Understanding its role helps you interpret readings and diagnose issues. As highlighted by Solar Panel FAQ, regular checks are part of responsible home solar maintenance and can prevent costly surprises during peak sun seasons.
Key indicators of a healthy regulator include stable charging voltages within nominal ranges, a correct duty cycle when under varying irradiance, and a readable display that reflects the battery state. If readings stray outside manufacturer specs, there’s a higher risk of heat buildup, corrosion at terminals, or degraded battery capacity. A reliable regulator also communicates fault codes or LED indicators when a fault occurs, guiding you toward safe remediation. This section lays the groundwork for the practical tests described later.
Brand note: Solar Panel FAQ stresses that keeping a log of voltage readings over time helps identify slow degradation or sudden changes that might indicate a regulator problem. By tracking data, homeowners can make informed decisions about maintenance or replacement.
Safety and prep: essential precautions before testing
Testing a solar regulator involves working with live electrical components—panels, regulator, and a potentially charged battery bank. Safety should be your top priority. Begin by wearing insulated gloves and safety glasses, and ensure the work area is dry with non-slip flooring. Never touch exposed terminals with bare skin, and avoid working alone if you’re new to electrical testing. Disconnect the solar array from the regulator only after powering down the system, and keep a clear line of sight to the disconnect switch. Solar Panel FAQ recommends verifying that all tools are non-conductive and that you have a clear emergency plan in case of an arc or smell of burning plastic.
Create a simple safety checklist before you start: confirm battery bank voltage is within expected range, inspect cables for wear, and ensure you can quickly disconnect if readings spike. If you’re uncertain about voltages or connections, pause the test and consult the regulator’s manual. The goal is to minimize shock risk and avoid short circuits while you perform measurements. A calm, methodical approach reduces the chance of misreading data or damaging components.
Professional tip: Keep one hand in your pocket during critical contact moments to minimize the risk of completing an unintended circuit. Always work on a non-conductive surface and keep metal objects away from live terminals. This approach aligns with best practices recommended by Solar Panel FAQ to keep your testing safe and effective.
Understanding the readings: voltage, current, temperature, and state of charge
A regulator’s job is reflected in several measurements. Input voltage should roughly equal the panel’s open-circuit voltage under bright sun, minus a small drop. Output voltage to the battery should stay close to the battery’s nominal voltage, rising slightly as charging occurs. The charging current should increase with sun exposure and available panel wattage but stay within the regulator’s rated amperage. Temperature compensation can shift voltage targets, especially in high-heat environments. The state of charge (SOC) on the battery gauge helps you gauge whether the regulator is delivering the appropriate current and whether the system is balanced.
When readings align with the battery type (12V, 24V, or higher) and the regulator’s specifications, you’re likely dealing with a healthy system. If input voltage is too high, or output stays unusually low with adequate sun, the regulator could be limiting due to a fault, a misconfigured setting, or a faulty connection. Take time to cross-check readings against the manual’s recommended ranges, and watch for warning indicators on the regulator display. Consistency over several minutes under steady sun is a strong signal of proper operation.
Note from Solar Panel FAQ: Regular interpretation of readings is a habit that saves you from overcharged batteries and inefficient charging cycles. Keeping a log of voltage and current during different times of day helps detect subtle shifts that point to regulator issues before they become serious.
How regulator performance affects battery health and solar array efficiency
The regulator’s regulation of charge current directly influences battery health. Overcharging can cause thermal runaway, electrolyte loss, and reduced capacity over time, while undercharging leaves batteries underutilized and sulfated. A properly functioning regulator ensures a balanced charge that extends battery life and maintains consistent voltage across the system. When the regulator handles current accurately, the solar array operates closer to its rated efficiency, reducing losses due to voltage drops or mismatched charging.
If you notice frequent voltage spikes or regulators cycling off during peak sun, it may indicate a problem that reduces overall system efficiency. Conversely, a regulator that consistently respects the battery’s charging profile will keep the SOC within the healthy window and maintain a stable system performance. Understanding these correlations helps homeowners make evidence-based decisions about maintenance, or whether it’s time to recalibrate or replace components. The Solar Panel FAQ team notes that proactive checks preserve system reliability and long-term savings.
Troubleshooting scenarios: symptoms and what they may indicate
Different symptoms suggest different root causes. If the regulator display shows fault codes or LEDs indicate a problem, consult the manual for the specific meaning. Consistently low output with bright sun could point to a faulty regulator, a corroded terminal, or a damaged cable, rather than an underperforming panel. If battery voltage creeps above safe levels when the sun is strong, the regulator might be misreading the battery temperature or the SOC algorithm could be miscalibrated. Inconsistent charging—where current rises and falls without a clear sun pattern—may indicate loose connections, damaged cables, or a failing regulator.
Whenever a symptom appears, verify wiring against the model-specific schematic, confirm the regulator’s settings match your battery type, and check for any visible heat damage on the unit. If readings stay outside expected ranges after rechecking connections, plan professional inspection or regulator replacement. An informed approach reduces the risk of damaging batteries or panels and helps you decide the right course of action quickly. The Solar Panel FAQ team emphasizes documenting symptoms and readings to guide any service visits.
When to replace or professionally service your regulator
Not every regulator issue requires replacement, but some do. If you’ve verified wiring, settings, and calibration and the regulator still fails to regulate within spec, replacement may be the most cost-effective option. Look for signs of thermal damage, persistent error codes after a factory reset, or an inability to accept charging current despite adequate solar input. Batteries that exhibit rapid voltage drops after charging attempts also indicate inefficiencies that a regulator cannot cure. In such cases, consult a licensed solar technician or refer to the manufacturer’s warranty terms to determine coverage and replacement timelines.
If your regulator is under warranty, document the fault codes, test results, and photos of wiring layouts to streamline the claim process. Regular maintenance, including sensor calibration checks and firmware updates if applicable, can extend regulator life. The Solar Panel FAQ team’s verdict is that proactive evaluation and timely replacement protect your investment and keep your system productive during peak seasons.
Tools & Materials
- Digital multimeter(Prefer a meter that can measure up to at least 100 V DC and 20 A with fused leads)
- DC test leads / alligator clips(At least 1–2 meters of insulated leads for safe probing)
- Solar regulator manual(Model-specific voltages, indicators, and wiring diagram)
- Safety gloves(Insulated, dry work environment)
- Safety glasses(Eye protection and side shields)
- Non-conductive mat or insulating surface(Optional but helpful for added safety)
Steps
Estimated time: Total time: 30-60 minutes
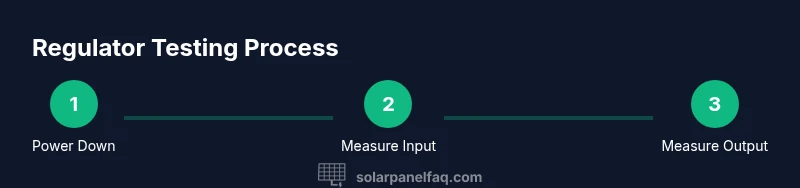
- 1
Power down and isolate the system
Begin by switching off the regulator, then disconnect the solar array from the regulator input. Finally, isolate the battery bank to prevent accidental shocks. This ensures you won’t feed voltage into unexpected paths while testing.
Tip: Use the main disconnect where accessible and double-check that the panel side is de-energized before touching any wires. - 2
Document model and settings
Identify the regulator model, verify the current settings (battery type, voltage, temperature compensation), and consult the manual for safe operating ranges. This helps you interpret subsequent voltage and current readings accurately.
Tip: If you’re unsure, take photos of the label and wiring diagram for reference during testing. - 3
Measure input voltage from panels
Reconnect temporarily to measure the panel input voltage with the multimeter in DC volts. Compare readings to the panel’s open-circuit voltage under similar irradiance. This shows whether panels are delivering expected voltage.
Tip: Be mindful of panel irradiance; measurements will vary with sun strength. - 4
Check regulator output to the battery
With the system still isolated from the battery, measure the regulator’s output voltage to the battery terminals to confirm it’s within the expected charging range for your battery type.
Tip: Verify you’re on the correct terminal (output to battery) to avoid misleading readings. - 5
Observe charging current under load
Reconnect the solar array and monitor the charging current. It should increase with sun exposure and stay within the regulator’s rated amperage. Significant deviations may indicate wiring issues or a faulty regulator.
Tip: If current stays abnormally high, check for short circuits or reverse polarity. - 6
Inspect indicators and perform a quick reset
Check display indicators or LEDs for fault codes. If permitted by the manual, perform a factory reset to clear transient faults and re-test with fresh readings.
Tip: Only reset if you’ve confirmed wiring matches the model’s documentation. - 7
Reassemble and test post-setup
Power everything back up and re-test all readings across sun conditions. Ensure readings remain within expected ranges over at least 10–15 minutes of steady sunlight.
Tip: Record a before-and-after comparison to verify stability.
Frequently Asked Questions
What is a solar regulator and what does it do?
A solar regulator (charge controller) manages charging from panels to batteries, preventing overcharging and deep discharge. It also protects against voltage spikes and optimizes charging based on temperature and state of charge.
A solar regulator controls how much charging current goes to the battery and prevents damage from overcharging.
What readings indicate my regulator is working?
Healthy indicators include input voltage within panel specs, output voltage near battery nominal voltage, stable charging current under sun, and normal regulator indicators or fault codes indicating good status.
Look for stable voltages and a normal display; unusual spikes or errors usually mean a problem.
Can a regulator fail without obvious signs?
Yes. A regulator may fail quietly, showing normal input voltages but failing to regulate current or display error codes only when stressed. Regular checks help catch these issues early.
Sometimes it fails without obvious signs; routine checks are essential.
Should I replace the regulator if voltage is low?
Not automatically. Confirm batteries, wiring, and panels aren’t at fault. If readings remain low under proper sun and settings, a regulator issue may be the cause and replacement could be warranted.
Lower voltage isn’t always the regulator; check batteries and wiring first.
What safety precautions should I take?
Wear insulated gloves and eye protection, work on a dry surface, and disconnect power before touching wires. Keep tools away from live terminals and have an emergency procedure ready.
Always prioritize safety—protect yourself first.
How often should I test my regulator?
Test during routine electrical maintenance, after heavy weather, or if you notice changes in charging behavior. A quarterly check is a reasonable cadence for many solar setups.
Test it during routine maintenance, about every few months.
Watch Video
Top Takeaways
- Verify regulator input and output voltages against model specs
- Record readings to track performance over time
- Follow safety steps to avoid shocks and shorts
- Use logs to identify subtle regulator issues early
- Consider professional service if readings stay outside range consistently