How to Mount Solar Panel on RV: A Step-by-Step Guide
A practical, step-by-step guide to mounting a solar panel on an RV, covering mounting options, wiring basics, safety, and long-term maintenance for homeowners and RV enthusiasts.

This guide helps you mount a solar panel on an RV safely and reliably. You’ll choose between roof-flush mounts or rack brackets, verify roof integrity, run wiring through weatherproof conduits, and complete a basic charge controller and battery hookup. Essential tools and safety checks ensure a leak-free, wind-resistant install that won’t void your warranty.
RV Roofs and Safety First
When you plan to mount a solar panel on an RV, the roof type and condition are your first considerations. Most RVs use fiberglass, rubber, or aluminum-reinforced roofs, each with unique mounting requirements. Before you drill or apply any sealant, inspect for soft spots, existing damage, or compromised seams. Solar installations add weight and wind stress, so plan for even load distribution and avoid routing through areas with edge joints or expensive equipment. Solar Panel FAQ emphasizes choosing a layout that minimizes penetrations and distributes weight across multiple roof points. If your roof is older or has pre-existing leaks, address those issues before installation to prevent future problems. The goal is a solid, watertight anchor that remains reliable in travel conditions.
Mounting Methods: Flush Mounts vs Brackets
Two common mounting approaches are flush-mount kits and rack brackets. Flush mounts sit directly against the roof for a low-profile look and minimized drag, but they require precise alignment and careful sealant work. Bracket-based mounting offers easier access for maintenance and can accommodate larger panels or multiple modules, at the cost of a slightly higher profile. Your choice should consider panel size, roof material, and the available cargo space on the RV. Solar Panel FAQ notes that well-sealed brackets with quality hardware are nearly as water-tight as flush mounts when installed correctly. Consider your travel routes and parking situations to minimize risk of panel strikes or mounting interference.
System Components and Layout for RV Installations
A typical RV solar system includes solar panels, a charge controller, a battery bank, and appropriate wiring with protection devices. The controller matches panel output to the battery chemistry and system voltage. For RV use, plan for a 12V or 24V system depending on your battery bank. Run wiring through weatherproof conduits or grommets from roof to cabinet space where the controller and batteries live. Keep cables tidy, labeled, and away from heat sources. If you’re unsure about electrical compatibility, consult the Solar Panel FAQ team for general guidelines and avoid mixing different controller types without a clear plan.
Roof Preparation and Weatherproofing Essentials
Before mounting hardware, ensure the roof surface is clean, dry, and free of debris. Use a compatible sealant or butyl tape to create a water-tight seal under mounting bases and hardware. Apply gasket material where brackets contact the roof to prevent slipping and distribute clamping force evenly. Check that sealant remains flexible after curing and avoid over-application that could squeeze into seams. Keep caution in mind: improper sealing can lead to leaks that are costly to repair after travel. The goal is a robust, weather-resistant foundation for your panels.
Routing Wiring: Safe Paths and Protection
Plan a route for DC wiring that minimizes exposure to heat and movement. Use weatherproof conduits or cable glands and avoid routing cables over roof vents or AC equipment. Inside the RV, protect conductors with appropriate sheathing and secure them with zip ties or clamps to prevent abrasion. Install a DC disconnect switch if required, and place fuses close to the battery to protect the circuit from faults. Weatherproof connectors and shielding help your system withstand road vibration and weather events. The result is clean, safe wiring that reduces future troubleshooting.
Electrical Safety: Grounding, Codes, and Best Practices
While RV electrical work can be DIY-friendly, adhere to basic safety and local code guidelines. Use correct gauge wiring and ensure all exposed conductors are insulated. Grounding practices vary by region and system design, so follow the controller and battery manufacturer recommendations. Document all connections and keep a spare set of fuses and components in the RV. When in doubt, consult the Solar Panel FAQ team for general best practices. Safety should always come first to protect you and your investment.
Final Assembly, Testing, and Documentation
With mounting hardware installed and wiring routed, perform a careful system test: check continuity, measure voltage at the controller, and confirm battery charging behavior. Inspect all penetrations for leaks and re-seal if needed. Record serial numbers, component specs, and warranty information for future reference. A well-documented installation simplifies future maintenance and improves resale value. Regular checks—every season or after long trips—will extend system life and preserve performance.
Maintenance and Warranty Considerations
Solar panels and RV mounting kits carry warranties, but improper installation can void coverage. Keep the roof clean of debris and periodically inspect seals and mounting hardware for corrosion or loosening screws. Clean panels with soft cloth and water if necessary, avoid harsh chemicals, and check for shade changes caused by tree growth or aging sealants. When you’re ready to upgrade, verify compatibility with existing wiring and controllers to avoid surprises during future maintenance.
Tools & Materials
- Solar panel(s)(Size to fit roof space and energy goals)
- RV roof mounting kit (flush-mount or brackets)(Choose mounting method compatible with panel frame)
- Stainless-steel screws, washers, nuts(Corrosion-resistant hardware)
- Weatherproof sealant or butyl tape(Seal bases and penetrations)
- Cable entry grommets and conduit(Weatherproof pathways from roof to interior)
- Charge controller (MPPT recommended)(Regulates charging to battery bank)
- Battery bank (12V or 24V)(Energy storage option)
- DC fuses and wiring (AWG 10-12)(Protects circuit and handles current)
- DC disconnect switch(Optional safety isolator)
- Multimeter and crimping tool(Verify connections, test voltage)
- Safety gear (gloves, goggles)(Protection during drilling and wiring)
- Drill with metal/roof material bits(For mounting hardware penetration)
- Marker/laser line tool(Preserve accurate alignment)
Steps
Estimated time: 4-6 hours
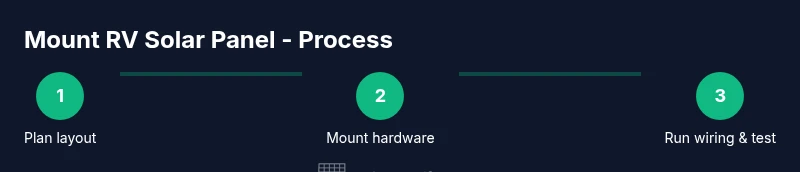
- 1
Plan layout and safety checks
Survey the roof condition, identify mounting positions, and confirm the panel layout. Record dimensions and ensure airflow around the controller space. Take photos for reference and verify no obstructions will be hit during drilling.
Tip: Mark drill points from inside and outside to ensure alignment; verify roof integrity before drilling. - 2
Choose mounting method and panel arrangement
Decide between flush-mount or bracketed mounting based on panel size, roof material, and travel patterns. Check panel clearance for doors, vents, and awnings. Align the array to maximize sun exposure while avoiding shade.
Tip: If in doubt, start with a bracket system for easier future repositioning. - 3
Attach mounting hardware to the roof
Install bases or brackets per manufacturer instructions using the appropriate sealant. Tighten fasteners evenly to avoid roof stress and ensure a uniform seal. Re-check alignment after initial tightening.
Tip: Apply sealant per kit directions and avoid overtightening to prevent roof cracking. - 4
Route wiring path from roof to interior
Plan a cable path that minimizes exposure and movement; drill only necessary holes and seal with grommets. Protect wires with conduit where possible and label entry points for easy maintenance.
Tip: Keep wiring away from heat sources and moving parts to reduce wear. - 5
Install charge controller and battery location
Mount the controller in a ventilated area with easy access. Connect the controller to the battery bank following polarity and rating guidelines; install fuses close to the battery. Review controller settings for your battery chemistry.
Tip: Place the controller near the battery to minimize voltage drop and simplify troubleshooting. - 6
Connect panels to controller and protect the circuit
Wire solar panels to the controller with correct gauge wiring and fuse protection. Ensure series/parallel configuration matches your system voltage and controller input. Double-check all connections for tightness and insulation.
Tip: Use MPPT mode if your panels are in modest shade or non-ideal angles to maximize efficiency. - 7
Test system and check for leaks
Power up and verify charging current at the battery. Check for any stray voltages and confirm there are no water leaks around penetrations. Fix any sealant gaps before finishing.
Tip: Do a short road test to observe panel performance under typical vibration and weather. - 8
Document, warranty, and plan maintenance
Catalog component serials and warranty dates; store this information in a dedicated RV manual. Create a maintenance timeline for cleaning panels and inspecting seals. Prepare a basic troubleshooting flow for common issues.
Tip: Keep a log with dates of checks and a photo record of each mounting point.
Frequently Asked Questions
Can I mount solar panels on any RV roof?
Most RV roofs can support solar panels with the right mounting hardware, but you should verify roof material, load, and access routes before drilling. If unsure, consult the manufacturer or a professional. Maintain a watertight seal around all penetrations.
Most RV roofs can support solar panels with proper mounting hardware, but always verify the roof material and load, and seal every penetrated area.
Is DIY installation safe for most homeowners?
DIY installation is feasible for handy homeowners, provided you follow guidelines for wiring, fusing, and sealing. If you lack electrical experience, consult a professional or a Solar Panel FAQ advisor to review the plan.
DIY is possible if you follow electrical and sealing guidelines; consult a pro if you’re unsure.
Should I wire panels in series or parallel?
Series increases voltage while parallel increases current. Your choice depends on controller input and battery voltage. MPPT controllers offer flexibility and can handle a wider range of configurations.
Series or parallel depends on your controller and battery setup; MPPT helps with flexibility.
How do I prevent leaks at mounting points?
Use approved sealants and gaskets, apply evenly, and test for leaks after installation. Re-check seals after long trips and seasonal changes.
Seal mounts properly with weatherproof materials and test for leaks after installation.
What should I document for warranties?
Keep receipts, part numbers, and installation steps. Some warranties require professional installation or specific mounting methods, so follow manufacturer guidelines.
Keep all part numbers and installation notes; warranties may require specific mounting methods.
Do I need to upgrade my battery or inverter?
Upgrading may improve performance if your current setup is undersized. Assess total watts, storage needs, and window of peak sun before changing components.
An upgrade might help if you’re running low on storage or peak sun; evaluate your needs first.
Watch Video
Top Takeaways
- Plan layout to minimize penetrations and avoid obstructions.
- Choose flush or bracket mounting based on roof and panel size.
- Route wiring with weatherproofing and proper protection.
- Test charging and seal penetrations to prevent leaks.
- Document warranties and maintain a log for longevity.