Solar Panel for Camper: A Complete How-To Guide
Learn to power a camper with solar panels: size the system, select components, install safely, and maintain efficiency—a practical, step-by-step guide for homeowners and RV travelers.

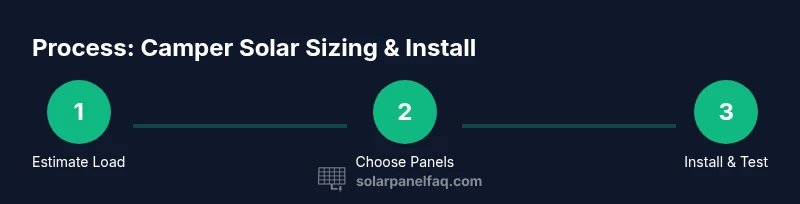
By following this guide, you will learn how to power a camper with solar panels: size your load, select panels, batteries, a charge controller, and an inverter, then install safely and test the system. The Solar Panel FAQ team shares practical steps and safety tips for homeowners and buyers. This quick overview sets up the deeper steps below.
Why a solar panel for camper matters
Powering a camper with solar panels gives you independence from campsites that lack electrical hookups, reduces noise and fuel use from generators, and protects valuable electronics from voltage swings. The phrase solar panel for camper is a practical way to think about off-grid living with a vehicle. A well-designed system can cover daily essentials like LED lighting, a water pump, a compact fridge, phone charging, and ventilation fans, while preserving battery health.
According to Solar Panel FAQ, many RV and camper owners underestimate how much energy they actually draw in a day. A little planning up front—listing devices, estimating run times, and sizing for a comfortable margin—pays off with fewer brownouts and more evenings under clear skies. In this article, we’ll cover sizing basics, component choices, mounting considerations, and maintenance tasks that keep a camper solar setup reliable season after season. By the end you’ll know how to design a solar panel for camper that fits your travel style and budget.
How to size your solar panel system for a camper
Begin by estimating your daily energy consumption. List each device you plan to run and estimate its daily watt-hours (Wh). Common items include lighting (5–20W per LED), a small fridge (30–100W average when running), a water pump (15–50W during operation), USB chargers, and portable electronics. Add a safety margin of 20–30% to account for cloudy days and longer stays. The math is simple:
Total Wh per day = sum of device Wh × hours used per day.
Next, choose a panel wattage that meets or exceeds that daily need. A rule of thumb is to target 2–3 days of autonomy if you rely on solar during travel with few sun days. Then pick a battery bank and a charger that can handle the array output. For campers, MPPT controllers improve efficiency, especially when panels are at varying angles or partially shaded. Finally, plan for expansion; a system that’s oversized today can accommodate extra devices later.
Essential components for a camper solar setup
A reliable camper solar system relies on a few core parts that work together harmoniously. The main components are the solar panel (or panels) that harvest sunlight, a charge controller that regulates the voltage and current to the battery, a deep-cycle battery bank to store energy, and an inverter to power AC appliances from the DC battery. You may also add mounting hardware, wiring, fuses, and a monitoring display. MPPT controllers are often preferred for their higher efficiency in real-world conditions, especially when your roof angles or shade vary during travel. For most campers, a 100–400W panel array paired with a 100–300Ah battery and a 300–1000W inverter covers daily essentials like lighting, fans, and phone charging while leaving room for a small fridge during sunny days.
Roof mounting and installation planning
Roof mounting requires careful planning to balance shade, weight, and weatherproofing. Start by evaluating the roof’s load capacity, choosing mounting hardware that minimizes roof penetrations, and ensuring a solid seal where cabling passes through. Position panels to maximize sun exposure for your typical routes, usually toward the southern sky in the northern hemisphere. Consider tilt strategies or adjustable mounts to optimize sun angle during different seasons. Plan cable routes with clean, protected channels to avoid chafing, and leave extra slack for movement during travel. Weatherproof sealants, grommets, and enamel-coated fasteners help prevent leaks and corrosion over time.
Wiring, safety, and system integration
Wiring a camper solar setup involves connecting the panel array to a charge controller, then to the battery bank, and finally to the inverter (if AC power is needed). Use appropriate gauge wires based on distance and current, and always include a fuse or circuit breaker near the battery. Keep DC cables away from high-heat areas and moving parts, and avoid routing through living spaces where wear could occur. When integrating with existing vehicle electrical systems, keep the solar system isolated from critical vehicle circuits to prevent backfeeds during starting or charging. If you’re ever unsure, consult a qualified installer or local regulations.
Maintenance, troubleshooting, and optimization
Regular maintenance keeps a camper solar system performing at its best. Clean panels to remove dust and debris, inspect cables for wear, and verify connections are tight after trips. Monitor battery health and electrolyte levels if using flooded lead-acid types; for lithium chemistries, follow manufacturer guidance on charging, storage, and temperature limits. Troubleshooting common issues like reduced charging or inverter shutoffs usually starts with checking fuses, connections, and solar irradiance. Seasonal optimization—rebalancing battery capacity, re-seating panels for better angles, and updating firmware on smart controllers—can squeeze extra usable energy and extend lifespan.
Budgeting, warranties, and lifecycle decisions
A well-planned camper solar project balances upfront costs with long-term savings. Typical budgeting factors include the panel wattage, battery capacity, controller type, inverter size, mounting hardware, wiring, and installation labor if you hire help. Batteries have life cycles and temperature sensitivities, so selecting a chemistry appropriate for the climate and usage pattern matters. Warranties help protect your investment; look for reasonable coverage across panels, controllers, and batteries. Consider future expansion needs—adding extra panels or a second battery can often be achieved without a complete overhaul.
Tools & Materials
- Solar panel (monocrystalline, 100–400W)(Choose wattage to cover expected daily use; consider future expansion.)
- Charge controller (MPPT preferred)(Match amperage to panel array; MPPT increases efficiency.)
- Deep-cycle battery (12V or 24V, AGM/LiFePO4)(Calculate Ah to support nights off-grid; plan autonomy and temperature tolerance.)
- DC-AC inverter (pure sine wave, 100–1000W)(Size based on peak appliance loads; consider surge capacity.)
- RV roof mounting hardware and sealant(Weatherproof mounts; ensure roof integrity and proper weight distribution.)
- DC wiring, fuses, and connectors(Suitable gauge for distance; include close-to-battery fusing.)
Steps
Estimated time: 2-6 hours
- 1
Assess energy needs
Create a device list and estimate total daily watt-hours. Factor in lights, fridge, water pump, charging, and fans. This baseline informs panel size and battery capacity.
Tip: Start with essential loads first and add optional devices later. - 2
Size the system
Add a 20–30% margin for cloudy days and weekends. Choose a panel wattage that meets daily needs, then pick a compatible battery and MPPT controller.
Tip: MPPT controllers can recover energy during partial shade or higher panel voltages. - 3
Select components
Pick a panel, a suitable battery type, a regulator, and an inverter with appropriate surge rating. Ensure all components can be safely wired together.
Tip: Document each part’s amperage, voltage, and capacity for easy checks later. - 4
Plan mounting and routing
Map a route for cabling from roof to the battery area, choosing weatherproof paths and minimal roof penetrations.
Tip: Use non-penetrating mounts where possible to protect the roof and improve resale value. - 5
Wire and fuse safely
Connect panels to the controller, controller to battery, and battery to inverter with correctly gauged wires and protective fuses near the battery.
Tip: Keep DC runs short and tidy to reduce voltage drop and wear. - 6
Test and optimize
Power up in open daylight, verify charging current, and monitor battery voltage. Adjust tilt and shading as needed for best performance.
Tip: Perform a full-load test with typical devices to confirm real-world performance.
Frequently Asked Questions
Will a solar panel for camper run a typical RV fridge and lighting?
Yes, a properly sized system with adequate battery capacity can run a small RV fridge and LED lighting. The exact performance depends on daily usage and sun exposure, so sizing is still essential.
Yes. With proper sizing and sufficient battery capacity, a camper solar system can run an RV fridge and lighting, but you need to size it correctly for your usage.
Can I install solar panels on my camper myself?
Many campers install their own solar systems with careful planning and safe wiring practices. If you’re not confident with electrical work, hire a professional to ensure safe integration.
Many people install it themselves, but if you’re not confident with wiring, consider a professional to ensure safety.
Do I need a battery with solar in a camper?
A battery bank stores energy for cloudy days and nighttime use. It’s strongly recommended for off-grid camping to smooth demand and protect electronics.
A battery bank is highly recommended to store energy for nights and cloudy days.
What maintenance does a camper solar system require?
Regularly clean panels, inspect wiring, check fuses, and monitor battery health. Temperature extremes can affect battery life, so monitor storage and charging conditions.
Keep panels clean, check wiring and fuses, and monitor the battery regularly.
How does MPPT improve performance?
MPPT controllers optimize power extraction by adjusting voltage to the battery, especially when sunlight is not optimal or panel voltage is high.
MPPT helps you get more energy from your panels, especially when sun isn’t perfect.
Is portable solar better than roof-mounted panels for campers?
Portable panels offer flexibility and easy storage, but roof-mounted systems save space and reduce setup time. The best choice depends on travel style and storage space.
Portable panels are flexible, while roof-mounted ones save space—choose based on how you travel.
Watch Video
Top Takeaways
- Calculate your daily load before choosing components.
- MPPT controllers improve performance in variable sun.
- Plan for weather, expansion, and safe installation.
- Maintenance extends system life and reliability.