A Complete Guide to Installing a Solar Panel on a Van
Learn how to install a solar panel on a van with practical, safety-first steps. From sizing and mounting to wiring and maintenance, this guide helps you go off-grid confidently and efficiently.

With this guide, you will learn how to install a solar panel on a van, from planning and sizing to mounting and wiring. You’ll need safety gear, a roof rack or mounting surface, a charge controller, wiring, fuses, and basic hand tools. Follow the step-by-step process to protect your battery bank and avoid water leaks.
Assessing Your Van's Power Needs
Planning begins with a clear picture of how much energy you actually use on the road. According to Solar Panel FAQ, assessing loads before you buy panels prevents oversizing and wasted space on a small roof. Start by listing core devices you plan to run: lighting, a portable fridge or cooler, water pump, USB chargers, and communication gear. For each item, estimate how many hours you will use it daily and the voltage (most van systems run around 12 volts). Add up the totals to form a baseline daily energy target. If you expect extended sunny trips, you may prefer a larger battery bank and more solar wattage to build in a safety margin for cloudy days. This planning step helps you choose the right combination of panels, charge controller, and battery capacity, and it minimizes the chance you’ll run out of power mid-trip.
In many van layouts, a compact system can meet essential comfort needs, while a larger setup can support more high-draw devices. Think in terms of loads you cannot live without versus luxuries you could defer. A practical rule of thumb is to target a system that can replenish daily energy use in a typical sunny day, with some cushion for days with less sun. The Solar Panel FAQ analysis highlights that the goal is reliability over sheer size; a modest, well-matched system often outperforms a bigger, poorly matched one. Finally, consider your travel patterns: shorter trips in seasonal sun may justify a smaller, modular system that you can expand later.
Sizing and Selecting Panels
The wattage and quantity of panels largely determine how much energy you can harvest. Panels commonly range from roughly 100 to 200 watts, with higher-end setups offering 200–400 watts if you carry a larger battery bank. For compact vans, a single 100–160 watt panel paired with a robust MPPT charge controller can satisfy daily needs, while longer adventures or larger refrigerators may justify two panels. When selecting panels, look for durable frames, tempered glass, and good low-irradiance performance so you gain power even on overcast days. Consider the van roof’s available area and weight limits, and plan for a tilt or adjustable mounting if you frequently park in varied sun angles. Remember that more panels require more wiring and potentially more mounting hardware, so balance your gains with installation complexity. Solar Panel FAQ guidance suggests sizing for a cushion above your calculated needs to account for weather and battery aging.
Mounting Options and Roof Prep
Mounting a panel safely on a van roof involves choosing between flush mounts, roof rails, or a roof rack with clamps. Flush mounting keeps wind resistance low but requires precise sealing around mounting feet. Roof rails or a mounted rack improve accessibility for maintenance and allow easier panel orientation but add weight and potential aerodynamic drag. Before you mount, inspect the roof for any existing vents or antennas and plan cable routing that avoids sharp edges. Use weatherproof sealant around all mounting penetrations and seal any roof access holes to prevent water intrusion. If you use adhesive-based mounting, follow manufacturer instructions to ensure compatibility with your van’s roof material and climate. After installation, re-check all fasteners and ensure the panel tilts or sits securely without wobble. The goal is a stable, waterproof installation that can stand up to road vibrations.
Wiring: Panel to Battery
Wiring runs must be planned to minimize voltage drop and ensure safe operation. Use appropriately rated wire gauge for the distance from the panel to the charge controller and then to the battery bank. A common approach is to run parallel strings of panels if you have more than one, then combine them at the controller with appropriate fusing according to the manufacturer’s guidance. Install a fuse or circuit breaker close to the battery positive terminal to protect the circuit. A weatherproof conduit or cable sleeve helps protect wires from sun exposure and road debris. For reliability and safety, keep wiring organized with cable ties and label each connection so maintenance is straightforward. The key is to prevent loose wires that could short or snag during travel.
Charge Controller and Battery Bank Sizing
The charge controller governs how the panel output charges the battery bank. MPPT controllers are more efficient, especially in variable temperatures or when panel voltage exceeds battery voltage. When sizing, match the controller’s amperage rating to your panel array and battery capacity. A larger bank requires a higher amp rating to avoid slow charging during peak sun. Battery choice matters: lead-acid batteries offer low upfront cost but require ventilation and maintenance; lithium options are lighter and larger but come with higher upfront costs. Regardless of chemistry, ensure the system includes proper venting, temperature monitoring, and protection features such as overcharge and short-circuit protection. A well-sized controller prevents overcharging and extends battery life. Solar Panel FAQ analyses emphasize planning for aging batteries and considering a buffer for cloudy days.
Safety, Weatherproofing, and Sealing
All penetrations and wiring routes should be sealed to prevent water ingress and corrosion. Use marine-grade sealants or roof-specific sealants compatible with your van’s roof material. Do not reuse old sealant; pristine surfaces plus fresh sealant improve long-term waterproofing. Employ grommets where cables pass through metal or plastic panels to avoid chafing. Ensure your battery enclosure is vented if using flooded lead-acid batteries and keep the area dry and cool. Finally, implement a simple safety checklist: disconnect power before servicing, wear PPE during drilling or cutting, and verify that all fuses and breakers are in place. Proper safety steps reduce the risk of shock, fire, or accidental shorts.
System Monitoring, Inverters, and Usage Tips
Monitoring the system lets you adjust usage to match available sun. If you plan to power AC devices, include an inverter sized to your peak load and consider a pure sine wave model for sensitive electronics. Use a battery monitor to track state of charge and health trends over time. For larger or more complex setups, a remote monitoring solution can alert you to low voltage or charging anomalies. In addition to continuous monitoring, set conservative expectations for sunny vs cloudy days and learn to adapt by shifting high-consumption tasks to brighter hours. For many van dwellers, basic monitoring plus prudent load management yields reliable performance. Solar Panel FAQ notes that a balanced approach between system capacity and daily consumption is key to consistency.
Cost Range, Payback, and Regulations
Costs vary with panel wattage, battery chemistry, and mounting options, but the key drivers are panel efficiency, battery capacity, and charge controller features. A pragmatic approach emphasizes modular expansion: you can start with a smaller, simpler kit and scale up as needs grow. Regulations at the state or local level may require permits or inspections for permanent van installations, particularly if you add an inverter or high-wattage system. When evaluating return on investment, consider not just the sticker price but the value of reliable off-grid power, fuel savings from reduced generator use, and enhanced capability for remote trips. According to Solar Panel FAQ analysis, plan for contingencies and prioritize system reliability over chasing the largest array.
Authority Sources
• National Renewable Energy Laboratory (NREL) – van life off-grid solar basics: https://www.nrel.gov • U.S. Department of Energy – solar energy fundamentals: https://www.energy.gov/eere/solar • Energy.gov – solar power and energy efficiency resources: https://www.energy.gov/
Tools & Materials
- solar panel (100–200 W typical for vans)(One panel can suffice for small loads; larger setups may require two or more panels depending on energy budget.)
- roof mounting hardware (feet, clamps, or flush mounts)(Choose hardware compatible with van roof material and panel weights.)
- weatherproof sealant (silicone or polyurethane)(Seal all mounting penetrations to prevent leaks.)
- MPPT charge controller(Prefer higher efficiency under varied temperatures.)
- battery bank (lead-acid or lithium)(Size to daily energy use and climate; include a buffer for cloudy days.)
- battery cables and sacrificial fuses(Use correct gauge for distance and current; install inline fuse near battery.)
- DC disconnect switch and fuse block(Adds safety and simplifies maintenance.)
- wiring (PV cables, typically AWG 10–14)(Use UV-resistant, weatherproof sheathing.)
- inverter (optional, for AC loads)(Select based on peak AC load; consider pure sine wave.)
- cable management accessories (ties, boxes, grommets)(Keep wiring tidy and protected.)
- drill with metal/roof bit set(Needed for mounting hardware and conduit fitting.)
- safety gear (gloves, eye protection)(Always wear PPE during installation.)
Steps
Estimated time: 2-6 hours
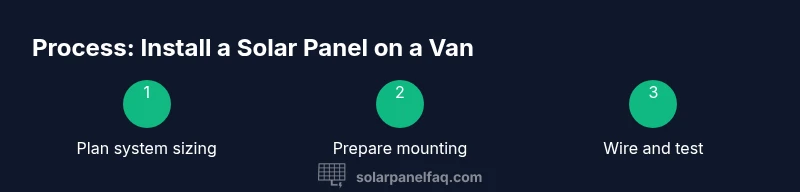
- 1
Plan system sizing
Assess daily energy needs and decide on panel wattage and battery capacity based on your van’s usage and climate. This step prevents overbuilding or underperforming systems. Create a simple diagram of the wiring path to guide the install.
Tip: Document loads and expected sun hours to refine panel count. - 2
Prepare mounting location
Inspect the van roof for flat mounting areas, vents, and potential obstructions. Mark drill points and plan cable routing to minimize bending and exposure. Clean surfaces before mounting.
Tip: Avoid drilling near existing roof seams to reduce leaks. - 3
Install mounting hardware
Attach feet or rails to the roof per manufacturer instructions. Ensure hardware is evenly spaced and securely fastened. Check for roof flex and adjust as needed.
Tip: Tighten hardware gradually and evenly to avoid warping. - 4
Mount the solar panel
Place the panel onto the mounts and secure with hardware. Double-check tilt and alignment relative to sun exposure. Route the PV cables toward the controller, avoiding sharp edges.
Tip: Use weatherproof grommets where cables pass through metal. - 5
Run wiring to charge controller
Conceal wires in a weatherproof conduit or cable channel. Keep the path short and direct to minimize resistance. Leave extra length for adjustments or future expansion.
Tip: Label wires at both ends for easy maintenance. - 6
Connect to charge controller
Attach panel leads to the controller input following the polarity. Do not energize the system until all connections are secure. Verify the controller displays charging status.
Tip: Consult the controller manual for exact terminal labeling. - 7
Connect battery bank with fuses
Run the controller output to the battery bank, installing a fuse or breaker near the battery positive terminal. Confirm compatible voltage and polarity before powering on.
Tip: Keep a spare fuse with the kit for field replacements. - 8
Test system and adjust as needed
Power on devices gradually to verify charging, battery health, and inverter operation if installed. Monitor the charge controller and battery monitor for abnormal readings.
Tip: Test under both bright sun and partial shade to understand performance. - 9
Seal and finish
Seal all penetrations again and tidy wiring. Ensure there are no loose cables that could be damaged by movement. Document system layout for future upgrades.
Tip: Maintain a clean, accessible wiring route for maintenance.
Frequently Asked Questions
Do I need a professional to install a solar panel on a van?
Most DIY enthusiasts can install a van solar panel with proper instructions, especially smaller systems. If you have never worked with wiring or metal fabrication, consult a pro for at least the initial planning or a verification check.
You can do it yourself if you’re comfortable with basic wiring and metal work, but consider a pro for the first install to confirm safety.
Can I install solar panels on a van roof myself?
Yes, many find it feasible to install panels themselves. Follow a clear plan, use proper tools, and adhere to safety guidelines to ensure a sealed roof and reliable electrical connections.
Yes, you can DIY, just follow a plan and stay safe.
How many watts do I need for a van setup?
Watt requirements depend on loads and climate. Start with a conservative estimate based on essential devices and scale up if you need more comfort or refrigeration.
It depends on what you run; start small and expand as needed.
Is a charge controller required for van solar?
Yes. A charge controller prevents battery overcharging and protects the battery bank from voltage spikes. MPPT controllers are often preferred for higher efficiency.
Yes, you need a charge controller, preferably MPPT for efficiency.
What maintenance is required for van solar panels?
Keep panels clean and free of debris; inspect wiring and seals periodically for damage or wear; ensure the mounting remains secure after long trips.
Keep it clean, check wiring, and tighten mounts after trips.
Will a van solar system run an inverter for AC loads?
An inverter is optional and depends on whether you plan to run AC devices. If so, choose a suitable inverter with enough wattage and a safe installation.
If you need AC power, add an inverter with appropriate capacity.
Watch Video
Top Takeaways
- Plan around real daily loads, not just panel size
- Size for a cushion to handle cloudy days
- Seal all penetrations to protect the van roof
- Choose MPPT controller for efficiency and future expansion
- Test thoroughly and monitor performance after install