How to Fix Solar Panels to a Van Roof: A Practical Guide
Learn a safe, practical method to secure solar panels to a van roof, covering mounting hardware, weatherproof sealing, wiring basics, and post-install checks for reliable mobile power.

Mounting solar panels to a van roof requires proper hardware, a clean surface, weatherproof sealing, and correct wiring. This quick guide outlines the essential steps, required tools, and safety checks to get you powered on the road. You’ll learn mounting, sealing, wiring, and inspection practices for a durable install.
Why proper mounting matters
When you’re converting a van into a mobile power station, the way you attach solar panels to the roof determines performance, durability, and safety. Poor mounting can lead to wind uplift, water intrusion, and electrical faults that compromise both the system and the vehicle. According to Solar Panel FAQ, investing in the right mounting hardware and surface prep reduces wind load and extends panel life. A robust mount also helps distribute weight evenly across the roof, minimizing stress on any single point. For homeowners and mobile installers, a proper mount safeguards your investment and keeps your power flowing on long trips.
Assessing your van roof and panel system
Start with a roof assessment: material type (metal, fiberglass, or composite), exposed edges, and potential pinch points for mounting rails. Consider the panel size, weight, and the overall weight limit your roof can bear. Evaluate the wind exposure of typical routes and whether you’ll need rail-based mounting or direct-bolt solutions. Correlate panel output with your load demands; a typical residential panel may be larger than a compact van roof’s available space, so plan spacing and orientation to maximize sun exposure while avoiding shade from vents or antennae. This planning stage is essential to ensure the system performs efficiently and safely on the move.
Tools, materials, and safety groundwork
Before you begin, assemble the essential tools and materials. You’ll need roof mounting rails compatible with your van, clamps or L-brackets, stainless steel fasteners, a sealant that remains flexible in temperature changes, butyl tape for waterproofing, a torque wrench, and a drill with metal bits. Also have a caulking gun, cleaning supplies, nitrile gloves, and a non-slip ladder or platform. Safety comes first: work with a buddy if possible, wear eye protection, and ensure the van is parked on stable ground with parking brake engaged. The right gear and a clean, dry surface lay the foundation for a successful install.
Step-by-step mounting and sealing
Proper mounting is a two-part process: securing rails and sealing penetrations. Start by marking layout positions for rails, ensuring even weight distribution and avoiding sun glare on critical components. Attach rails using manufacturer-recommended hardware, then place the panels on the rails to verify alignment. Tighten fittings to the proper torque as specified by the hardware manufacturer, then seal all penetration points with a weatherproof sealant and butyl tape to prevent leaks. Finally, check that there is no panel movement under light manual force and re-check after a 24-hour weather cycle to confirm a solid seal. This approach minimizes movement and water ingress while maximizing solar exposure.
Wiring, grounding, and battery integration
Wiring is as important as mounting. Run panel cables through a weatherproof conduit or existing roof cable entry point, keeping them away from hot surfaces and moving parts. Connect panels in series or parallel according to your charge controller’s input rating, and install a fuse or breaker between the array and the controller. Grounding is essential for safety and lightning protection, so bond the metal parts to a dedicated ground. Route wires neatly, secure with clips, and label circuits for easier maintenance. If you’re integrating with a battery system, ensure the controller’s voltage and amperage ratings match your battery bank and vehicle inverter requirements.
Weatherproofing and load testing
After sealing and wiring, perform a basic weatherproof check: inspect seals for gaps, perform a light spray test if safe, and verify there are no drips around the roof fixtures. Check the mounting hardware for any signs of movement after a test drive or strong gusts. Conduct a simple load test by measuring panel voltage and current with a multimeter under sun exposure to ensure output aligns with expectations. Plan for periodic maintenance: reseal penetrations every year or after heavy weather, and inspect rails and bolts for corrosion or wear.
Safety checks, maintenance, and warranties
Document all mounting and wiring steps, including photos of sealant seams and cable routing. Keep a maintenance log and refer to the manufacturer’s warranty for both panels and mounting hardware. Use compatible components throughout the system to avoid warranty voids; mismatched rails or adapters can create load points and reduce efficiency. Solar Panel FAQ emphasizes following manufacturer torque specs and inspecting weather seals regularly to preserve performance and protect against leaks. If you notice any unusual odors, heat, or corrosion, stop and reassess the installation.
Troubleshooting common issues
If you notice reduced output, troubleshoot by inspecting sun angle, shade from vents or uploads, loose connections, or degraded seals. Check that the charge controller is correctly configured for your panel array and battery type. If motion is detected in the mount or if there is visible water intrusion, reassess sealing and attachment. In uncertain cases, consult a professional installer to prevent risk of electrical shock or structural damage.
Tools & Materials
- Roof mounting rails(Choose rails compatible with your van roof profile and panel size)
- L-brackets or clamps(Stainless steel preferred for outdoor use)
- Stainless steel fasteners (M6-M8)(Corrosion-resistant and appropriate length)
- Weatherproof sealant(Flexible, UV-resistant sealant suitable for roof materials)
- Butyl tape(Used under rails to seal against water ingress)
- Torque wrench(Follow manufacturer torque specs for fasteners)
- Drill with metal bits(For mounting holes if rails require drilling)
- Cleaning supplies (alcohol wipes, microfiber cloth)(Prepare clean surface before mounting)
- Nitrile gloves(Protect hands during installation)
- Cable entry conduit or grommets(Weatherproof pass-through for wires)
Steps
Estimated time: Total time: 2-4 hours
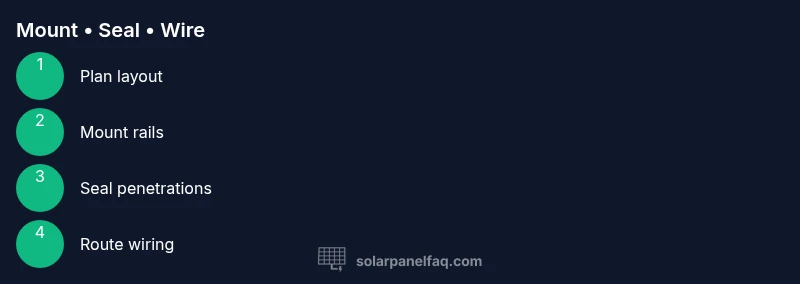
- 1
Plan layout and site the rails
Mark rail positions ensuring even weight distribution and sun exposure. Verify no interference with vents, antennas, or door frames. This step prevents misalignment and ensures optimal panel yield.
Tip: Use a straightedge or laser level to keep rails perfectly aligned along the roof ridge. - 2
Install mounting rails
Attach rails with the appropriate fasteners and verify they sit flush with the roof. Use a torque wrench to tighten to manufacturer specs, ensuring no over-tightening that could crush the roof material.
Tip: Check for warping or gaps after initial snug-fit before final torque. - 3
Mount panels on rails
Place panels on rails and align with spacing guidelines; secure using provided hardware per rail system. Avoid overtightening to prevent panel frame damage.
Tip: Keep wiring channels clear to prevent cable pinch points. - 4
Seal rail-to-roof penetrations
Apply butyl tape beneath rails and seal all fastener penetrations with flexible sealant. Check that seals are continuous and free of gaps.
Tip: Wipe surfaces dry before applying sealant to maximize adhesion. - 5
Route and secure panel wires
Run cables through a weatherproof conduit or grommet; avoid sharp bends and preserve flex life. Attach wires to avoid contact with moving doors or cluttered space.
Tip: Label circuits at both ends for easier maintenance. - 6
Connect to charge controller safely
Configure the charge controller for series or parallel panel wiring and install appropriate fusing. Ensure correct polarity and verify controller ground.
Tip: Double-check controller settings with the manual before applying power. - 7
Perform load test and final inspection
Measure output under sun exposure and confirm expected voltage/current. Inspect all seals and mounting points for movement or leaks after testing.
Tip: Take photos of the final installation for warranty and maintenance records. - 8
Document maintenance plan
Create a simple maintenance log noting inspection dates, torque checks, and sealant reapplication timelines. Schedule periodic checks, especially after extreme weather.
Tip: Set reminders for annual sealant reapplication and hardware inspections.
Frequently Asked Questions
Do I need to drill into my van roof to mount panels?
Many systems use mounting rails that attach without permanent hull penetrations, but some setups require drilled anchors. Always follow the hardware manufacturer instructions and check your van’s roof material and warranty.
Some mounts require holes, but many setups use rails that don’t penetrate the roof. Always follow the hardware instructions and check your van’s roof warranty.
Can I mount panels without rails?
Rails or clamps are typically recommended for wind resistance and adjustability. Direct mounting to the roof can work for flat, strong surfaces but is less versatile and may affect warranty.
Rails are usually recommended for wind resistance and adjustability. Direct mounting is possible on flat, sturdy roofs but may affect warranty.
How do you prevent leaks at mounting points?
Seal all penetrations with a flexible sealant and use butyl tape under rails. Ensure the surface is dry and clean before applying sealant. Recheck seals after heavy rain or washing.
Seal penetrations with flexible sealant and use butyl tape under rails. Keep surfaces dry and recheck after heavy rain.
What safety steps should I follow during installation?
Work with a partner, wear protective gear, and secure the vehicle. Disconnect any auxiliary systems while wiring, and avoid working on wet surfaces or in high winds.
Always work with a partner, wear protective gear, and secure the vehicle. Disconnect systems while wiring and avoid wet conditions.
How long does a typical van solar install take?
A well-planned install typically takes a few hours, depending on roof type, hardware, and wiring complexity. Allow extra time for sealing and testing.
Typically a few hours, varying with roof type and wiring complexity. Plan for extra time to seal and test.
Watch Video
Top Takeaways
- Plan layout before drilling or mounting.
- Use weatherproof sealing at every penetration.
- Follow manufacturer torque specs for all fasteners.
- Route and label wiring clearly for safety.
- Maintain periodic inspections to preserve performance.