How to Install Solar Panels with Confidence: A Step-by-Step Guide
Learn how to install solar panels with your home safely and efficiently. This guide covers planning, permits, roof readiness, wiring basics, mounting, and interconnection, with practical, step-by-step instructions for homeowners and buyers.

By the end, you will know how to install solar panels with your home’s roof and electrical system, including safety checks, permit considerations, mounting, wiring, and interconnection. Before you begin, verify roof condition, local codes, and utility requirements. This quick guide outlines the essential steps and prerequisites to start your rooftop solar upgrade confidently.
Overview and safety prerequisites
According to Solar Panel FAQ, the safest and most reliable solar installation starts with a clear plan, proper personal protective equipment (PPE), and a thorough assessment of roof condition and electrical readiness. This section sets the foundation for the project by outlining the key goals and the regulatory context you must respect before you climb a ladder. If you’re new to solar, treat this stage as the foundation for a successful installation. You’ll learn why permits, utility interconnection, and a well-scoped plan matter, especially when learning how to install solar panels with minimal roof disruption. Plan for weather windows, ensure fall protection, and assemble your team before you begin. The intent here is to reduce surprises later by thinking through site access, safety protocols, and basic electrical compatibility. A robust early plan saves time and reduces the chance of costly rework. Remember: safety and preparation are not optional features; they are mandatory for a long-lasting installation.
Why preparation matters for a smooth install
- Safety gear, clear access routes, and weather-aware timing dramatically reduce on-site risk.
- A well-documented plan helps with permits, interconnection, and inspections.
- Early coordination with your utility streamlines the interconnection process.
As Solar Panel FAQ emphasizes, the preparatory phase is the most cost-effective part of the project because it prevents last-minute changes. This is especially true when addressing how to install solar panels with minimum roof impact. If you’re unsure about a roof or electrical system, seek professional assessment early to avoid compromising performance or safety.
Brand-driven guidance and expectations
The Solar Panel FAQ team notes that most homeowners underestimate permit complexity and interconnection requirements. By knowing what to expect ahead of time, you can align your project with local codes and utility rules, reducing delays. For readers seeking practical guidance, this section aims to provide a clear, actionable path forward, while acknowledging that certain steps may require licensed professionals for safety and compliance.
Tools & Materials
- Extendable ladder(Select a height that allows safe access to the roof without overreaching.)
- Fall protection and harness(Must be used on pitched roofs; anchors and lanyards should meet safety standards.)
- Roof mounting rails and brackets(Choose compatible hardware for your roof type (asphalt, metal, tile).)
- Solar panels(Select modules with appropriate wattage and warranty terms.)
- Inverter (string or microinverters)(Ensure compatibility with panels and local grid requirements.)
- Conduit, wiring, and connectors(Route safely and label conductors for easy troubleshooting.)
- Junction boxes and disconnects(Install per code; keep accessible for inspections.)
- Torque wrench(Use manufacturer torque specs to avoid loose mounts or damaged rails.)
- Sealant and flashing material(Weatherproof seals prevent leaks at mounting points.)
- Multimeter / PV meter(Test voltage, resistance, and continuity during installation.)
- Electrical tape and labels(Label DC conductors, PV strings, and AC outputs clearly.)
- Tool belt and headlamp(Optional for comfort and visibility during rooftop work.)
Steps
Estimated time: 1-3 days
- 1
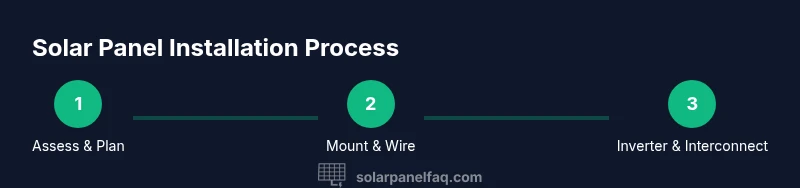
Assess site readiness and permits
Begin with a safety check of the work area and roof condition. Confirm that you have the necessary permits and utility clearance before climbing. Create a checklist for inspections and plan for inclement weather windows.
Tip: Coordinate with your local building department early to avoid delays; permit review can take time. - 2
Define system size and layout
Determine how many panels you need based on roof space, shading, and energy goals. Sketch a layout that maximizes sun exposure while aligning with the inverter’s input limits. Consider future expansion and stringing options.
Tip: Document the layout with a simple diagram and mark cable routing paths to simplify installation. - 3
Prepare roof and mounting surface
Inspect the roof surface for damage and clean the area where rails will be installed. Install mounting brackets and rails per manufacturer instructions, ensuring secure anchors into decking or trusses. Protect shingles or tiles during mounting to prevent leaks.
Tip: Use proper flashing and sealant at all penetrations; verify no loose components before proceeding. - 4
Install mounting rails and attach modules
Attach rails to brackets, then place and fasten solar modules in the planned sequence. Check for level alignment across the row and maintain uniform gap spacing. Tighten hardware to specified torque values.
Tip: Work progressively from one end to the other to keep rows aligned; avoid stepping on exposed panels. - 5
Run wiring from modules to inverter location
Route DC wiring inside conduit from the panels to the inverter location. Protect cables from UV exposure and physical damage, and keep conductors organized with cable ties. Install DC disconnects where required by code.
Tip: Label all DC conductors and keep the feed cables away from hot surfaces or sharp edges. - 6
Install inverter and safety disconnects
Mount the inverter in a sheltered, accessible location with adequate ventilation. Connect the DC strings to the inverter, then wire the AC side to the main panel or service disconnect as per code. Ensure grounding and bonding are correct.
Tip: Follow the manufacturer’s wiring diagrams precisely; miswiring is a common fault that affects performance. - 7
Connect to the utility and perform interconnection checks
Coordinate with the utility to submit interconnection paperwork and schedule inspections. Verify that anti-islanding and backfeed protections are functioning. Conduct preliminary tests with a PV meter and verify string performance.
Tip: Keep a log of all interconnection numbers and inspector contact details for future reference. - 8
Commission and monitor performance
Power up the system and confirm that all strings contribute to the inverter output. Monitor through the inverter’s display or a monitoring app for early signs of issues. Schedule periodic maintenance and performance checks.
Tip: Set up a routine (monthly checks) to ensure panels stay clean and connections remain tight.
Frequently Asked Questions
Do I always need a permit to install solar panels myself?
Permit requirements vary by location. In many places you’ll need building and electrical permits, and you may require utility approval for interconnection. Always check with your local authority before starting.
Permit requirements vary by location; check with your local authority before you start.
Can I install solar panels on any roof?
Roof type, age, and condition influence whether installation is feasible. Steep or damaged roofs may require professional assessment or reinforcement before mounting panels.
Roof condition and type matter; consult a professional if your roof is steep or compromised.
Is it safer to hire an electrician for electrical connections?
For grid-tied systems, electrical interconnections should be handled by a licensed electrician or a qualified solar installer. This reduces risk and ensures code compliance.
Electrical work should be done by a licensed professional to ensure safety and code compliance.
What maintenance will my solar system require?
Regular cleaning to remove debris, periodic inspections of mounting hardware, and monitoring of output help sustain performance. Warranties often require proper maintenance.
Keep panels clean and check connections periodically for best performance.
How long does a typical DIY solar installation take?
Timeline depends on permit processing and roof type. A DIY installation can span several days to a week, including planning, mounting, wiring, and interconnection steps.
Typically several days to a week, depending on permits and roof conditions.
What’s the difference between microinverters and string inverters?
Microinverters attach to each panel, offering independent optimization, while string inverters optimize a string of panels through a single unit. Choice impacts shading tolerance and maintenance.
Microinverters optimize each panel; string inverters handle a group together.
Can I expand my system later if energy needs grow?
Yes, many systems are designed for future expansion. Plan wiring paths, junctions, and inverter capacity during the initial install to simplify later growth.
Yes, plan for future expansion from the start to make upgrades easier.
Watch Video
Top Takeaways
- Plan safety first with permits and weather windows.
- Assess roof suitability and electrical readiness before mounting.
- Choose mounting, inverter, and wiring strategies that match your roof and grid rules.
- Document layouts, wiring, and permits for easy inspections.
- Monitor performance and schedule regular maintenance.