How to Install Solar Panel on Rooftop: Step-by-Step Guide
A comprehensive, safety-focused guide for homeowners on how to install solar panels on rooftops, covering planning, permits, mounting, wiring, commissioning, and maintenance with practical tips and signals for best performance.

This guide will walk homeowners through safely installing a rooftop solar panel system, from planning and permits to mounting, wiring, and commissioning. You should have basic roof access, safety gear, and a plan for electrical connections. This process emphasizes safety, code compliance, and long-term performance.
Why rooftop installation matters
Rooftop solar installations offer a compact and scalable way to generate electricity right where you live. By placing panels on the roof, homeowners can take advantage of high sun exposure while keeping equipment close to the home’s electrical system. This approach can simplify wiring routes and minimize the need for trenching or long underground runs. According to Solar Panel FAQ, rooftop installations often balance performance with aesthetics and ease of access for maintenance. When you begin planning, ensure your roof structure can handle the added load and that there is clear access for inspection, cleaning, and potential repairs. A well-designed plan reduces delays, improves performance, and helps you meet local codes from day one.
Assessing roof and location
Before you lift a single panel, evaluate the roof thoroughly. Check the orientation of your roof sections to maximize sun exposure, and identify any shading from nearby trees or chimneys. Inspect the roof’s age and condition, look for damaged shingles, and confirm there are sturdy rafters or trusses at the intended mounting points. Measure the available area and confirm there is room for the desired array size without edge-to-edge overhang. Consider wind loads and snow possibility for your region, as these factors influence mounting strategies and anchor choices. This assessment informs the layout and helps prevent costly repositioning later.
System design basics: layout and orientation
A well-designed rooftop system aligns with the sun and your home’s electrical configuration. Decide between a landscape or portrait panel orientation based on roof dimensions and racking compatibility. Aim for azimuth alignment near due south (in the northern hemisphere) to maximize daily production, and choose a tilt angle that balances energy capture with rainfall shedding. Plan wiring routes to the inverter or microinverters, keeping shade-free strings and minimizing crossing obstacles. For homeowners wondering how to install solar panel on rooftop, remember that shading, panel spacing, and access for cleaning are critical for sustained performance and ease of maintenance.
Selecting equipment: panels, inverters, and mounting
Choose high-quality panels with reputable warranties and solid efficiency ratings. Decide between string inverters, microinverters, or optimizers based on shading and seasonality at your site. Select a mounting system that fits your roof type—standing-seam, concrete tile, or asphalt shingle—along with rail lengths, clamps, and fasteners rated for your roof and local weather. Ensure components are UL-listed or equivalent and compatible with your electrical design. Proper selection reduces performance losses and simplifies installation and service in the future.
Safety planning and risk management
Rooftop work carries fall and electrical hazards. Develop a safety plan that includes fall protection, stable ladders, non-slip footwear, and spotters when needed. Ensure you lock out power at the main service panel before handling DC wiring, and use insulated tools for all electrical tasks. Weather conditions—wind, rain, or extreme heat—should trigger postponement. Document unsafe areas and establish clear communication signals with any helpers. A safe workflow protects you, your family, and your investment.
Preparation and planning steps
Create a detailed installation plan before touching the roof. Gather permits, drawings, and equipment lists, and identify required inspections. Verify structural drawings or a qualified engineer’s assessment if your roof is older or has unique features. Schedule a time window for the crew and ensure all safety gear and tools are ready. Do not bypass permits; they set the foundation for a compliant and insurable installation and help you avoid fines or rework delays.
Installation steps overview
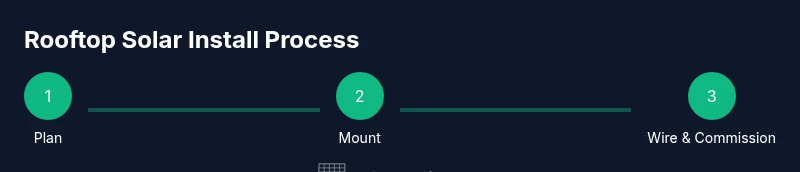
The typical sequence starts with securing the mounting rails to the roof with appropriate anchors and sealing to prevent leaks. Next, attach rail sections, install racking hardware, and position the mounting points. Mount panels onto the rails, then secure clamps and torque them to spec. Route DC wiring to the combiner box and connect conduit to the inverter. Finally, install the AC disconnect and perform a safety check before commissioning.
Wiring and electrical connections
Wiring involves concentrating all DC circuits from the panels into a fuse or disconnect, then routing the wires down through the attic or along the rafter spaces to the inverter location. Use appropriately rated conduit, strain reliefs, and weatherproof seals where needed. Inverter connections convert DC to AC for your home, with a dedicated AC disconnect visible and accessible. Ensure proper grounding and adherence to electrical codes to protect you and your system over time.
Commissioning and performance checks
Commissioning confirms the system operates correctly and safely. Verify insulation resistance, check voltage and current readings, and confirm the inverter is producing energy when sunlight is available. Test the system under load conditions and confirm the monitoring system records expected data. If anything deviates, document it and address before signing off. A thorough commissioning helps ensure long-term reliability and optimal performance.
Maintenance and warranty considerations
Plan for periodic cleaning and inspection, especially after heavy debris or snowfall. Check mounting hardware for tightness and inspect sealant areas for leaks. Review manufacturer warranties and ensure installation records are stored with any service documentation. Good maintenance extends equipment life and preserves warranty coverage. Solar panels typically require minimal ongoing maintenance beyond occasional cleaning and visual checks.
Common mistakes to avoid
Avoid over- or under-tightening clamps, which can damage rails or panels. Do not ignore roof condition or structural issues; fix them before mounting. Skipping permits or electrical inspections frequently leads to delays and potential safety concerns. Failing to plan for cable management or drainage can create leaks or climate exposure risks. Finally, neglecting a proper orientation and shading assessment lowers energy yield and reduces return on investment.
Conclusion and next steps
A successful rooftop solar installation begins with careful planning, code compliance, and a clear safety plan. By following a structured approach, homeowners can achieve reliable performance and meaningful energy savings over time. The Solar Panel FAQ team emphasizes that working with qualified professionals for critical electrical work and inspections can enhance safety and ensure compliance, while homeowners handle the design and mounting tasks. With proper preparation and ongoing maintenance, your rooftop system can deliver durable, clean power for years ahead.
Tools & Materials
- Roof safety harness and fall-arrest gear(Full-body harness with lanyard and anchor points rated for roof work)
- Ladder and fall protection plan(Stability, non-slip footing, and a spotter if needed)
- Cordless drill, bits, and driver bits(Torx and hex bits; keep spare batteries handy)
- Racking system and mounting rails(System compatible with roof type; include clamps and standoffs)
- Roof sealant or flashing compound(Seal every mounting point to prevent leaks)
- Torque wrench(Maintain manufacturer torque specs for clamps and bolts)
- Electrical wiring: conduit, DC disconnect, and conduits(Weatherproof where needed; route to inverter safely)
- Solar panels and inverter(Select for your system size and efficiency goals)
- DC/AC ethernet and monitoring equipment(Optional for advanced monitoring)
- Multimeter and voltage tester(Check continuity, resistance, and closures)
- Permits and paperwork(Keep copies for inspections and future resale)
- Personal protective equipment (PPE)(Gloves, eye protection, and non-slip footwear)
Steps
Estimated time: varies by roof size and system complexity
- 1
Assess site and plan
Conduct a thorough roof assessment, dimensions, shading analysis, and plan the array layout. Confirm structural capacity with a professional if needed and decide on panel orientation and mounting points.
Tip: Document measurements and mark anchor points before climbing the roof. - 2
Obtain permits and approvals
Submit required permits, drawings, and electrical plans to the local authority. Obtain inspections confirm compliance with codes and safety rules.
Tip: Check for HOA restrictions early to avoid rework. - 3
Prepare roof and install mounting
Clean the area, install mounting rails, and securely anchor them to roof rafters or studs with appropriate sealant to prevent leaks.
Tip: Use sealant at every penetration and verify water drainage. - 4
Mount panels and cabling routes
Attach panels to rails with clamps, leaving space for wiring and cooling air. Route DC wires toward the inverter location using protected conduits.
Tip: Keep panels clear of snow buildup and ensure spacing for thermal expansion. - 5
Make electrical connections
Install the DC disconnect, connect modules in strings per design, and route to the inverter. Ground equipment as required by code.
Tip: Only qualified personnel should handle high-voltage connections. - 6
Install inverter and AC wiring
Mount the inverter in a dry, ventilated location. Connect AC wiring from the inverter to the main panel with a dedicated breaker.
Tip: Keep inverter away from direct sunlight and heat to maximize efficiency. - 7
Commission and test
Power up the system, verify output, and monitor readings. Confirm safety interlocks function and display correct production data.
Tip: Document test results for warranty and future maintenance. - 8
Finalize and review maintenance
Seal any access points, tidy wires, and schedule periodic inspections. Review warranty terms and create a maintenance plan.
Tip: Set reminders for annual checks on panels and seals.
Frequently Asked Questions
Do I need a permit to install rooftop solar panels?
Most jurisdictions require a building or electrical permit for rooftop solar. Permits ensure safety and code compliance and streamline inspection and interconnection with the utility. Check local authorities for specific requirements.
Yes, you typically need a permit for rooftop solar installation to meet safety and code standards.
Can I install solar panels myself?
DIY installation is possible for some aspects, but electrical work and roof mounting carry safety risks. Many homeowners hire a licensed electrician for the electrical connections and a professional for mounting, especially on complex roofs.
DIY work may be possible for mounting, but electrical work should be done by a licensed professional.
What maintenance do rooftop solar panels require?
Rooftop panels require periodic cleaning to maintain efficiency and a visual inspection for damage or loose components. Warranties may require professional inspections after installation or at defined intervals.
Keep panels clean and inspect for damage; follow the warranty guidelines.
How long does installation take?
Installation duration varies with roof type, system size, and permitting speed. A typical residential rooftop install may span a few days for planning, mounting, and interconnection, plus any required inspections.
Time varies, but expect a multi-day process including planning and inspections.
Is it safe to walk on a pitched roof for installation?
Walking on a pitched roof requires fall protection and proper footwear. Only trained personnel should access steep or uneven surfaces, and weather conditions should be favorable.
Yes, with fall protection and proper training, but avoid risky conditions.
What warranty considerations should I review?
Review panel and inverter warranties, mounting hardware guarantees, and installation workmanship coverage. Ensure service terms align with expected lifespan and that warranties require professional installation.
Check all warranties for duration and conditions, especially installation workmanship.
Watch Video
Top Takeaways
- Plan roof layout before any install
- Obtain permits and inspections for compliance
- Prioritize safety and proper grounding
- Choose components that match roof type and shading
- Provide ongoing maintenance for performance