How to Install Solar Panels in Malaysia: A Practical Guide
A comprehensive, step-by-step guide for homeowners in Malaysia to install solar panels. Covers permits, components, installation steps, safety, maintenance, and potential savings. Learn best practices from Solar Panel FAQ for a smooth, compliant solar journey.

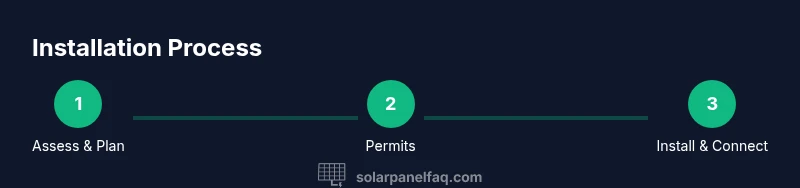
According to Solar Panel FAQ, start by confirming local permit requirements and choosing a grid-tied or off-grid system. Then hire a licensed installer, select components suitable for Malaysia’s sun, and plan for safety, maintenance, and monitoring. Consider shading and energy needs, review incentives, and estimate long-term savings. This quick path helps homeowners avoid common pitfalls.
Understanding the Malaysian solar landscape
Malaysia has seen growing interest in residential solar, driven by high daytime sun and rising electricity costs. For homeowners, the journey begins with clarity: what kind of system fits your roof, how much energy you typically use, and what local rules apply. The Solar Panel FAQ team emphasizes that a successful install starts with honest site assessment and realistic goals. In many neighborhoods, local authorities and utility rules require a permit and a professional electrical interconnection. The outcome should be a system that safely reduces your grid dependence while aligning with your roof structure, budget, and long-term plans. Preparation now saves time later and helps you avoid common mistakes that can derail a project before it begins.
Planning around Malaysia's climate and house layout
Malaysia’s tropical climate means high solar irradiance most days, but shading from surrounding trees or adjacent buildings can dramatically affect output. Start by mapping roof exposure, orienting panels toward the equator where possible, and noting any shading during peak sun hours. Consider roof condition, material, and load-bearing capacity. The Solar Panel FAQ guidance highlights the value of using data from a whole-house energy audit to size your system accurately. This helps ensure the system delivers meaningful savings without oversizing or undersizing. A well-planned layout also accommodates future expansions, such as battery storage or additional panels if your energy needs grow.
Selecting system type and core components
There are two broad ways to connect to the grid: grid-tied and off-grid with storage. For most homeowners, a grid-tied system with net metering or feed-in arrangements offers simpler maintenance and lower upfront costs. Off-grid systems provide energy independence but require battery storage and more complex inverters. Components to consider include solar panels (mono- or polycrystalline), mounting hardware, wiring, inverters or microinverters, a combiner box, and a safety disconnect. In Malaysia, durability against humidity and rain is essential, so look for panels with robust weather protection and reputable warranties. The installer should help you choose the right mix based on roof space, budget, and desired autonomy.
Stepwise installation approach and safety planning
Professional installation involves a methodical sequence: site prep, mounting system installation, wiring routes, panel placement, electrical connections, and final interconnection with the grid. Safety is non-negotiable: use fall protection when working on pitched roofs, adhere to electrical codes, and ensure proper sealing to prevent leaks. The Solar Panel FAQ recommends a site-specific installation plan, with clear access to the electrical disconnect and meter. During planning, confirm compatibility between your roof type (flat, tile, or metal) and mounting solutions to avoid structural issues later. This planning shaves days off the actual installation and reduces potential rework.
Permits, inspections, and interconnection with the utility
Electrical work and building modifications often require permits. In Malaysia, you’ll typically need approvals from the local building department and the electrical utility for interconnection. Your installer should manage most of the paperwork, but you’ll need to provide roof plan, electrical diagrams, and equipment certifications. After installation, an inspection ensures compliance with safety and performance standards. The interconnection process confirms that the system can safely export electricity to the grid, with metering configured for monitoring and incentives where applicable. Delays here are common, so begin early and maintain open communication with authorities and the installer.
Commissioning, testing, and initial monitoring
Commissioning verifies that all components function together: strings, inverters, and the grid connection must operate smoothly. Conduct daytime voltage checks, verify string currents, and test the monitoring software to confirm performance fundamentals. A thorough test reduces post-install surprises and helps you set realistic expectations. Solar Panel FAQ’s approach emphasizes documenting all settings, warranty information, and maintenance schedules. Once commissioned, establish a routine to monitor daily output and compare against expected production to catch any anomalies early.
Maintenance, warranties, and long-term performance
Regular maintenance is simple but essential. Clean panels as needed to remove dirt and check for debris or shading that could reduce output. Inspect mounting hardware and seals for corrosion or wear after heavy rains and storms. Warranties typically cover panels for 20–25 years and inverters for 10–15 years, with performance guarantees from manufacturers. Keep records of installation dates, equipment serials, and service visits. A proactive maintenance plan helps protect your investment and sustain energy savings over time.
Cost considerations, incentives, and financial planning
Costs vary based on system size, equipment quality, and installation complexity. In Malaysia, incentives and financing options can influence overall economics, so consult your installer about subsidies, tax relief where applicable, and payback expectations. While exact figures depend on site specifics, framing a clear budget early helps you compare quotes effectively. Treat the project as a long-term investment and align it with home improvement priorities and energy price trends. The Solar Panel FAQ team emphasizes documenting expected savings and warranty coverage to guide decision-making.
Choosing a reputable installer and next steps
A reputable installer should provide a transparent proposal, engineering diagrams, and a clear timeline. Check references, verify licenses, and confirm after-sales support for maintenance and monitoring. Ask about system monitoring capabilities, potential upgrades, and how to handle future expansions such as battery storage. Once you select a partner, request a detailed contract that includes warranties, safety practices, and a contingency plan for unexpected weather or supply delays. Your solar journey should empower you to manage energy more confidently and sustainably.
Tools & Materials
- Solar panels (monocrystalline or polycrystalline)(Choose efficiency and warranty length; consider panel warranty vs performance warranty)
- Inverter(s) or microinverters(Match inverter type to panel arrangement; consider string vs microinverter for shading resilience)
- Racking/mounting system(Roof-compatible mounting with corrosion-resistant hardware)
- DC disconnect switch(Accessible, clearly labeled for safety)
- Combiner box(Useful for multiple strings; not always necessary)
- Routed wiring and conduit(Weatherproof routing; protect from UV and moisture)
- Junction boxes and connectors(Use weather-rated components)
- Sealant and flashing(Prevent roof leaks where mounting penetrates)
- Electrical permits and documentation(Keep copies of certifications and warranties)
- Safety gear(Harness, helmets, and fall protection for roof work)
Steps
Estimated time: Several days to a week, depending on site size, permit timelines, and contractor availability
- 1
Assess site and energy needs
Survey roof orientation, shading, and structural integrity. Review your past energy use and set a target for annual solar generation.
Tip: Document shading at different times of day with photos and notes. - 2
Select system type and components
Decide between grid-tied or off-grid configurations and choose panels, inverters, and mounting hardware.
Tip: Ask for a verified bill of materials and warranty terms. - 3
Obtain permits and approvals
Submit electrical and building permits through the local authority and prepare interconnection forms for the utility.
Tip: Start early; permit timelines vary by locality. - 4
Prepare mounting and layout
Install the mounting framework, ensuring level placement and proper roof load distribution.
Tip: Use temporary bracing and verify alignment before final fastening. - 5
Install panels and wiring
Mount panels, route wiring safely, and install DC disconnects as required by code.
Tip: Follow manufacturer instructions closely to preserve warranties. - 6
Connect inverters and grid interconnection
Install inverters, connect to panels, and coordinate with utility for net metering or interconnection.
Tip: Electrical work should be performed or supervised by a licensed electrician. - 7
Test, inspect, and commission
Perform voltage and insulation tests, complete inspections, and commission the system for operation.
Tip: Document test results and save all warranty paperwork. - 8
Monitor and maintain
Set up monitoring software, schedule regular cleaning, and inspect hardware after severe weather.
Tip: Keep a log of performance vs. expected output.
Frequently Asked Questions
Do I need a permit to install solar panels in Malaysia?
Yes, most installations require building and electrical permits from local authorities and may involve interconnection approvals with the utility. A licensed installer will usually handle the paperwork.
Yes. You typically need building and electrical permits, plus interconnection approval from the utility; your installer can manage most of this process.
Can I install solar panels myself in Malaysia?
Professional installation is strongly recommended. Electrical work and rooftop mounting involve safety risks and code compliance, so rely on a licensed installer for critical steps.
DIY is not advised. Electrical work and rooftop mounting require a licensed professional for safety and code compliance.
What roof types are best for solar in Malaysia?
Flat, pitched tile, and metal roofs can all work with proper mounting hardware. The installer will evaluate load capacity, weather exposure, and sealing needs for durability.
Most roof types can work with solar panels, as long as mounting and sealing are properly done.
How long does installation take?
Timeline depends on roof type, permit processing, and system size. Expect several days to a week from start of mounting to commissioning when conditions are typical.
It usually takes several days up to about a week, depending on complexity and approvals.
What maintenance does a solar system need?
Keep panels clean, inspect for shading changes, and check wiring and mounting annually. Monitor performance to catch anomalies early and address warranty requirements.
Maintenance is simple—clean panels, monitor output, and check connections periodically.
Are there incentives or subsidies for solar in Malaysia?
Incentives vary by program and region. Your installer can help you explore subsidies, financing, or renewable energy schemes that may apply to your project.
There can be subsidies or financing options available; talk to your installer about current programs.
Watch Video
Top Takeaways
- Plan thoroughly before purchasing equipment.
- Hire licensed professionals for electrical work.
- Understand permits, interconnection, and warranties.
- Monitor performance and maintain the system for longevity.